Adding Multiple Clips to the Timeline Track Area
When you drag more than one item to the Timeline, the new layers appear in their own
tracks above any existing layers. This is equivalent to performing a composite edit with
a single object. A drop menu lets you choose whether the additional layers should be
stacked up as a composite, or whether they should appear one after another (sequentially).
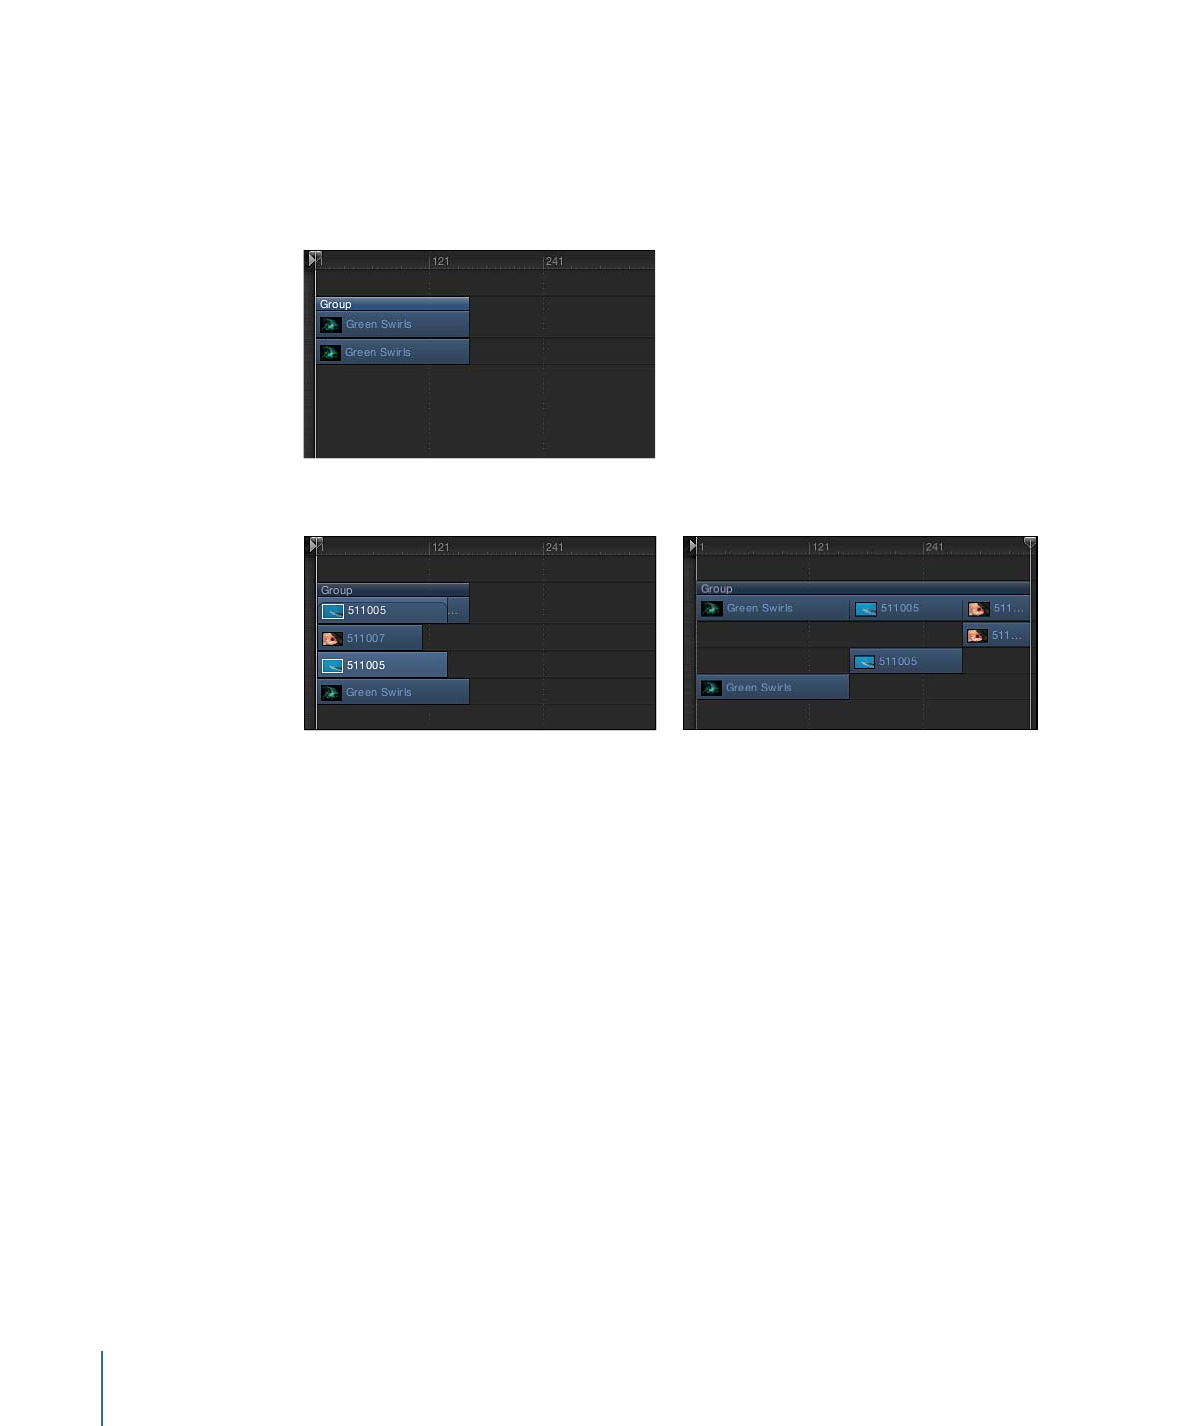
Before edit
Composite edit
Sequential edit
To add multiple layers as a composite
1
Shift-click or Command-click to select multiple items in the File Browser, Library, or Media
list, then drag them to the Timeline track area.
2
Drag to the frame where you want the new layers to start, holding down the mouse
button until the drop menu appears.
3
Choose Composite from the drop menu.
Multiple layers are added to the project at the same point in time, each new layer on its
own track.
Also, if you release the mouse button in the Timeline track area before the drop menu
appears, a composite edit is applied by default.
Alternatively, you can drop the multiple layers into the Timeline layers list. Doing so results
in a composite edit.
To add multiple layers sequentially
1
Shift-click or Command-click to select multiple items in the File Browser, Library, or Media
list, then drag them to the Timeline track area.
334
Chapter 8
Using the Timeline

2
Drag to the frame where you want the new layers to start, holding down the mouse
button until the drop menu appears.
3
Choose Sequential from the drop menu.
The multiple layers are edited into the project, one after another, each on its own track.