Creating a Simple Custom Replicator Pattern
Creating a custom replicator pattern begins by selecting a layer in your project to use as
a source for the cells, then replicating that layer. By default, a nonanimated, filled
rectangular pattern is created from the source. You can then modify the replicator
parameters to suit your project needs.
738
Chapter 15
Using the Replicator
To create a pattern from a source layer
1
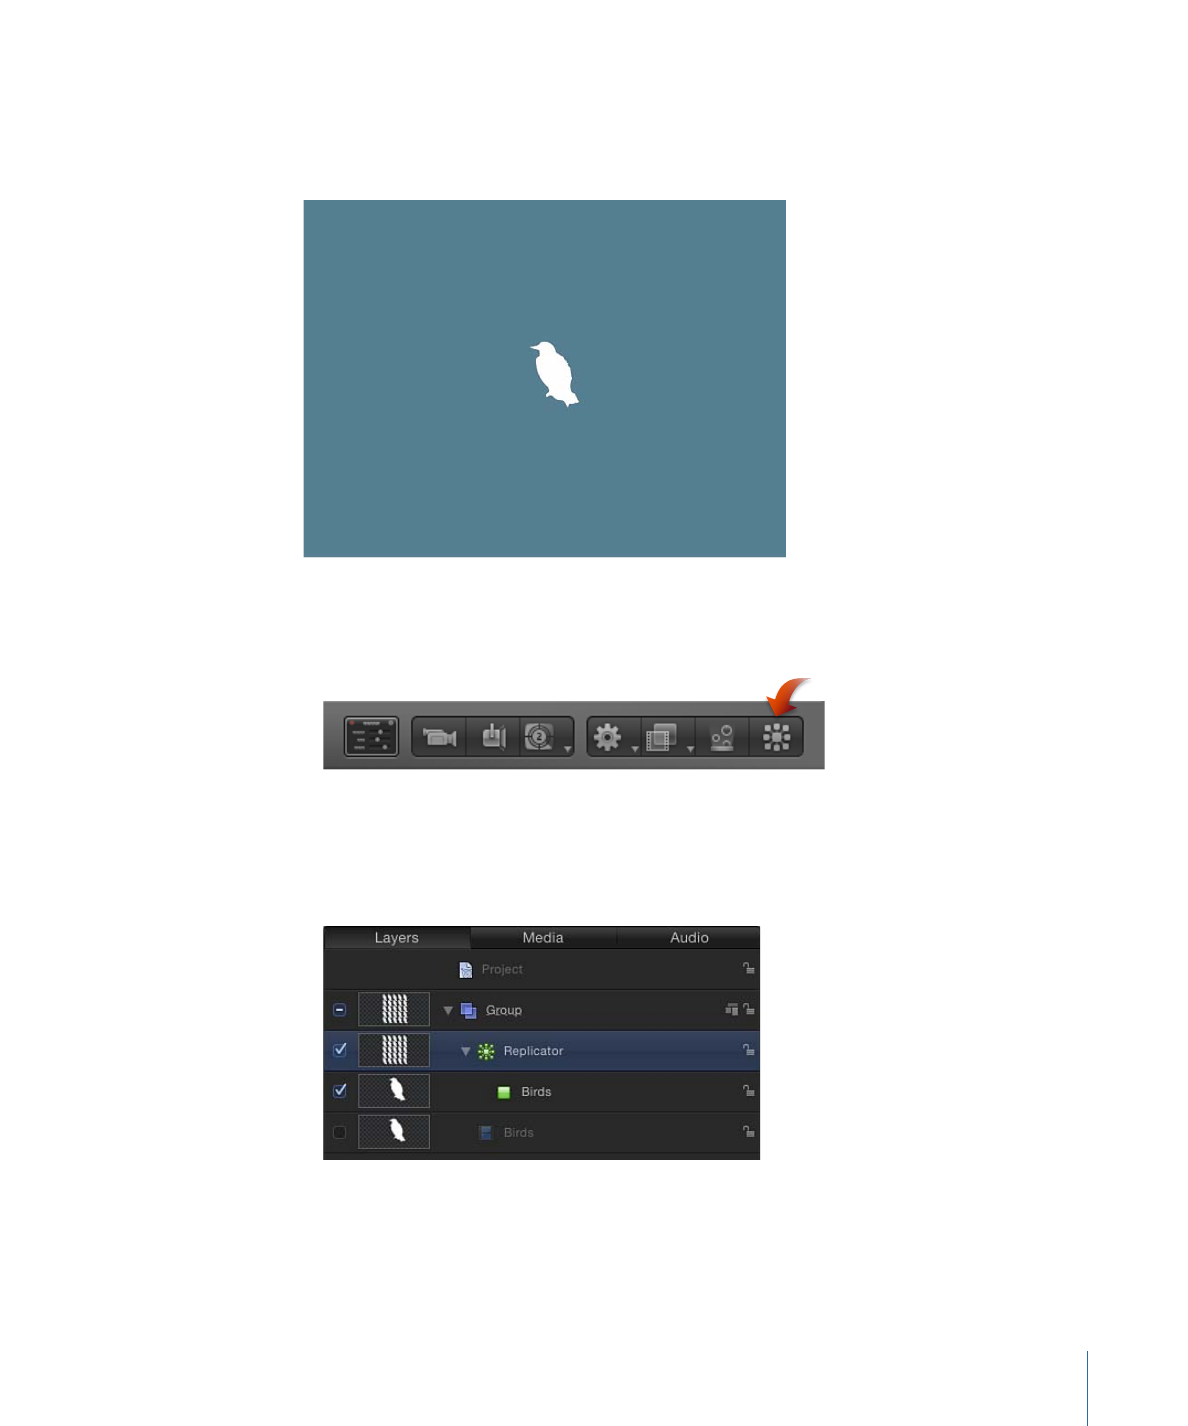
Place an object to replicate into your project.
This example uses a bird graphic from the Content folder in the Library.
2
Select the object, then do one of the following:
• In the toolbar, click the Replicate button.
• Choose Object > Replicate (or press L).
When a layer is replicated, the following occurs:
• The replicator layer (labeled “Replicator”) appears in the Layers list and is selected.
• A duplicate of the original layer (the bird shape) becomes the replicator cell.
• The original source layer (the bird shape) is disabled.
739
Chapter 15
Using the Replicator
Note: Changes made to the original source layer, such as opacity or shearing, are
respected in the pattern after the replicator is created.
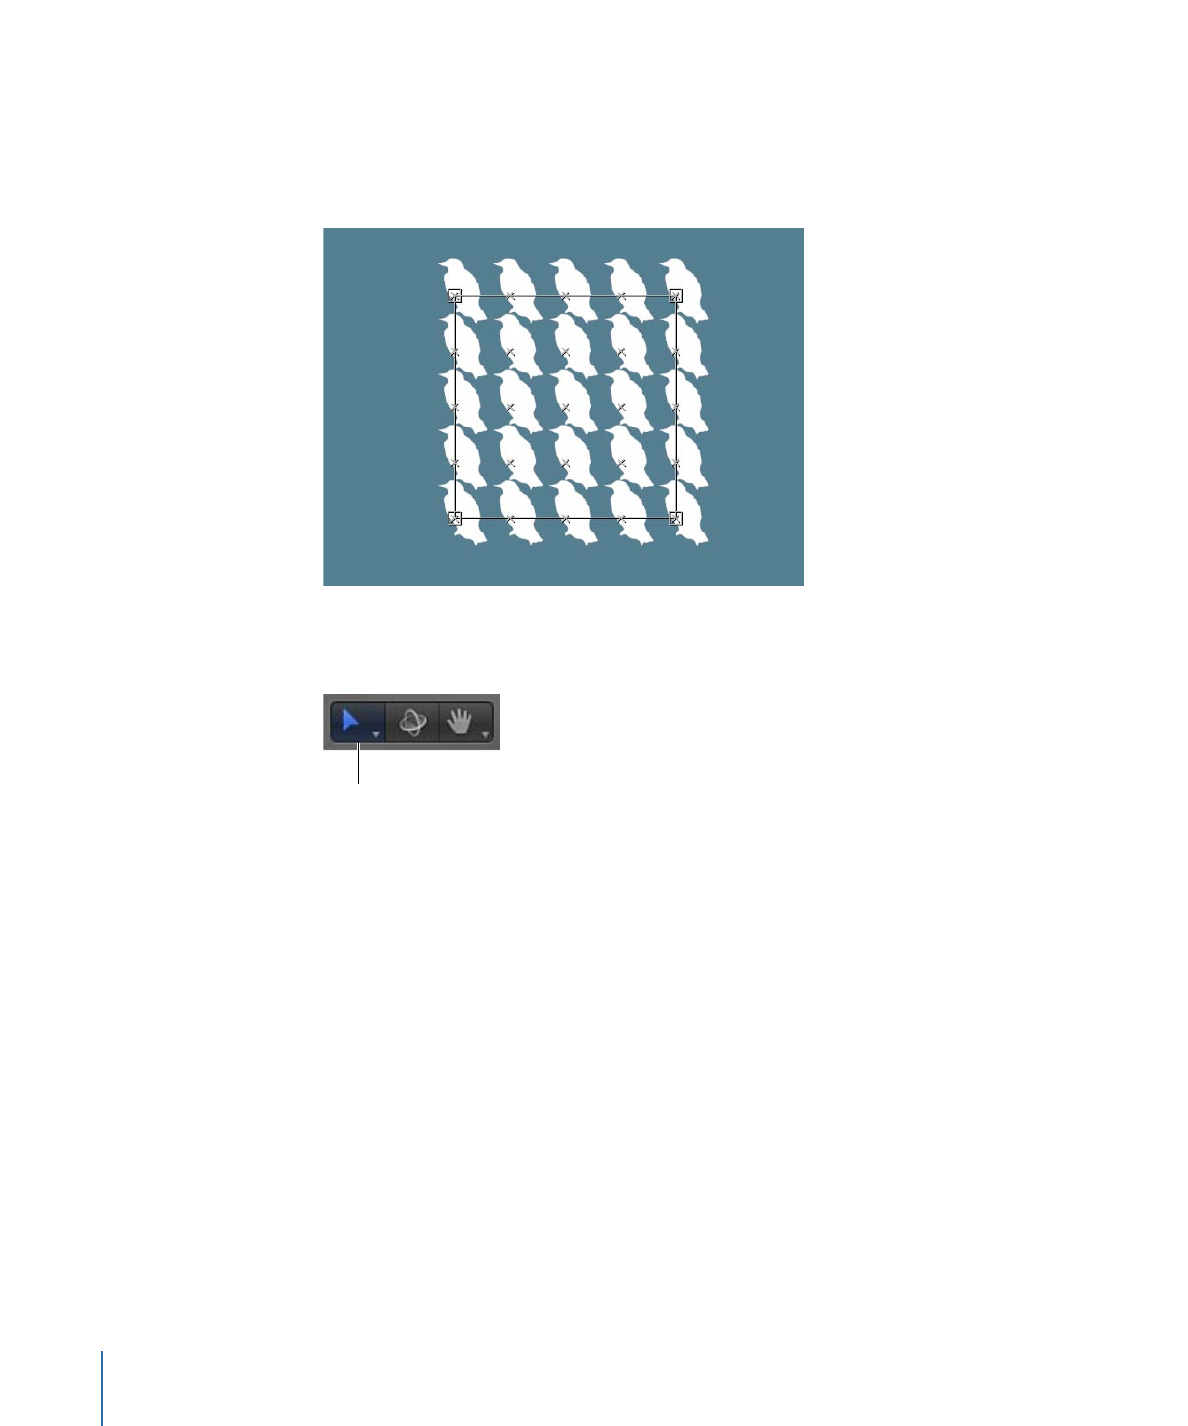
• In the Canvas, the default rectangle pattern appears, centered in the same location as
the source object.
• In the toolbar, the Adjust Item tool is selected so you can immediately begin using the
replicator’s onscreen controls.
Adjust Item tool
When the Adjust Item tool is selected, dragging the pattern’s onscreen controls (the
bounding box) resizes the replicator. Dragging in the Canvas (not over the bounding
box outline) repositions the replicator object as a whole.
• The Replicator HUD appears.
Note: If you have hidden the HUD, press D.