Masking a Layer or Group
Use the mask tools to create different shapes with which to mask a layer or group. There
are five mask tools available that are analogous to the five shape drawing tools covered
earlier in this chapter:
• Rectangle Mask
• Circle Mask
1194
Chapter 20
Using Shapes, Masks, and Paint Strokes
• Freehand Mask (used like the Paint Stroke tool)
• Bezier Mask
• B-Spline Mask
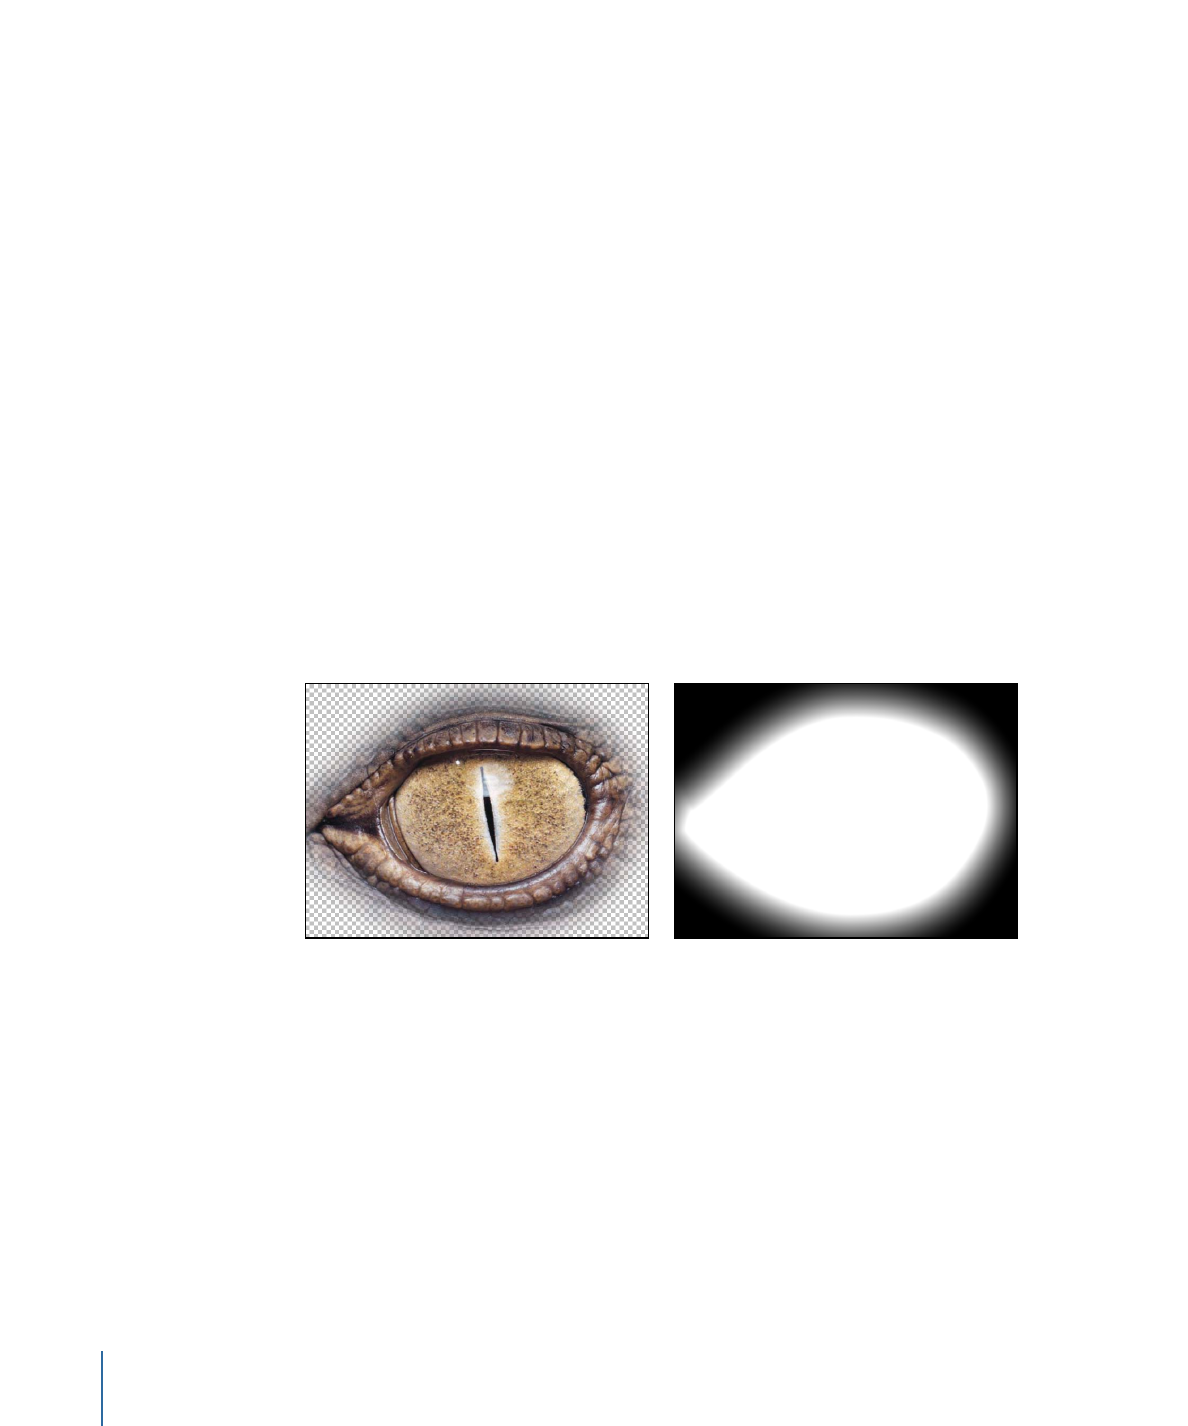
Note: You can also use an Image Mask to mask a layer. For more information, see
Applying
Image Masks to a Layer
.
Important:
A mask cannot be applied to a nonflattened 3D group. (To flatten a 3D group,
select the Flatten checkbox in the Group Inspector.) A mask can be applied to a layer in
a 3D group. To add a mask to a layer that has been manipulated in 3D space, use the
Isolate button. Masks cannot be manipulated in 3D space. For example, the Position
parameter for a mask only includes the X and Y position parameters, but not the Z position
parameter; the Rotation parameter only includes Z, but not X or Y. For more information,
see
Masking Objects in a 3D Project
.
Drawing and editing masks using these tools works identically to drawing and editing
shapes. The main difference is that while drawing a shape creates a new layer in your
project, masks must be drawn on top of another layer in your project. After you draw a
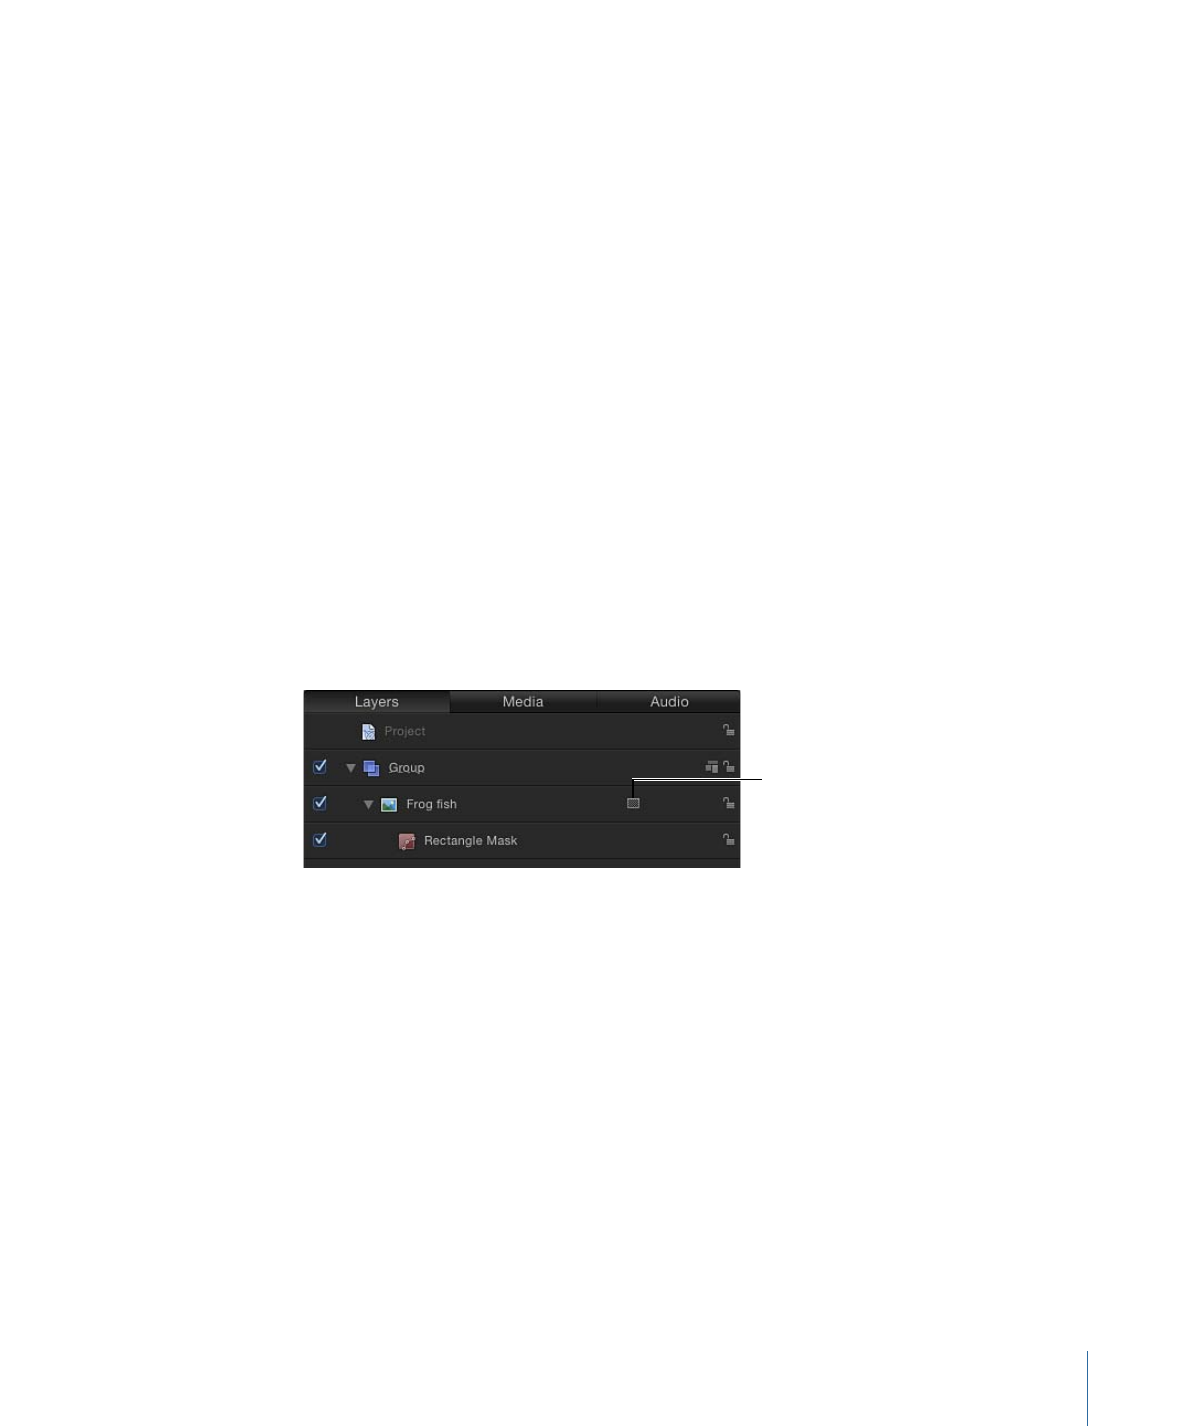
mask, it is nested in the specific layer or group for which it was created, in the Layers list
and Timeline. When a mask is attached to a layer, a mask icon appears to the right of the
name of the layer. Turn the mask display on or off by clicking this icon.
Click the mask icon
to turn mask display
on or off.
Note: Masks created for one layer can be copied or moved to other layers.
Important:
When a mask is applied to a 2D or flattened 3D group, the group is rasterized.
For more information, see
Groups and Rasterization
.
1195
Chapter 20
Using Shapes, Masks, and Paint Strokes
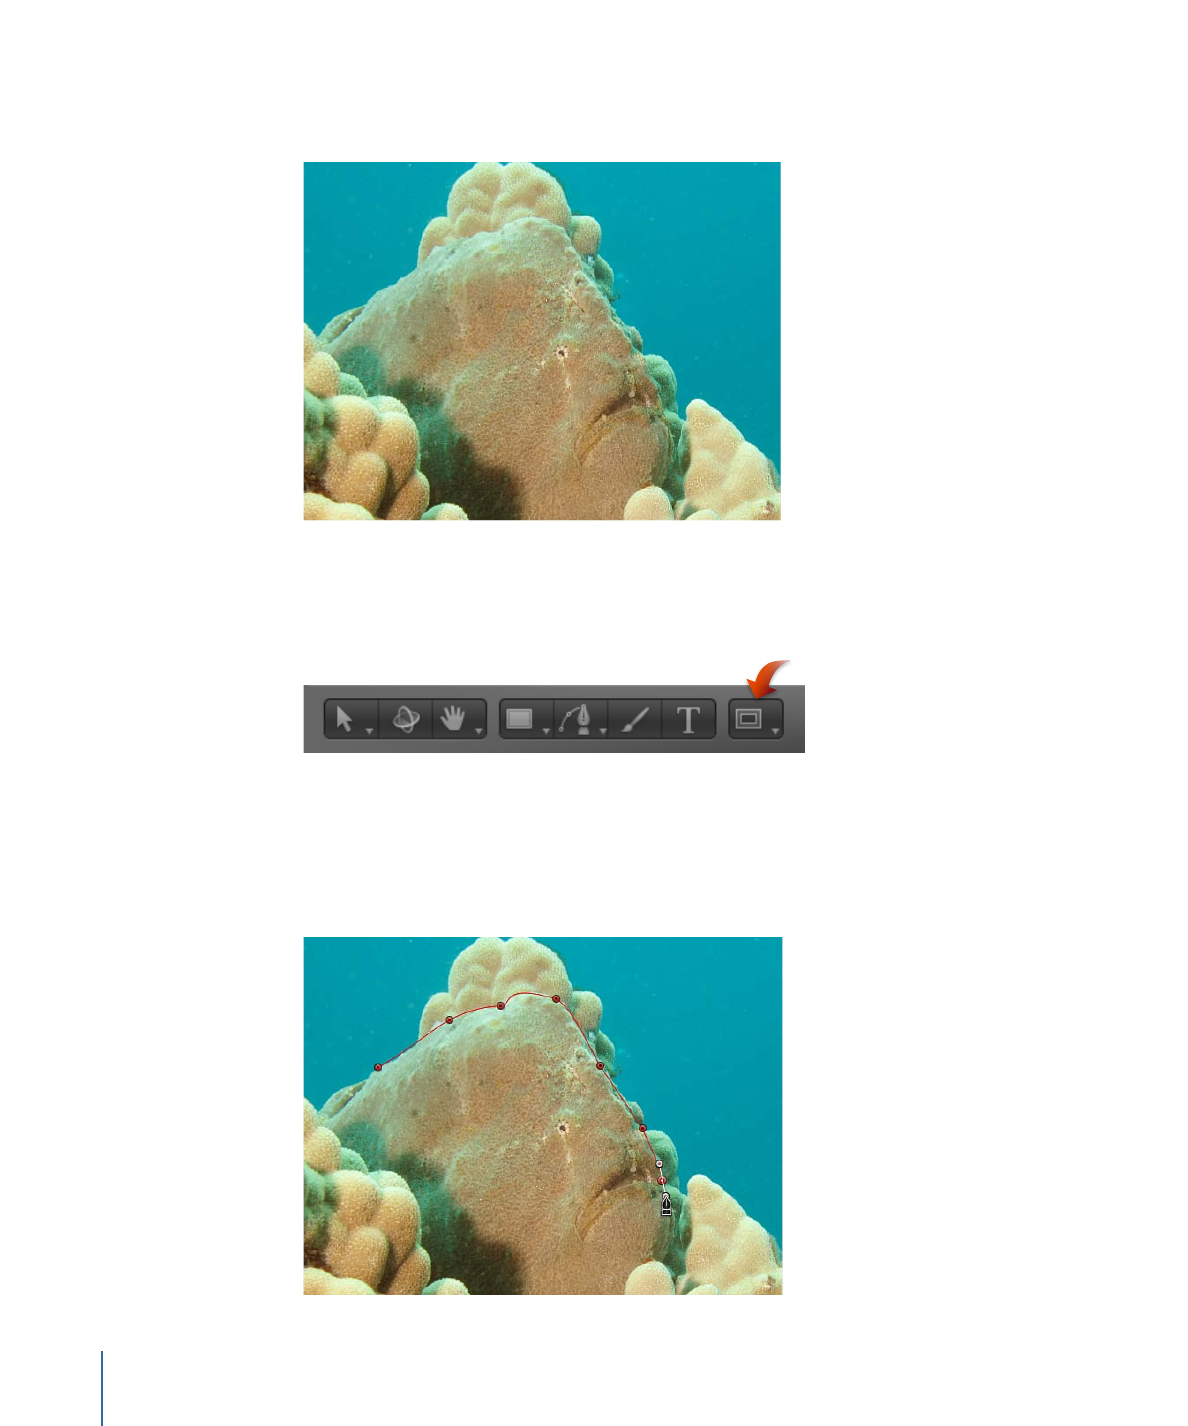
To mask a layer
1
Select a layer in the Canvas or Layers list.
2
Choose a mask drawing tool from the pop-up menu in the toolbar (the Rectangle Mask
tool, the Circle Mask tool, the Freehand Mask tool, the Bezier Mask tool, or the B-Spline
Mask tool).
Note: If you haven’t selected a layer, the mask tools are not available.
3
Begin drawing the shape to mask the layer.
For more information about how to draw and edit shapes, see
Shape and Mask Drawing
Tools
.
1196
Chapter 20
Using Shapes, Masks, and Paint Strokes
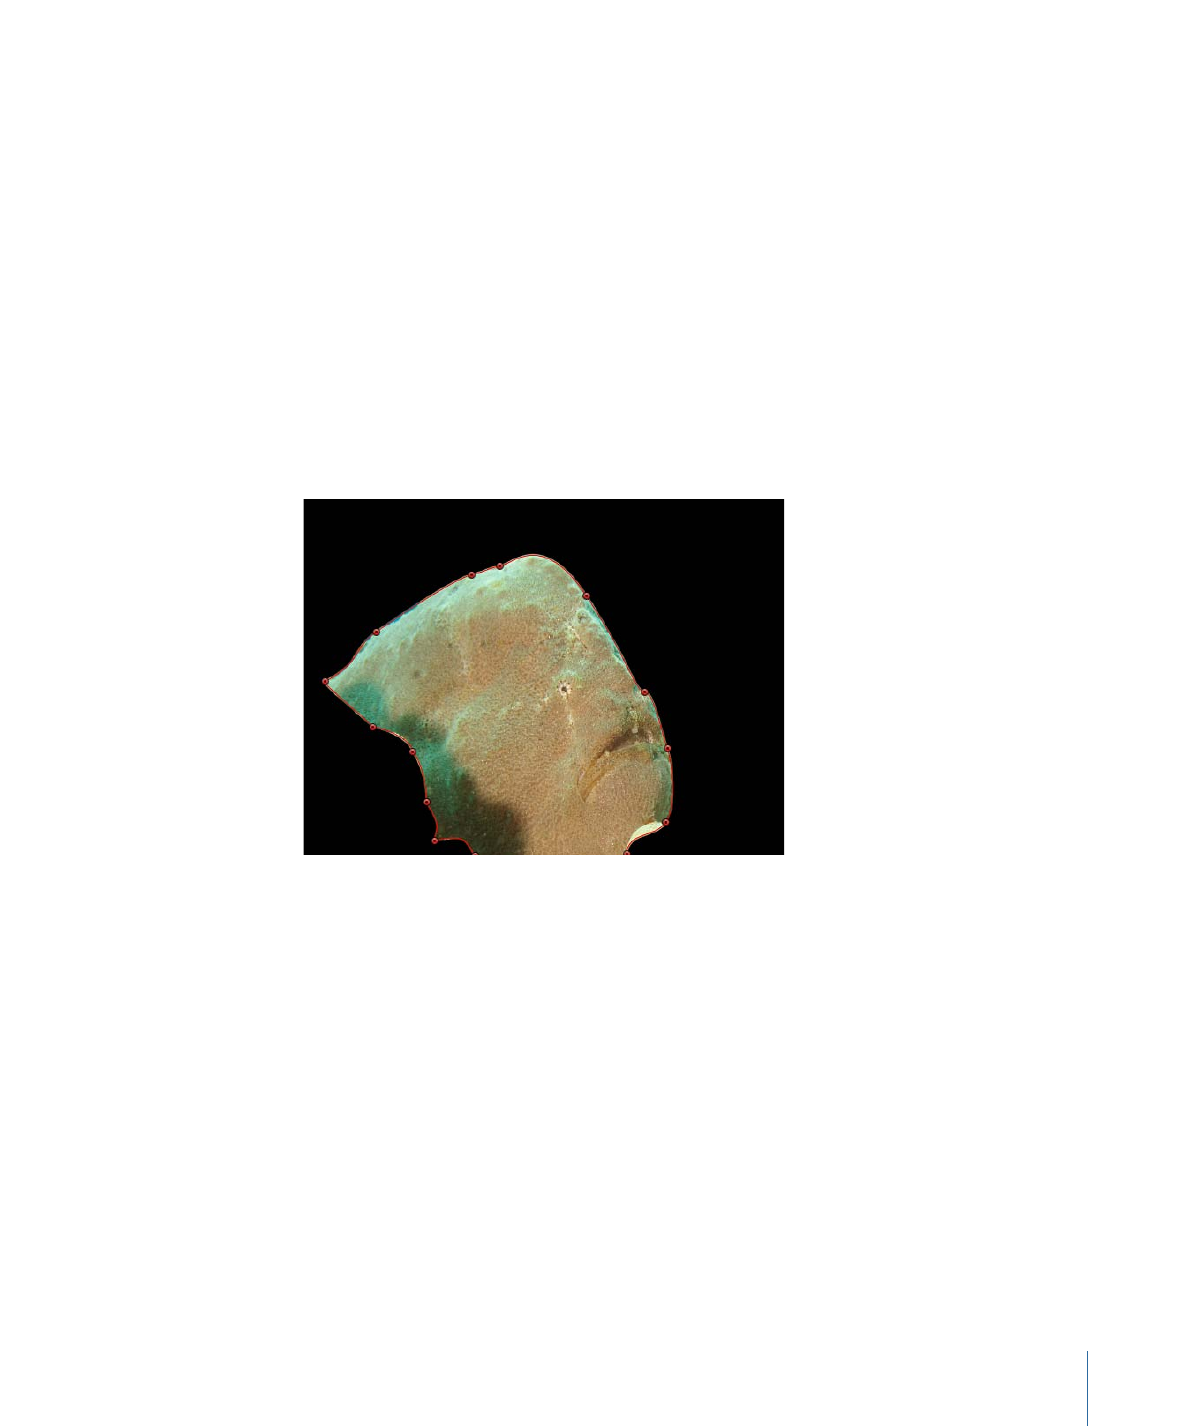
4
When you’re done, you can finish the mask by doing one of the following:
• Click the first point to close the mask.
• Press C to close the mask, joining the first point you created to the last.
• Double-click to close the mask, joining the first point you created to the last.
• Press Return to close the mask, joining the first point you created to the last.
• When using the Freehand Mask tool, join the end of the mask to the target circle at
the beginning of the mask. If you don’t reach the beginning of the mask, the mask
shape is closed when you lift the stylus or release the mouse button.
Note: Unlike standard shapes, masks are always closed.
After you’ve finished drawing the mask, its effect is immediate, and the mask you created
appears nested underneath the layer to which it’s applied in the Layers list and Timeline.
You can create multiple masks for a single layer. To add masks, select the object again,
then follow the above procedure. By default, all new masks are set to the Add blend
mode. You can change the Mask Blend Mode parameter in the Inspector to combine
masks for different effects. For more information about using multiple masks together,
see
Combining Multiple Masks
.