Combining Multiple Masks
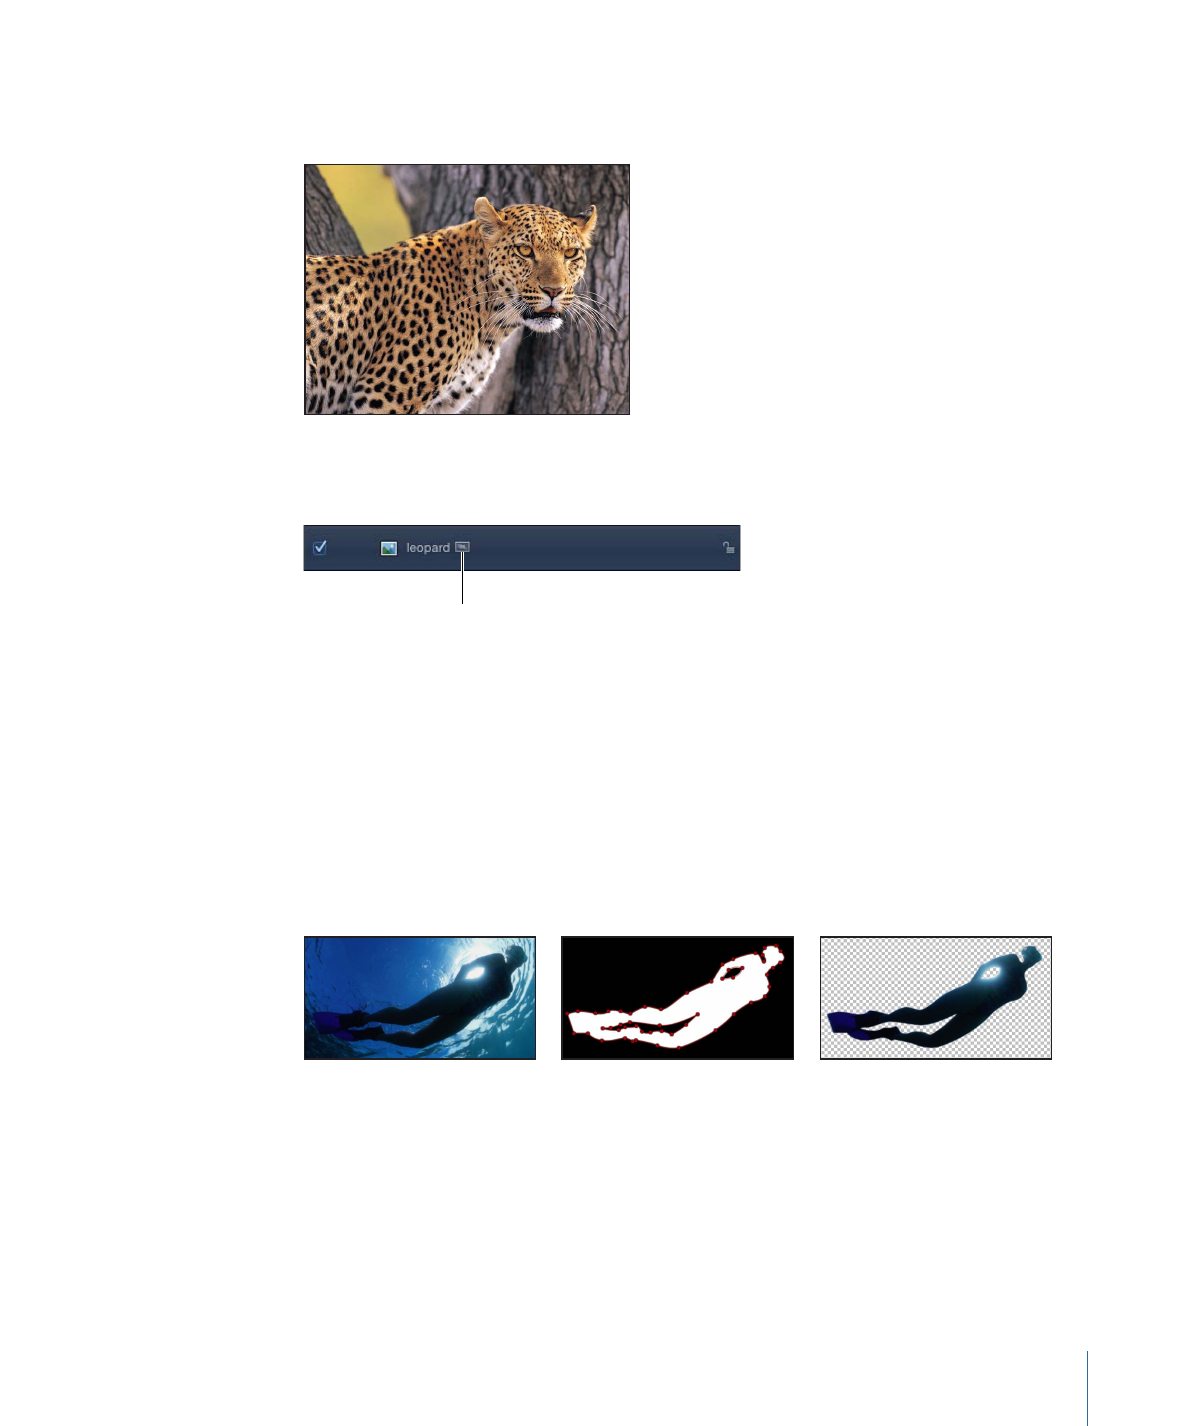
Often, you may find that it is impossible to create the mask shape you need using only
a single mask. For example, when masking something that has a hole in it, you need at
least two masks—one set to Add to mask the overall object, and a second one set to
Subtract to cut the necessary hole in the middle of it. In the following example, the only
way to mask the space between the diver’s arms and legs is to create three overlapping
masks set to Subtract.
Original object
Three overlapping masks
Final result
1199
Chapter 20
Using Shapes, Masks, and Paint Strokes

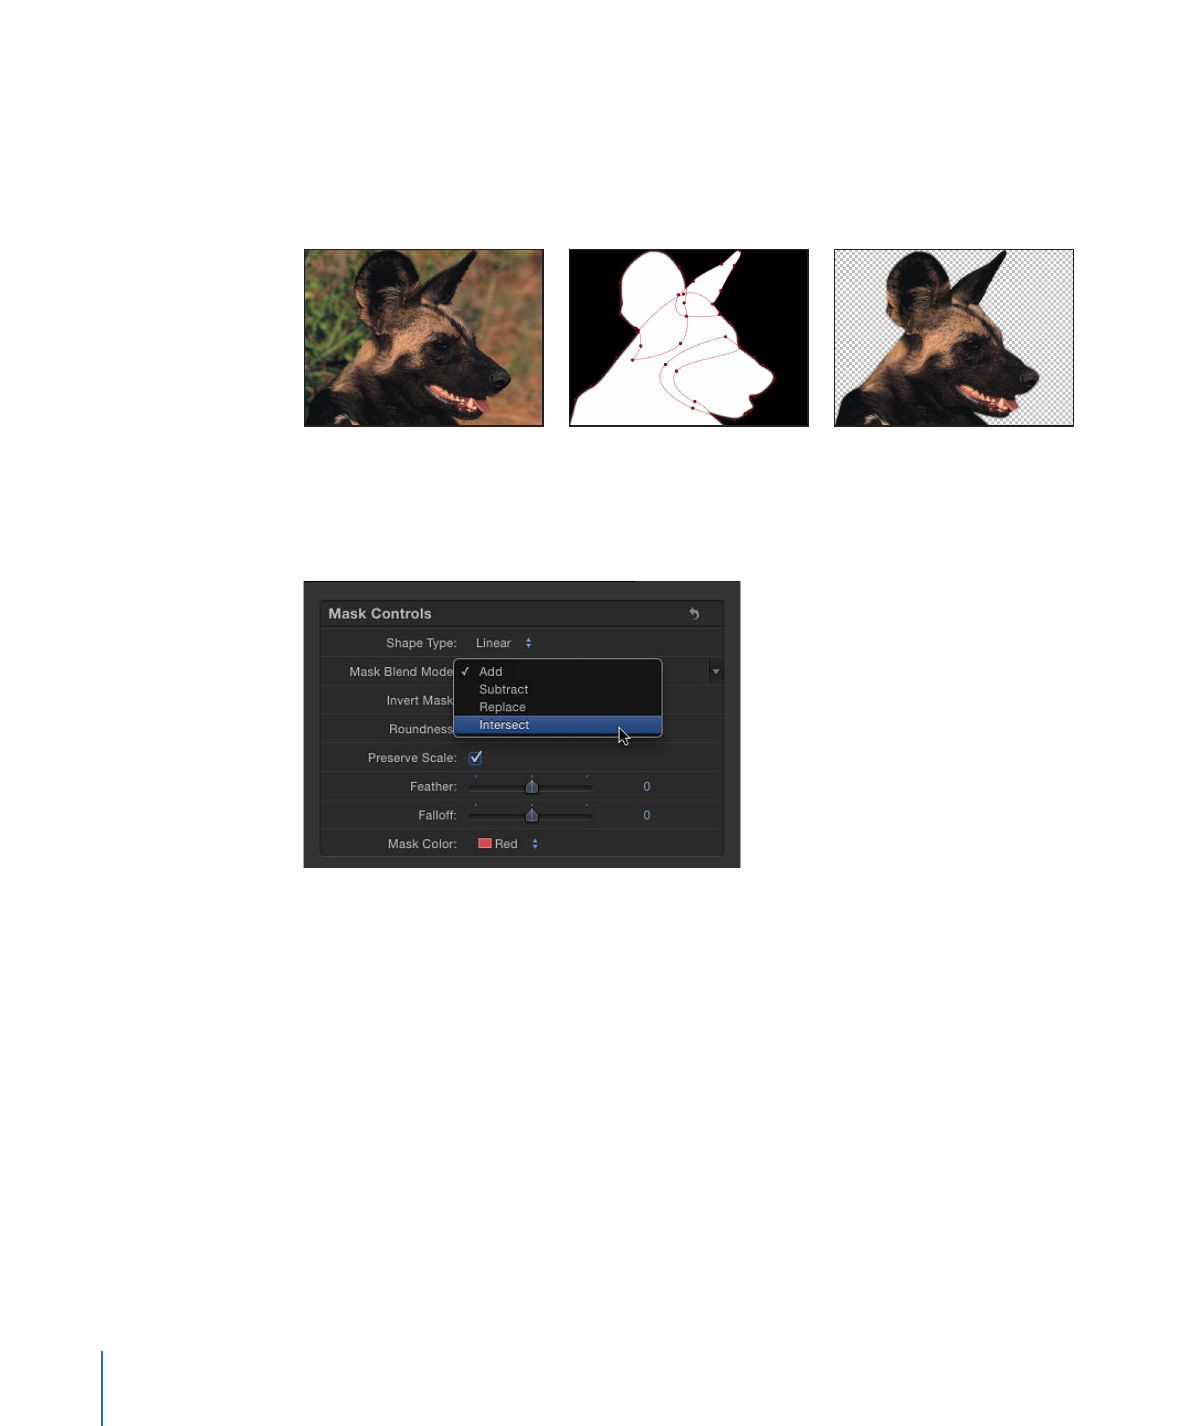
Other times, you may find that it’s more convenient to mask a complex object using
multiple masks. This is frequently the case when rotoscoping an object and animating
the masks. In this example, the dog’s head is masked with four masks set to Add—one
for the head, one for each ear, and a separate mask for the mouth. This makes it easier
to make adjustments later on, especially when animating a mask to do rotoscoping.
Original object
Four overlapping masks
End result
Whatever the reason, you can easily combine multiple masks for any object by adjusting
each mask’s Mask Blend Mode parameter in the Inspector to create any combination.
Each mask’s blend mode determines whether the mask adds to, subtracts from, or replaces
a layer’s previously existing alpha channel. Additionally, blend modes affect how masks
interact with one another. Ultimately, every mask applied to a layer combines according
to the specified blend modes to create that layer’s final alpha channel. Mask Blend Modes
can be changed at any time.
Blend mode operations are also determined by the order in which each mask appears in
the Layers list, particularly with the Replace and Intersect modes. For example, a mask
set to the Intersect mode masks out all other regions of a layer that do not overlap it. A
mask set to Intersect affects all masks nested underneath it. Masks added above it are
unaffected by this behavior.
1200
Chapter 20
Using Shapes, Masks, and Paint Strokes