Randomize Shape
The Randomize Shape behavior allows you to animate the control points of a shape by
applying a random offset to each point of the shape. This behavior is useful for creating
rapid and varied effects on a shape.
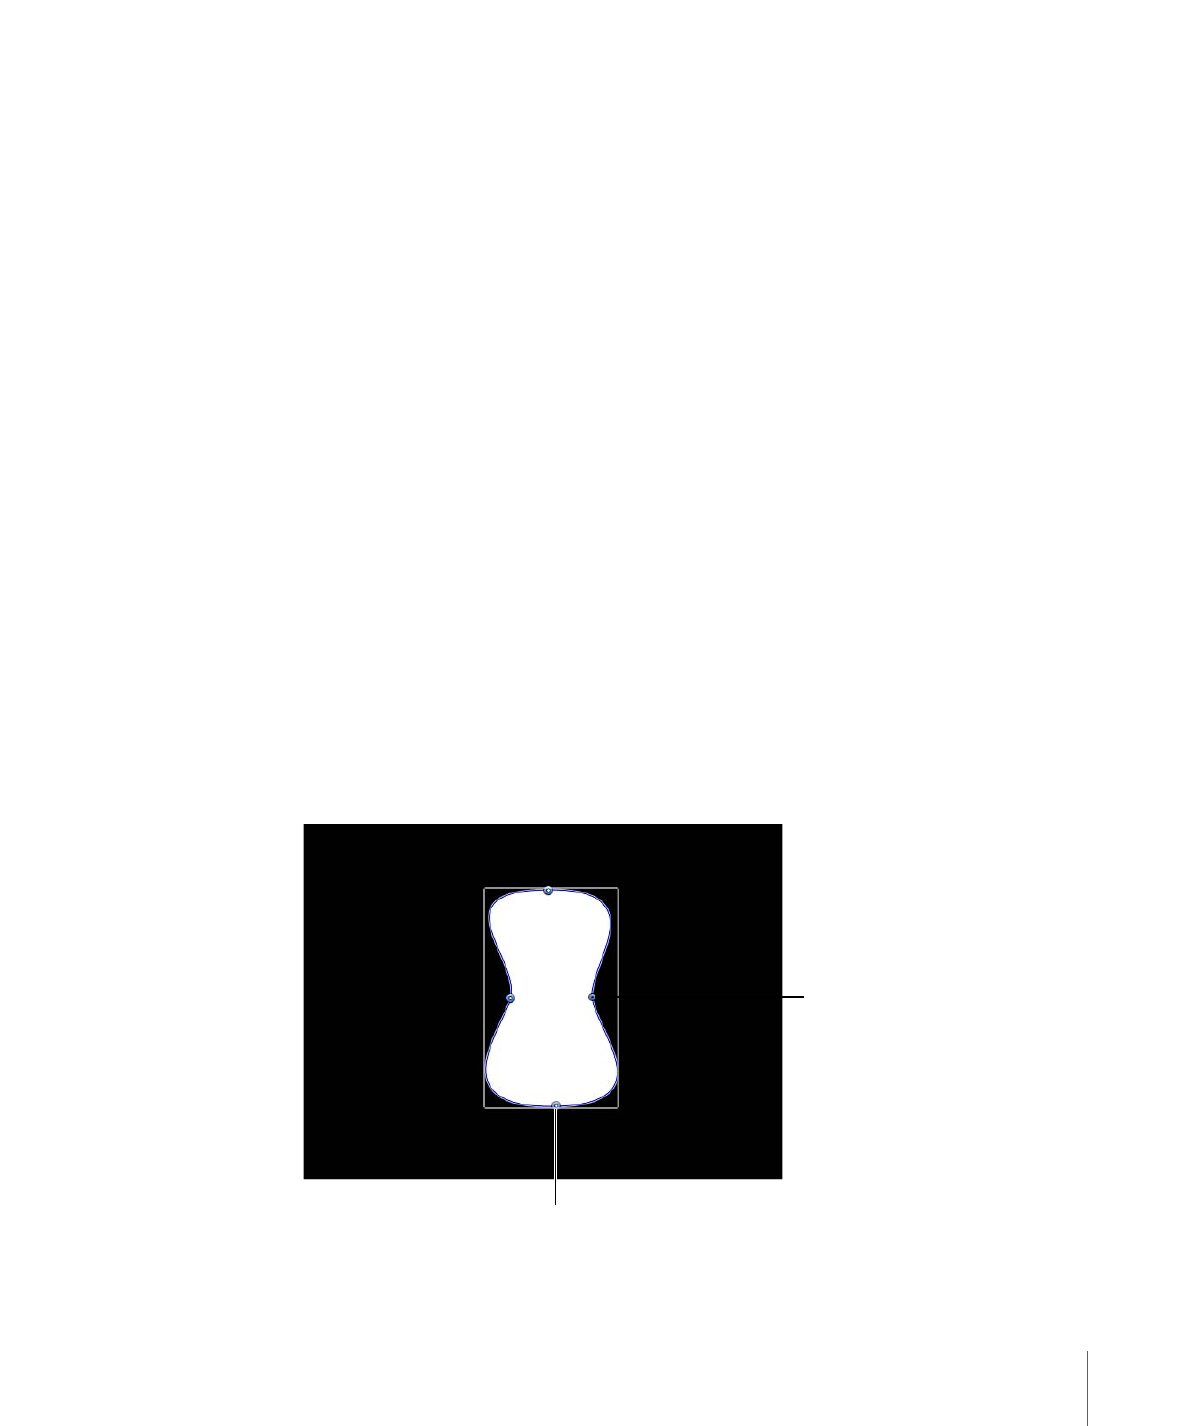
When the Randomize Shape behavior is applied to a shape, all control points of the shape
are affected by default. When the behavior is selected in the Layers list, affected control
points appear blue with white dots in the center of the point on the blue shape behavior
spline. To disable control points, click the control points. A disabled point is a darker blue
with a dark dot in the center of the point.
The darker blue control
point is disabled and
is not affected by the
behavior.
The lighter blue control
point with the white dot
is enabled and is affected
by the behavior.
1177
Chapter 20
Using Shapes, Masks, and Paint Strokes
Parameters in the Inspector
Amount/Multiplier:
This parameter is set to Amount when the Apply Mode is set to Add,
Subtract, or Add and Subtract; it is set to Multiplier when the Apply Mode is set to Multiply.
This parameter defines the maximum value the Randomize behavior will generate.
Apply To:
A pop-up menu that defines whether the behavior is applied to the shape’s
control points, tangent handles, or both points and handles.
• Points: The control points of the shape are randomized, changing their position over
the duration of the behavior.
• Tangents: The control points’ tangent handles (rather than the control points) of the
shape are randomized. The control points stay in a fixed position while the curves
between the points are animated.
• Points and Tangents: Both the control points and handles are animated.
Apply Mode:
A pop-up menu that determines how values generated by this behavior
are combined with other behaviors and keyframes that affect the same parameter. This
provides you with different ways of using a Randomize behavior to modify a vertex’s
preexisting values. There are four options:
• Add: Values generated by this behavior are added to other behaviors and keyframes
that affect the same parameter.
• Subtract: Values generated by this behavior are subtracted from other behaviors and
keyframes that affect the same parameter.
• Multiply: Values generated by this behavior are multiplied by other behaviors and
keyframes that affect the same parameter.
• Add and Subtract: Values generated by this behavior are added to and subtracted from
other behaviors and keyframes that affect the same parameter.
Frequency:
A slider that lets you adjust the amount of random variation per second.
Higher values generate faster variations, whereas lower values generate slower variations.
Noisiness:
A slider that adds an additional overlay of random variance to the Frequency
you’ve set. Higher Noisiness values result in more erratic variations in the affected
parameter.
Link:
This parameter appears when you apply this behavior to a two-dimensional
parameter (such as Distort) or three-dimensional parameter (such as Position or Rotation)
that consists of X, Y, and/or Z values. Select this checkbox if you want the transformation
applied to the X and Y vertices to be the same. For instance a +10 change to X will result
in an identical +10 change to Y.
Preserve Angle:
When this checkbox is selected, the tangent handles become (or remain)
flat, maintaining the continuity of the curves.
1178
Chapter 20
Using Shapes, Masks, and Paint Strokes
Random Seed:
A button that lets you pick a new random seed number. This number is
used to randomly generate new sequences of values, based on the other parameters of
this behavior.
HUD Controls
The Randomize Shape HUD contains the Amount, Multiplier, Apply To, Frequency,
Noisiness, Link, and Preserve Angle parameters.