
Using Dynamic Guides and Snapping While Editing
The Canvas dynamic guides and control point snapping help you connect selected points
to themselves, or to other objects.
To use control point snapping on a single shape
1
In the View pop-up menu above the right side of the Canvas, ensure that the Dynamic
Guides item is checkmarked.
2
In the menu bar, choose View > Snap to ensure that snapping is turned on.
1129
Chapter 20
Using Shapes, Masks, and Paint Strokes
When active, a check mark appears next to the menu item.
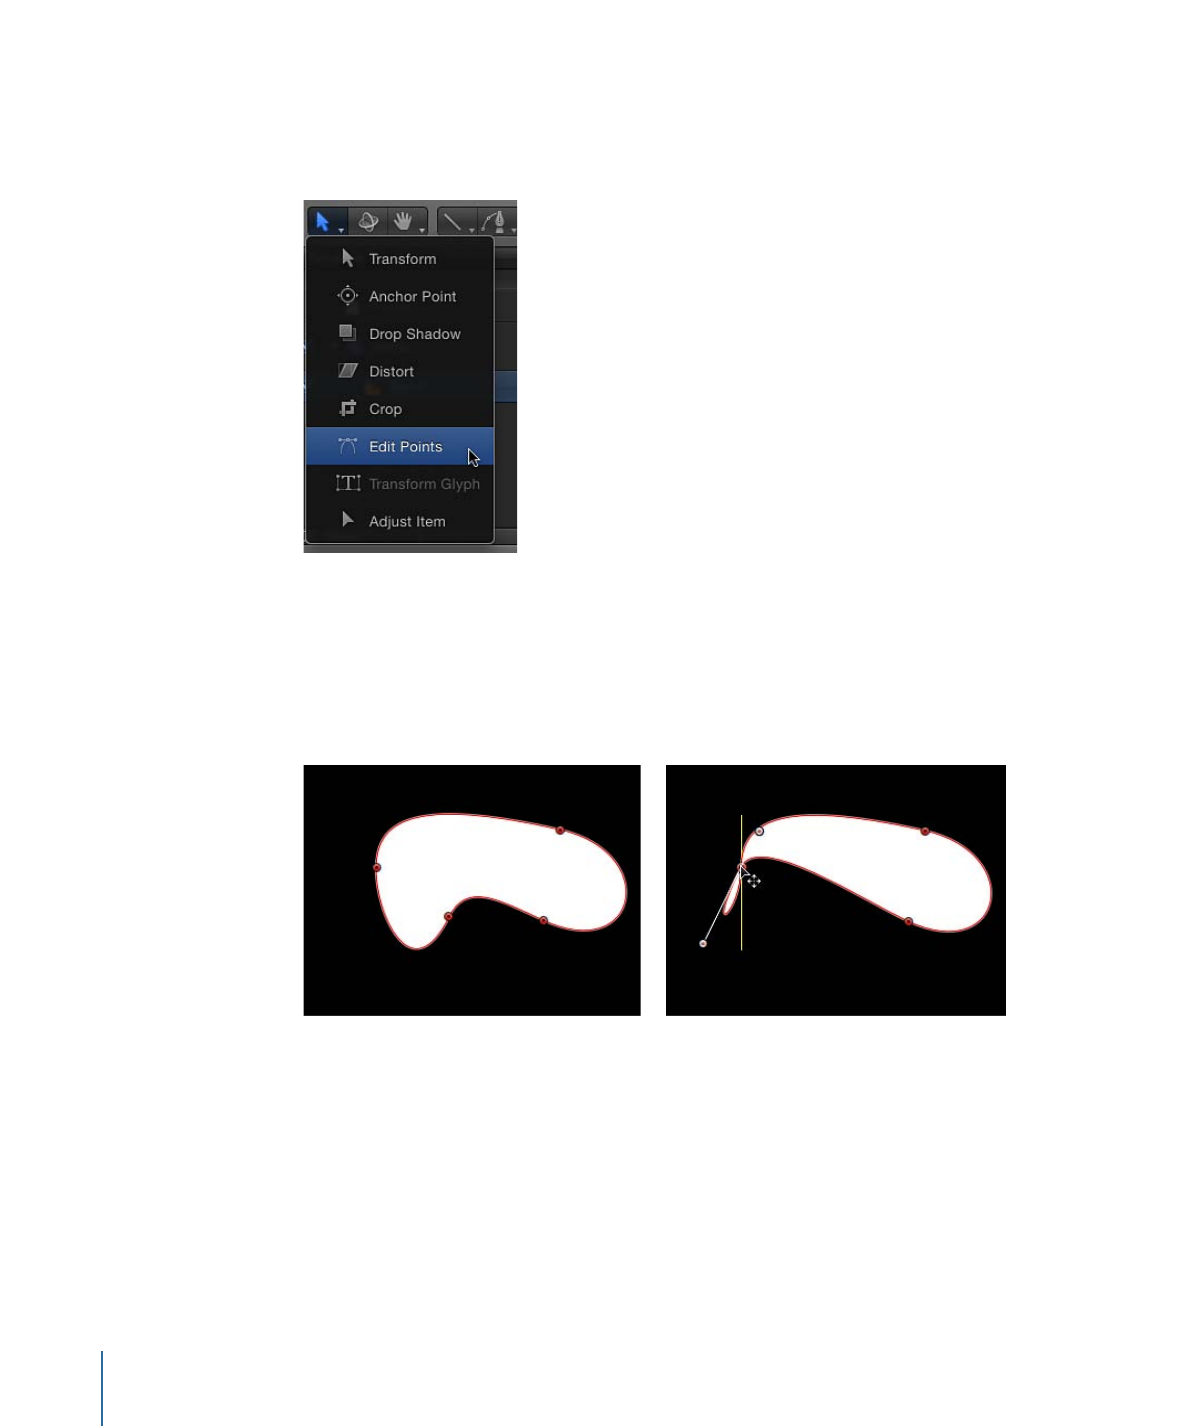
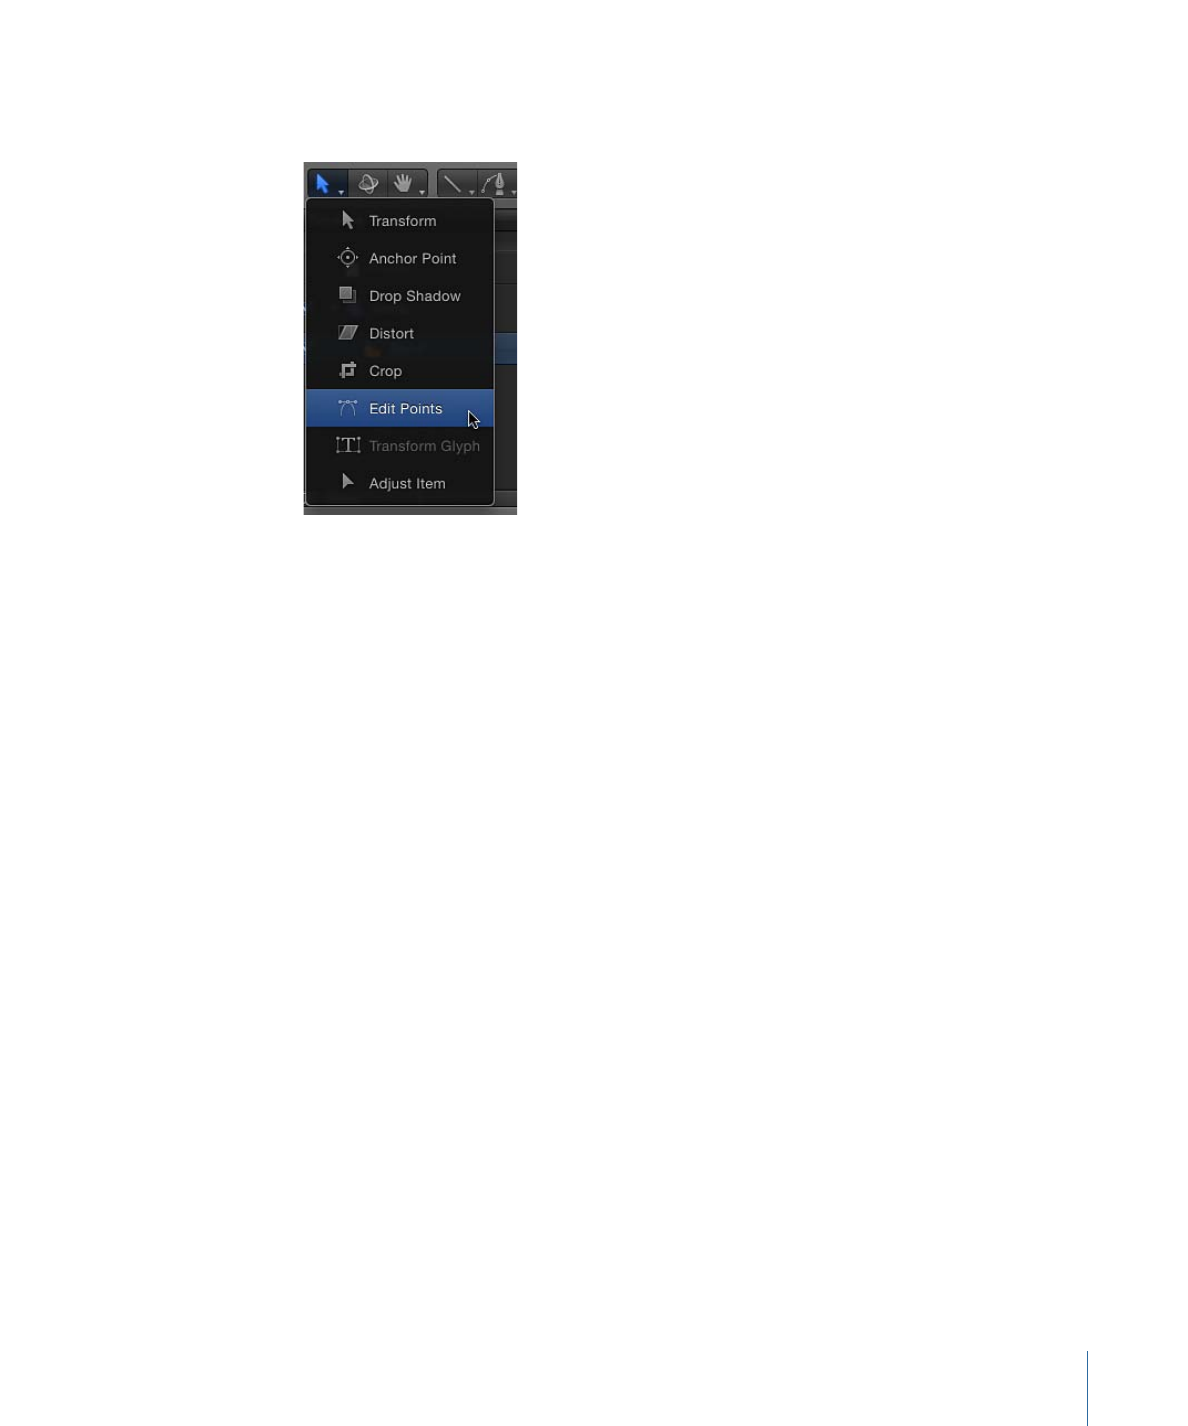
3
Select the shape to edit, then choose the Edit Points tool from the 2D transform tools
pop-up menu in the toolbar.
Note: In the Canvas, you can also Control-click a shape and choose Edit Points from the
shortcut menu.
4
In the Canvas, drag a control point.
Yellow guides appear when the selected control point aligns with itself or with the edges
or center of other objects.
Original shape
Control point snapping to left
boundary of shape
To use control point snapping on multiple shapes
1
In the View pop-up menu above the right side of the Canvas, ensure that the Dynamic
Guides item is checkmarked.
2
Choose View > Snap to ensure snapping is turned on.
When active, a check mark appears next to the menu item.
1130
Chapter 20
Using Shapes, Masks, and Paint Strokes
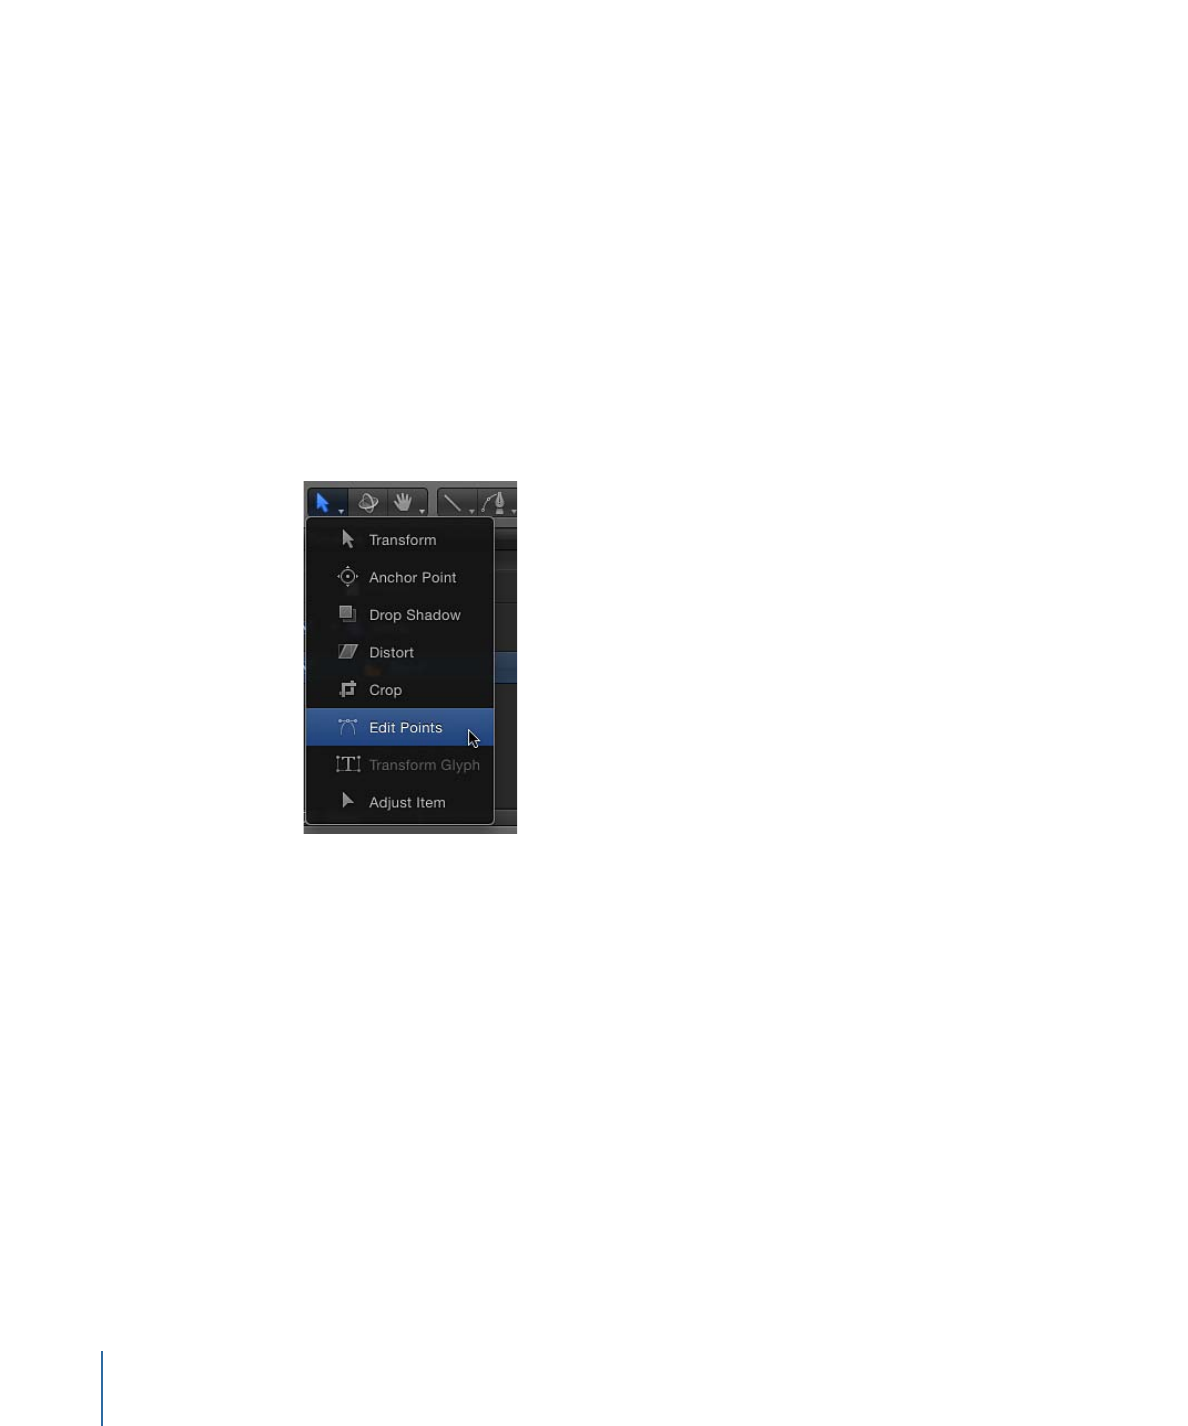
3
Select the shape to edit, then choose the Edit Points tool from the 2D tools pop-up menu
in the toolbar.
Note: In the Canvas, you can also double-click a shape or Control-click a shape and choose
Edit Points from the shortcut menu to show its control points.
4
Shift-click to select another shape.
5
In the Canvas, drag a control point on the originally selected shape.
Guides appear when the selected control point aligns with other control points on the
shape being edited, as well as with other shapes in the Canvas.
Yellow guides appear when the selected control point aligns with itself or with the edges
or center of other objects.
Use the following guidelines to turn off snapping, to allow for subtle shape adjustments:
• Press N to turn off snapping. Press N again to turn snapping back on.
• As you begin to move the selected control point, press and hold the Command key to
turn off snapping as you drag the point.
Note: If you press Command and then drag a control point, adjustable tangent handles
are created. If you press Command and click a curved point, that point becomes a
corner point. For more information on editing Bezier curve control points, see
Editing
Bezier Control Points
.
To transform a Bezier or B-Spline shape
1
Click the Select/Transform tool.
2
Click a shape in the Canvas.
3
Move, resize, or rotate the shape.
Note: To enter control point-adjustment mode in the Canvas, double-click the shape.
1131
Chapter 20
Using Shapes, Masks, and Paint Strokes
When you move, resize, or rotate, a shape, you also transform its control points to match
the new orientation of the shape.
For more information about how to perform object transformations, see
2D Transform
Tools
.