
Creating Paint Strokes
Unlike a freehand Bezier or B-Spline shape drawn one point at a time, a paint stroke is
typically created with one continuous movement.
Technically, paint strokes are outline-only shapes created using any shape tool. An
outline-only shape is indicated by a paintbrush icon in the Layers list and Timeline. This
icon changes to a shape icon when a shape fill is enabled.
Note: The Paint Stroke feature is a design and graphics tool, not a retouching or
rotoscoping tool.
There are two ways to create a paint stroke:
• Select the Paint Stroke tool in the toolbar, then draw a stroke in the Canvas using a
stylus and tablet (or a mouse).
• Create a shape (paint stroke, line, rectangle, or circle) in the Canvas, select the Outline
checkbox in the Style pane of the Shape Inspector, then choose Airbrush or Image from
the Brush Type pop-up menu.
For more information about converting a shape to an editable paint stroke, see
Using a
Shape Outline as a Paint Stroke
.
The Paint Stroke tool creates a shape outline comprised of dabs. Dabs—analogous to the
cells of a replicator or particle emitter—define the appearance of the stroke. Although
particle cells can emit various particle types, airbrush paint strokes have only a single dab
type. The dabs can be very close together or spaced widely apart along the stroke. The
dabs’ color, opacity, spacing, scale, angle, and so on can be modified in the Inspector
after a stroke is created.
For more information on modifying a paint stroke after the stroke is created, see
Stroke
Pane Controls in the Inspector
.
Paint strokes can be animated using behaviors or by keyframing. In addition to Basic
Motion, Simulation, and Parameter behaviors, shapes have their own category of behaviors
that includes a behavior to sequence effects over the length of the stroke. For more
information on using the Shape behaviors, see
Shape Behaviors
.
1124
Chapter 20
Using Shapes, Masks, and Paint Strokes

Note: The stroke’s shape (defined by its control points) and open/closed state can be
modified in the Canvas or Inspector. Because a stroke is a shape, it can be edited like any
other shape, using the methods described in
How to Edit Shapes
.
After you select the Paint Stroke tool in the toolbar and before drawing the stroke in the
Canvas, you can define the color and other attributes of the stroke in the Paint Stroke
Tool HUD. In the HUD, you select a preset shape style to use as your brush source.
There are several ways to set the style of a paint stroke:
• Select a preset shape style in the Paint Stroke Tool HUD before drawing a stroke. If no
preset shape is selected before drawing a stroke, a basic solid stroke (outline) is created.
• Modify a paint stroke created with the Paint Stroke tool using the Shape Style pop-up
menu in the Style pane of the Shape Inspector.
• Select the Outline checkbox in the Shape HUD or the Style pane of the Shape Inspector,
then modify the outline of a shape (circle, rectangle, and so on) using the Outline
parameter controls.
• Drag a shape style (in the Shape Styles category) from the Library to the paint stroke
layer in the Layers list. The style of the shape from the Library is applied to the paint
stroke.
Depending on the effect you want, you may achieve better results using a stylus and
tablet with the Paint Stroke tool. Many styles and brushes take advantage of the pen
pressure and speed applied when creating the stroke using a graphics tablet. You can
apply the pressure or speed to different stroke parameters, such as width, opacity, and
spacing. For example, choosing Width from the Pen Pressure pop-up menu in the Paint
Stroke Tool HUD results in wider strokes when you apply more pen pressure.
Using the Write On parameter, you can record a stroke so it “draws” over time. In this
case, a Write On Shape behavior is applied to the stroke using as its settings the time it
took to draw the stroke and the speed at which each section of the stroke was created.
These settings can be modified after the stroke is created. A Write On behavior can also
be applied after a paint stroke is created. For more information on using the Write On
behavior, see
Write On
.
To make a paint stroke
1
Select the Paint Stroke tool (or press P).
The Paint Stroke tool HUD appears. (If it doesn’t appear, press F7.)
1125
Chapter 20
Using Shapes, Masks, and Paint Strokes
Important:
Like the other drawing tool HUDs, the Paint Stroke Tool HUD is available only
after the Paint Stroke tool is selected and before you create your stroke in the Canvas.
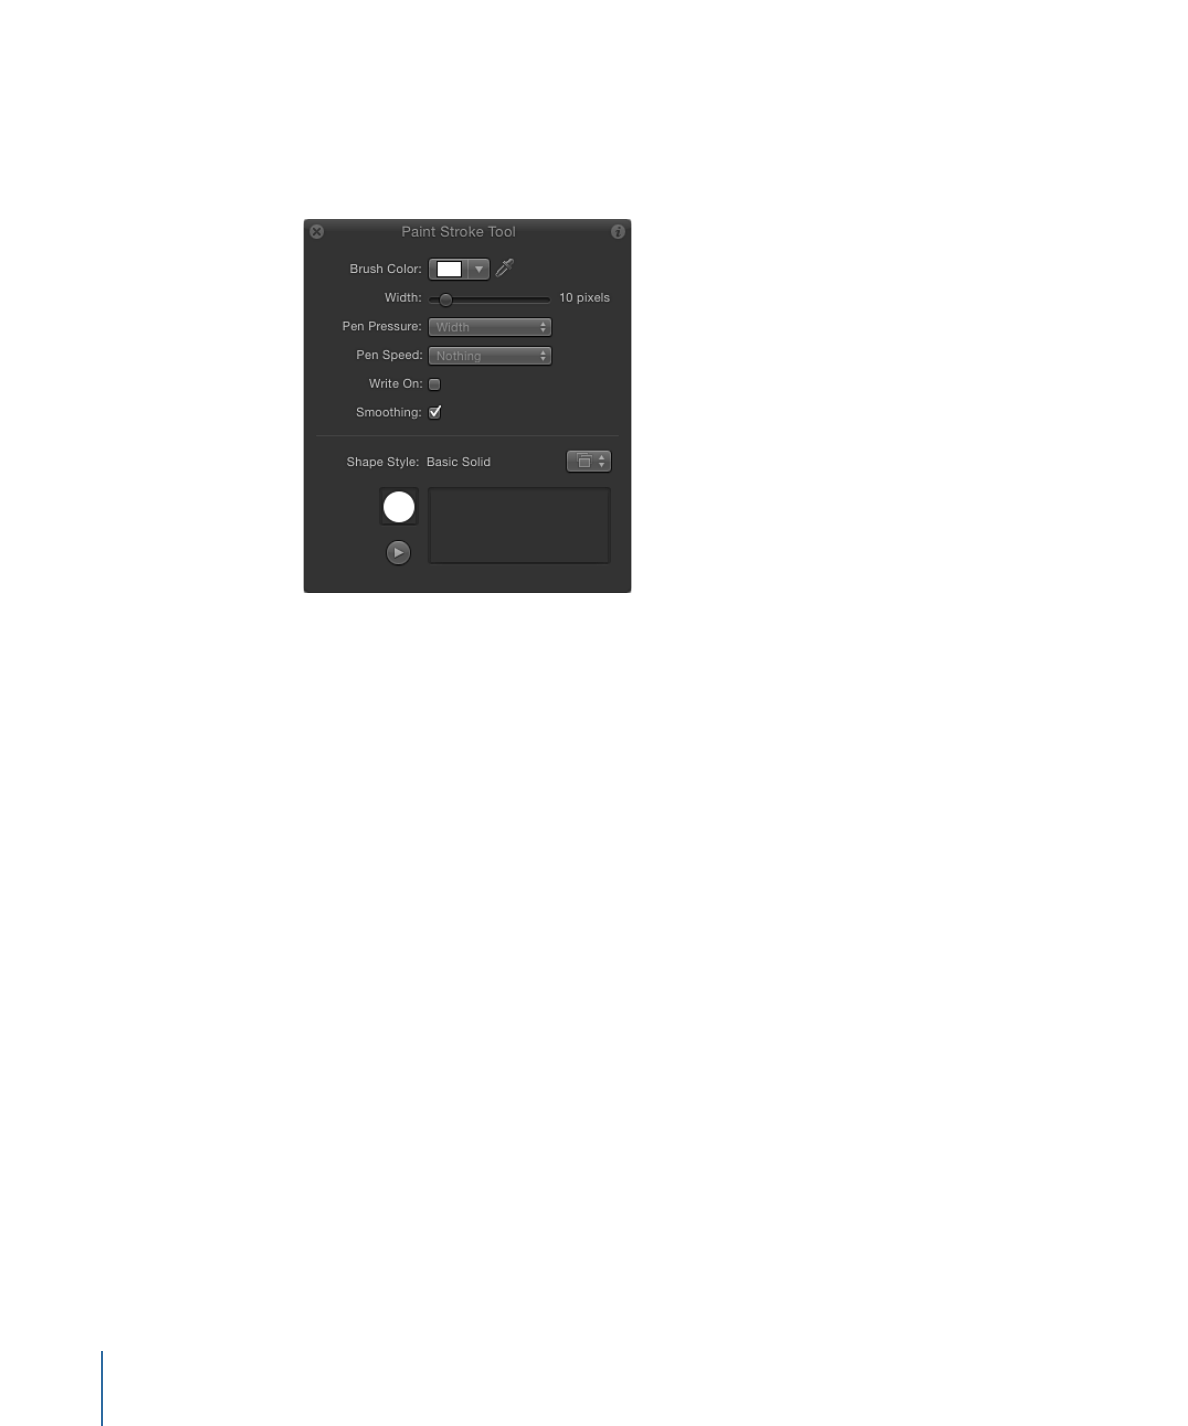
The Paint Stroke Tool HUD allows you to determine the properties derived from the
pressure and speed of the stylus before the stroke is drawn.
2
Define a paint stroke style in the HUD:
a
Choose an option from the Shape Style preset pop-up menu.
b
Modify the Brush Color and Width settings.
If a preset is not used, a basic solid stroke is created. You can still apply a preset to the
stroke using the Inspector. Presets do not override the width or color of the stroke set
in the HUD.
Note: The Pen Pressure and Pen Speed parameters become available depending upon
the chosen style. These parameters are not available with a solid brush type.
3
If you want to create a stroke that is drawn over time, select the Write On checkbox.
When a paint stroke is created with the Write On checkbox selected, a Write On behavior
is applied to the stroke. As with any other behavior, you can modify its parameters in the
HUD or Inspector. For more information on using the Write On behavior, see
Write On
.
4
Draw your stroke in the Canvas, then press S or Esc to activate the Select/Transform tool.
The Paint Stroke Tool HUD is replaced with the Shape HUD, which contains basic
parameters identical to all other shape HUDs. Consequently, after a stroke is drawn, you
must use the Inspector to modify parameters unique to the paint stroke and its dabs.
The lower portion of the Paint Stroke Tool HUD contains a sketch area that allows you to
preview a paint stroke effect.
To preview the paint stroke in the Paint Stroke Tool HUD
1
Select the Paint Stroke tool in the toolbar.
1126
Chapter 20
Using Shapes, Masks, and Paint Strokes

2
Do one of the following:
• Select any brush style in the Paint Stroke Tool HUD, then draw a stroke in the sketch
area to see a preview of the paint stroke.
• Select the Write On checkbox, draw a stroke in the sketch area, then click the Play
button to see a preview of the write-on stroke.
• Apply a preset from the Shape Style pop-up menu to an existing stroke in the sketch
area.
If the preset is an animated stroke, the stroke is automatically drawn in the sketch area.
Press the Play button to see the stroke animation again.
Note: To create a paint stroke that is “painted” on the Canvas over time (if your chosen
preset is not animated), select the Write On checkbox in the HUD before drawing the
paint stroke in the Canvas.
Important:
Some operations, as well as the application of some filters or a mask, cause
a group to be rasterized. Because all paint strokes live in groups, this affects how strokes
interact with other objects in your project. For more information, see
Groups and
Rasterization
.