Adjusting Filters
After you apply a filter to an object, the filter is represented in the following places in the
Motion project window, allowing you to make adjustments:
• In the Layers list, underneath the object it was applied to, where you can select the
filter, turn its effect on or off, or lock it to prevent modification
• In the Timeline layers list, underneath the object it was applied to, where you can select
the filter, turn its effect on or off, or lock it to prevent modification
• In the Timeline track area, as a purple bar underneath the blue bar of the object it was
applied to, where you can select the filter and modify its timing by slipping or trimming
the bar
988
Chapter 19
Using Filters
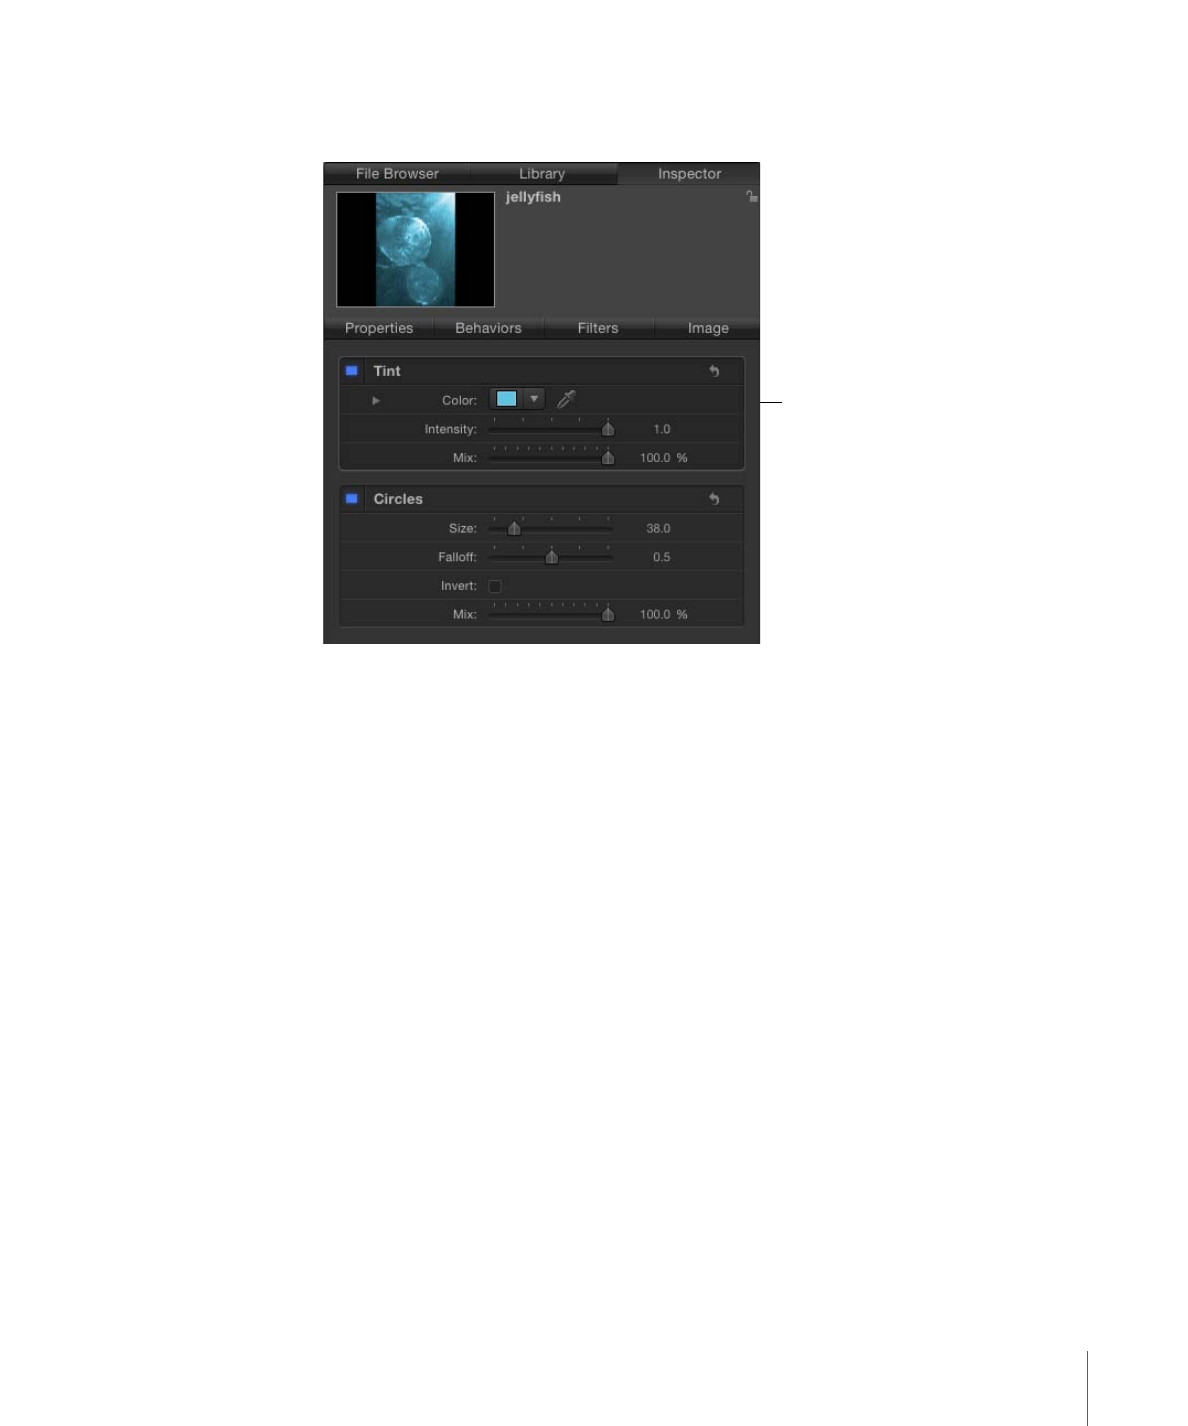
• At the top of the Filters Inspector, where you can turn the filter’s effect on or off and
adjust all its parameters using sliders and other controls
Filters Inspector
• In the HUD, where you can adjust many filter parameters using sliders and other controls
• In the Canvas, where you can manipulate the filter’s onscreen controls
The controls in the Filters Inspector give you the most precise control over the parameters
of a filter. A subset of those parameter controls is available in the HUD.
To modify an applied filter in the Filters Inspector or HUD
1
Select a filter in the Layers list, Timeline, or Filters Inspector.
2
Adjust parameters in the Filters Inspector or HUD.
For more information about filter controls in the Layers list and Timeline layers list, see
Enabling, Renaming, and Locking Filters
. For more information about filter onscreen
controls, see
Adjusting Filter Onscreen Controls
. For more information about modifying
filters in the Timeline track area, see
Changing Filter Timing
.
You can also modify filters by adding keyframes or applying Parameter behaviors. For
more information, see
Keyframing Filter Parameters
and
Applying Behaviors to Filter
Parameters
.
989
Chapter 19
Using Filters