
Adjusting a Motion Path in 3D Space
You can adjust a motion path in 3D space. The easiest way to modify a motion path in
3D space is to add a camera to your project and manipulate the path in a modified camera
view.
To adjust a motion path in 3D space
1
If there is no camera in your project, add a camera by doing one of the following:
• Click the New Camera button in the toolbar.
• Choose Object > New Camera (or press Command-Option-C).
Note: If none of your project groups are set to 3D, a dialog appears asking if you want
to switch your 2D groups to 3D groups. Click Switch to 3D to allow the camera to affect
the groups.
2
Do one of the following:
• Choose a camera view from the Camera pop-up menu in the upper-left corner of the
Canvas (the default option is Active Camera). This example uses the Top view.
• With the Active Camera (or other) view selected, use the Orbit tool (the center tool in
3D View tools in the upper-right corner of the Canvas) to rotate the camera.
Note: If you use the 3D View tools with any camera selected, you are moving the
camera, not just changing the camera view.
Depending on the camera view, the object on the path might not be visible. For
example, if the object has not been rotated in X or Y space and you are working in Top
view, the camera is looking down perpendicularly (on the Y axis) on the object. The
motion path and its points are still visible (as long as the Motion Path behavior is
selected).
407
Chapter 9
Using Behaviors
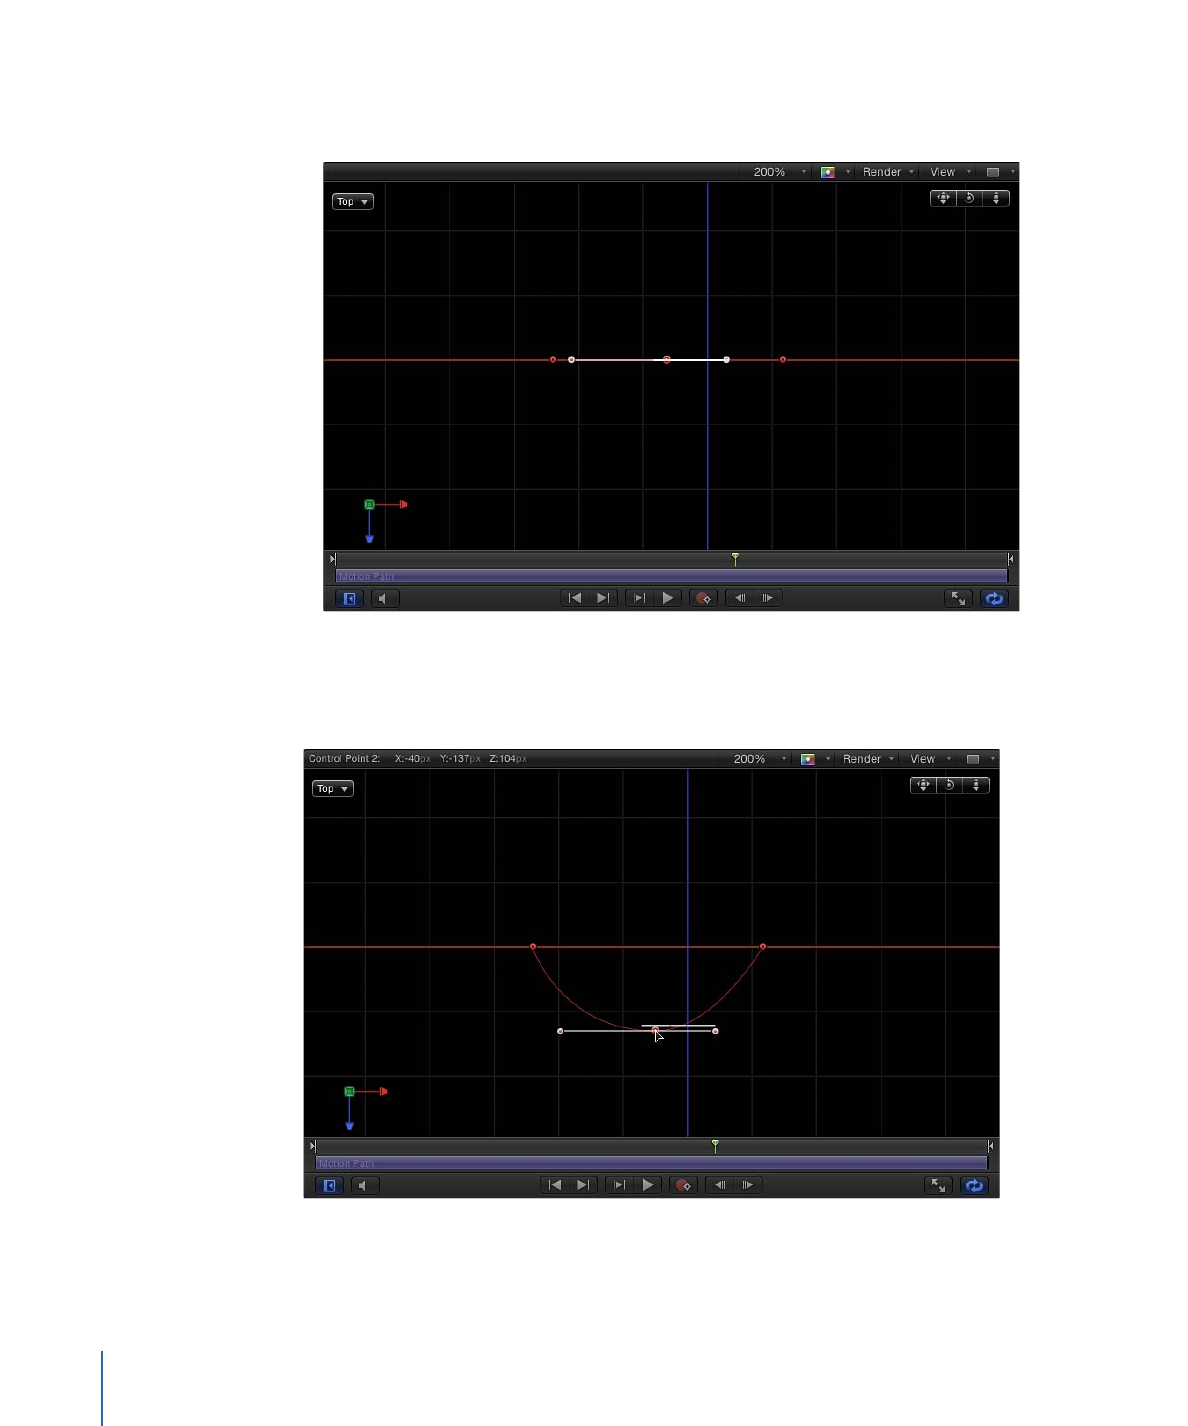
In the following image, the motion path appears flat when viewed from above—the
affected object only moves in X and Y space.
3
Drag a control point up or down to adjust the object in Z space.
In the following image, the path is no longer flat—the affected object moves in X, Y, and
Z space.
Note: The motion path onscreen controls are available for all camera views.
408
Chapter 9
Using Behaviors
To enter specific values for the control point locations, click the Control Points disclosure
triangle in the Motion Path behavior parameters. The first value field is X, the second
value field is Y, and the third value field is Z.
4
To reset the camera view, do one of the following:
• Double-click the 3D View tool that you previously adjusted. For example, if you dragged
the Orbit tool to rotate the current camera, double-click the Orbit tool to reset the
camera.
• If you chose (and/or modified) a default camera view (such as Top, Right, Left, and so
on), choose Active Camera from the Camera menu, or choose View > 3D View > Active
Camera.
• With the camera selected, click the reset button in the Properties Inspector.