Grow/Shrink
Use the Grow/Shrink behavior to animate the scale of an object, enlarging or reducing
its size over time at a speed defined by the Scale Rate or Scale To parameter. The
Grow/Shrink effect begins at the object’s original size at the first frame of the behavior.
Note: The Grow/Shrink behavior cannot be applied to cameras or lights.
Tip: To scale particles over their lifetime, use the Scale Over Life particle behavior. For
more information, see
Using Particles Behaviors
.
Note: The vertical and horizontal growth rates can be set to independent values, for
asymmetrical effects.
The Grow/Shrink behavior is a good one to use with high-resolution graphics to zoom
into an image, such as a map or photograph. You can also combine this behavior with
the Throw or Wind behavior to pan across the image while zooming into it.
The Grow/Shrink behavior can also be used to emphasize or de-emphasize images in
your project. You can enlarge objects to make them the center of attention, or shrink an
object while introducing another to move the viewer’s eye to the new element.
Parameters in the Inspector
Increment:
This pop-up menu lets you choose how the behavior’s effect progresses over
its duration in the Timeline. There are three options:
• Continuous Rate: This option uses the Scale Rate parameter to grow or shrink the object
by a steady number of pixels per second.
397
Chapter 9
Using Behaviors

• Ramp to Final Value: This option grows or shrinks the object from its original size to
the specified percentage plus the original scale in the Scale To parameter. If the behavior
is shortened in the Timeline, the Grow/Shrink effect goes faster.
• Natural Scale: Enabled by default, this option uses an exponential curve to allow the
animation to progress slowly when the scale values are small and speed up when the
values are large. This creates the illusion that the scaling is occurring at a constant
speed.
Scale Rate/Scale To:
Depending on the command chosen in the Increment pop-up menu,
the Scale Rate or Scale To parameter defines the speed and magnitude of the effect. This
parameter can be expanded to reveal X and Y subparameters by clicking the disclosure
triangle to the left. This lets you adjust the horizontal or vertical scale independently.
Curvature:
This parameter lets you adjust the acceleration with which this behavior
transitions from the original to the final size. Higher Curvature values result in an easing
into and out of the effect, where the object slowly starts to change size, and this change
gradually speeds up as the behavior continues. Because Curvature is defined by the length
of the behavior in the Timeline, minus the End Offset, it does not affect the overall duration
of the effect
Note: The Curvature parameter is not available when the Increment parameter is set to
Natural Scale.
End Offset:
A slider that lets you offset the end of the behavior’s effect relative to the
last frame of its position in the Timeline, in frames. Adjust this parameter to make the
behavior stop before the actual end of the behavior in the Timeline. Use this slider to
offset the end of the Grow/Shrink effect from the end of the object.
398
Chapter 9
Using Behaviors

HUD Controls
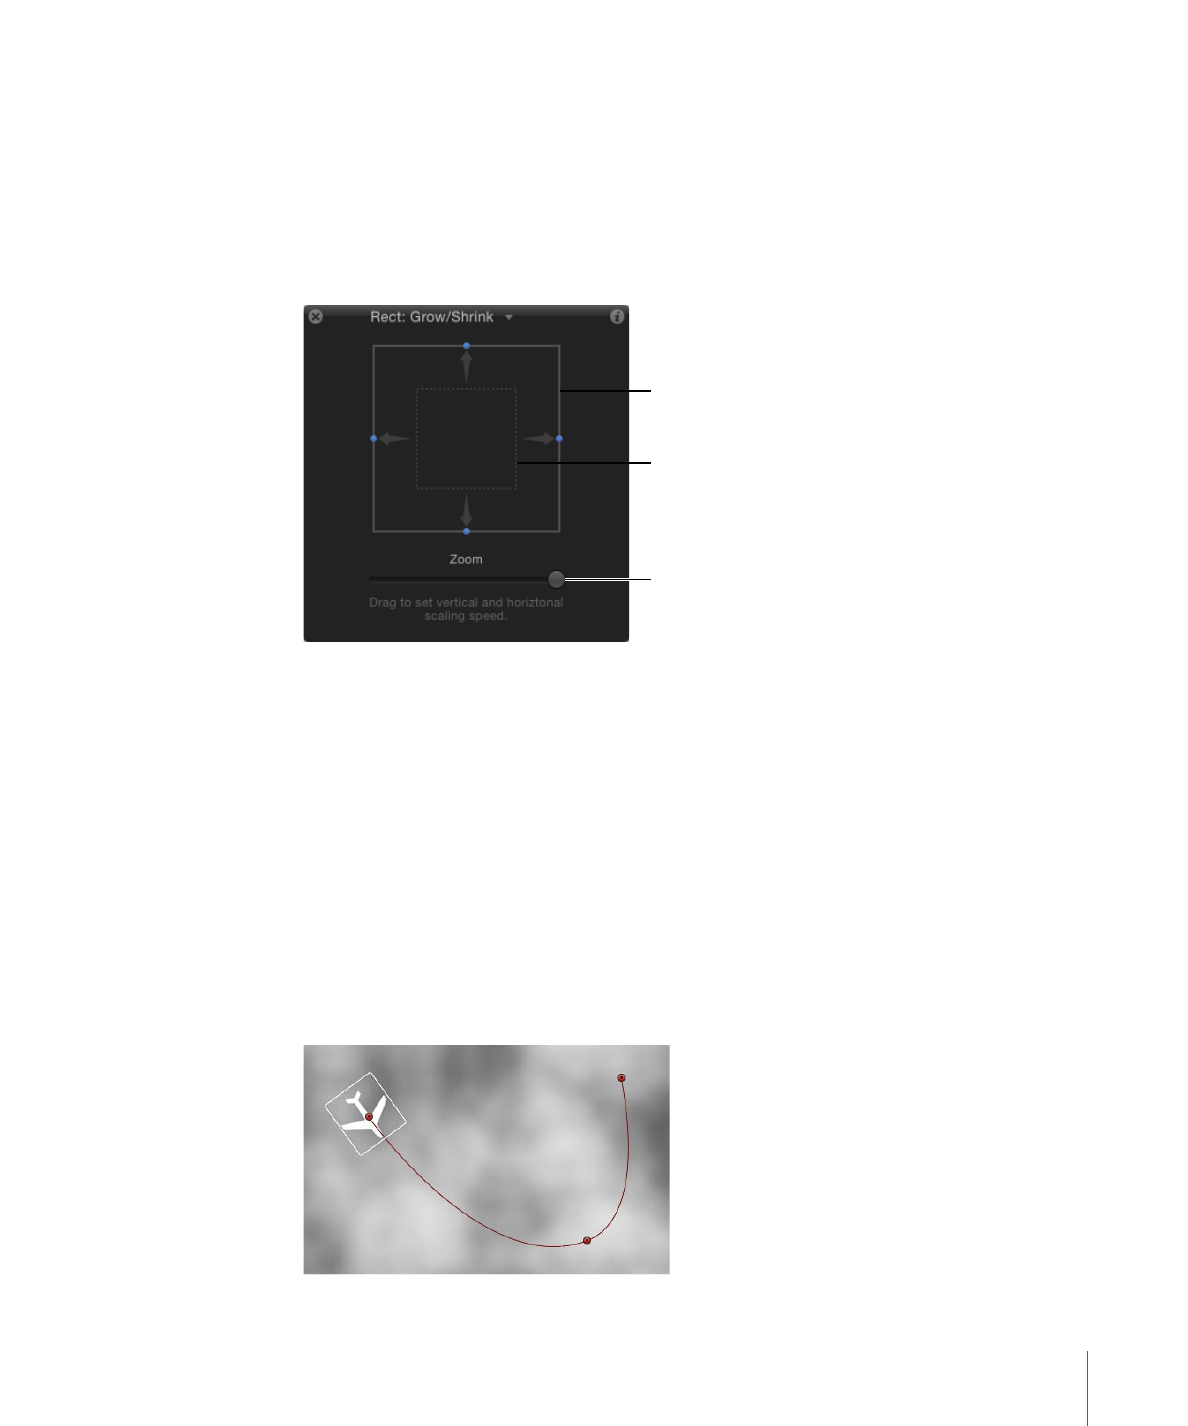
The Grow/Shrink HUD consists of two rectangular regions. The first, a rectangle with a
dotted line, represents the original size of the object. The second is a solid rectangle that
represents the relative growth rate, and can be resized by dragging any of the borders.
Enlarge the box to grow the target object, or reduce the box to shrink it. A slider to the
right lets you adjust the scale of the HUD controls, increasing or decreasing the effect
the controls have over the object.
Scale To parameter
Original size
Zoom level of HUD