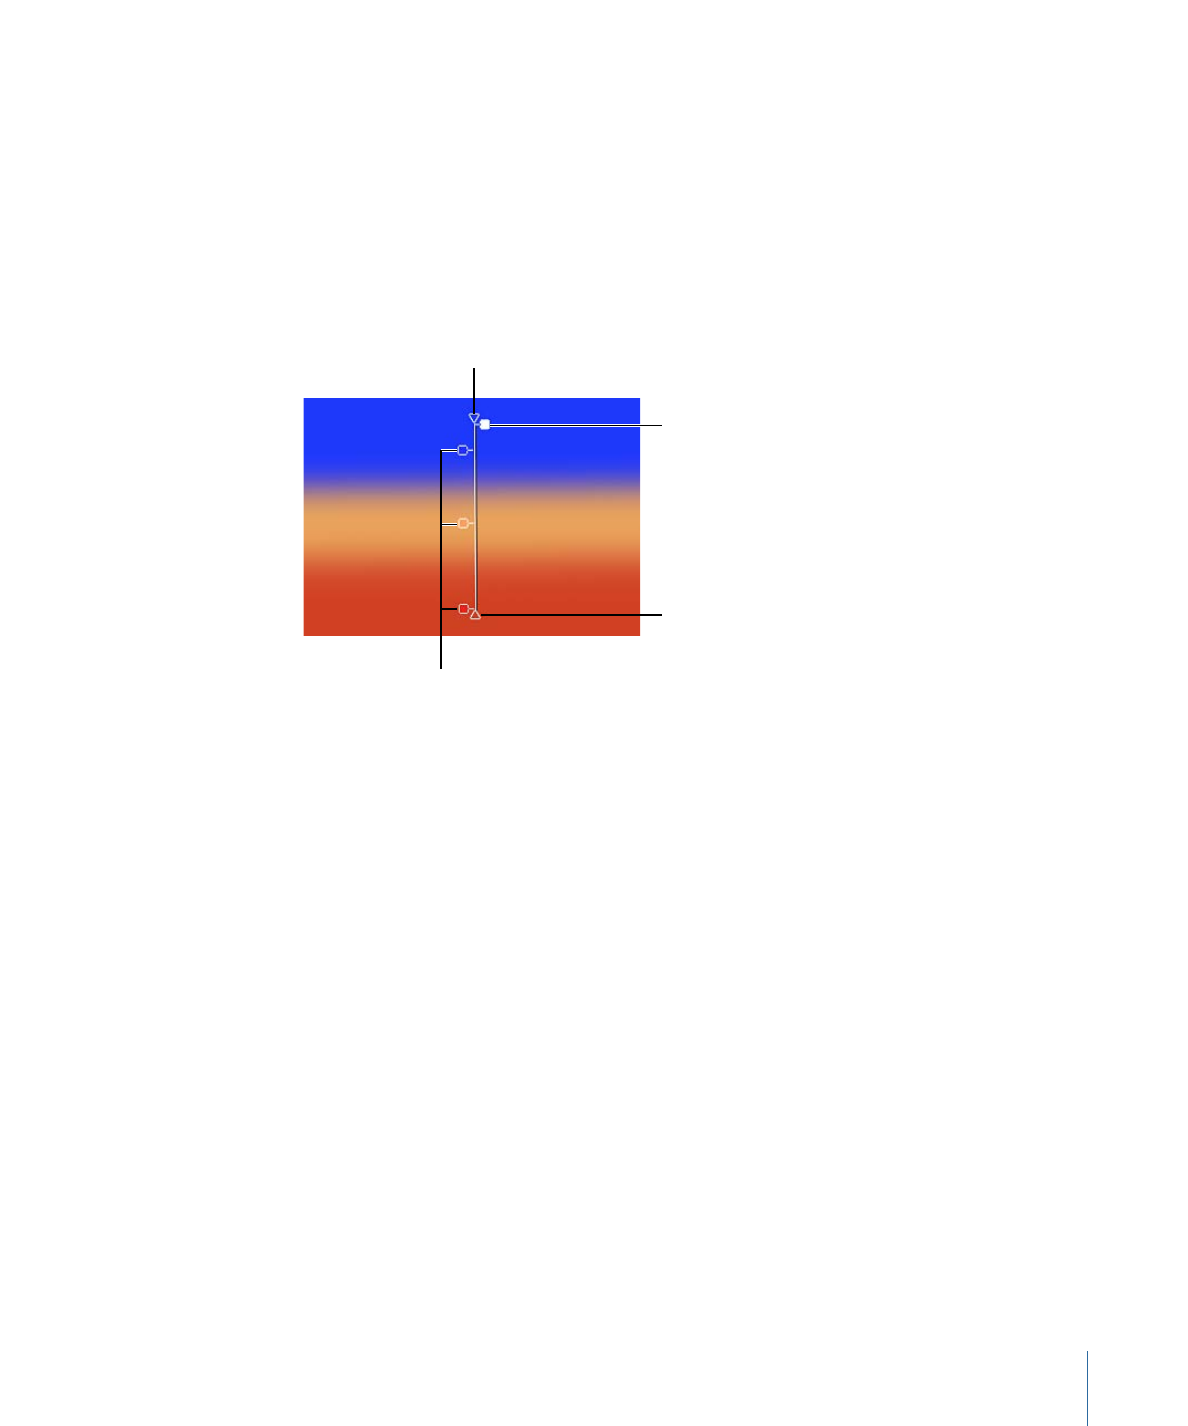
Using Onscreen Gradient Controls
Onscreen controls provide a more interactive way to edit a gradient’s color, location and
value of color tags and opacity tags, and start and end points. You can also use onscreen
controls to add color tags and opacity tags, as well as change their interpolation.
Opacity tag
End triangle
Start triangle
Color tags
To display the onscreen gradient controls
Do one of the following:
µ
In the Canvas, Control-click the object with the applied gradient, then choose Edit Gradient
from the shortcut menu.
µ
Choose the Adjust Item tool from the 2D transform tools pop-up menu.
The onscreen controls appear.
To adjust the start and end gradient positions
µ
To adjust the Start X and Y position of the gradient, drag the top triangle (at the end of
the gradient line).
µ
To adjust the End X and Y position of the gradient, drag the bottom triangle (at the end
of the gradient line).
To change the location of gradient tags
µ
To change the location of gradient colors, drag the color tags along the gradient line.
µ
To change the location of the gradient opacity, drag the opacity tags along the gradient
line.
139
Chapter 3
User Interface Controls

To remove a color or opacity tag
µ
Drag the color tag or opacity tag away from the gradient line and release the mouse
button.
To add a color tag
Do one of the following:
µ
Double-click the gradient control line.
µ
Control-click the gradient control line where you want the tag, then choose Add Color
Tag from the shortcut menu.
µ
Option-click the gradient control line where you want the tag.
To duplicate a color or opacity tag
µ
Option-drag the tag to a position.
To change the color of a gradient tag
µ
Control-click the tag, then drag the eyedropper in the pop-up color palette to select a
color. As you drag over the color spectrum, the gradient color is actively updated.
To add an opacity tag
Do one of the following:
µ
Control-click the gradient control line where you want the tag, then choose Add Opacity
Tag from the shortcut menu. By default the tag is set to 100% opacity.
µ
Option-Shift-click the gradient control line at the location where you want the tag.
To change an opacity tag’s transparency
µ
Control-click the tag, then drag the eyedropper in the pop-up palette to set an opacity
value for the tag. White represents more opaque values; progressively darker levels of
gray represent decreasing opacity; and black represents complete transparency. As you
drag over the spectrum, the gradient is actively updated.
To change a color tag’s interpolation
µ
Control-click the gradient control line next to the tag, then choose Constant, Linear, or
Continuous from the Color Interpolation submenu.
To change an opacity tag’s interpolation
µ
Control-click the line next to the tag, then choose Constant, Linear, or Continuous from
the Opacity Interpolation submenu.
To reverse the direction of the color gradient
µ
Control-click the gradient control line, then choose Reverse Color from the shortcut menu.
To reverse the direction of the opacity gradient
µ
Control-click the gradient control line, then choose Reverse Opacity from the shortcut
menu.
140
Chapter 3
User Interface Controls
To evenly distribute the gradient color tags
µ
Control-click the gradient control line, then choose Distribute Color from the shortcut
menu.
To evenly distribute the gradient opacity tags
µ
Control-click the gradient control line, then choose Distribute Opacity from the shortcut
menu.
To apply a preset gradient style
µ
Control-click the gradient control line, choose Presets from the shortcut menu, then
choose a preset style from the submenu.