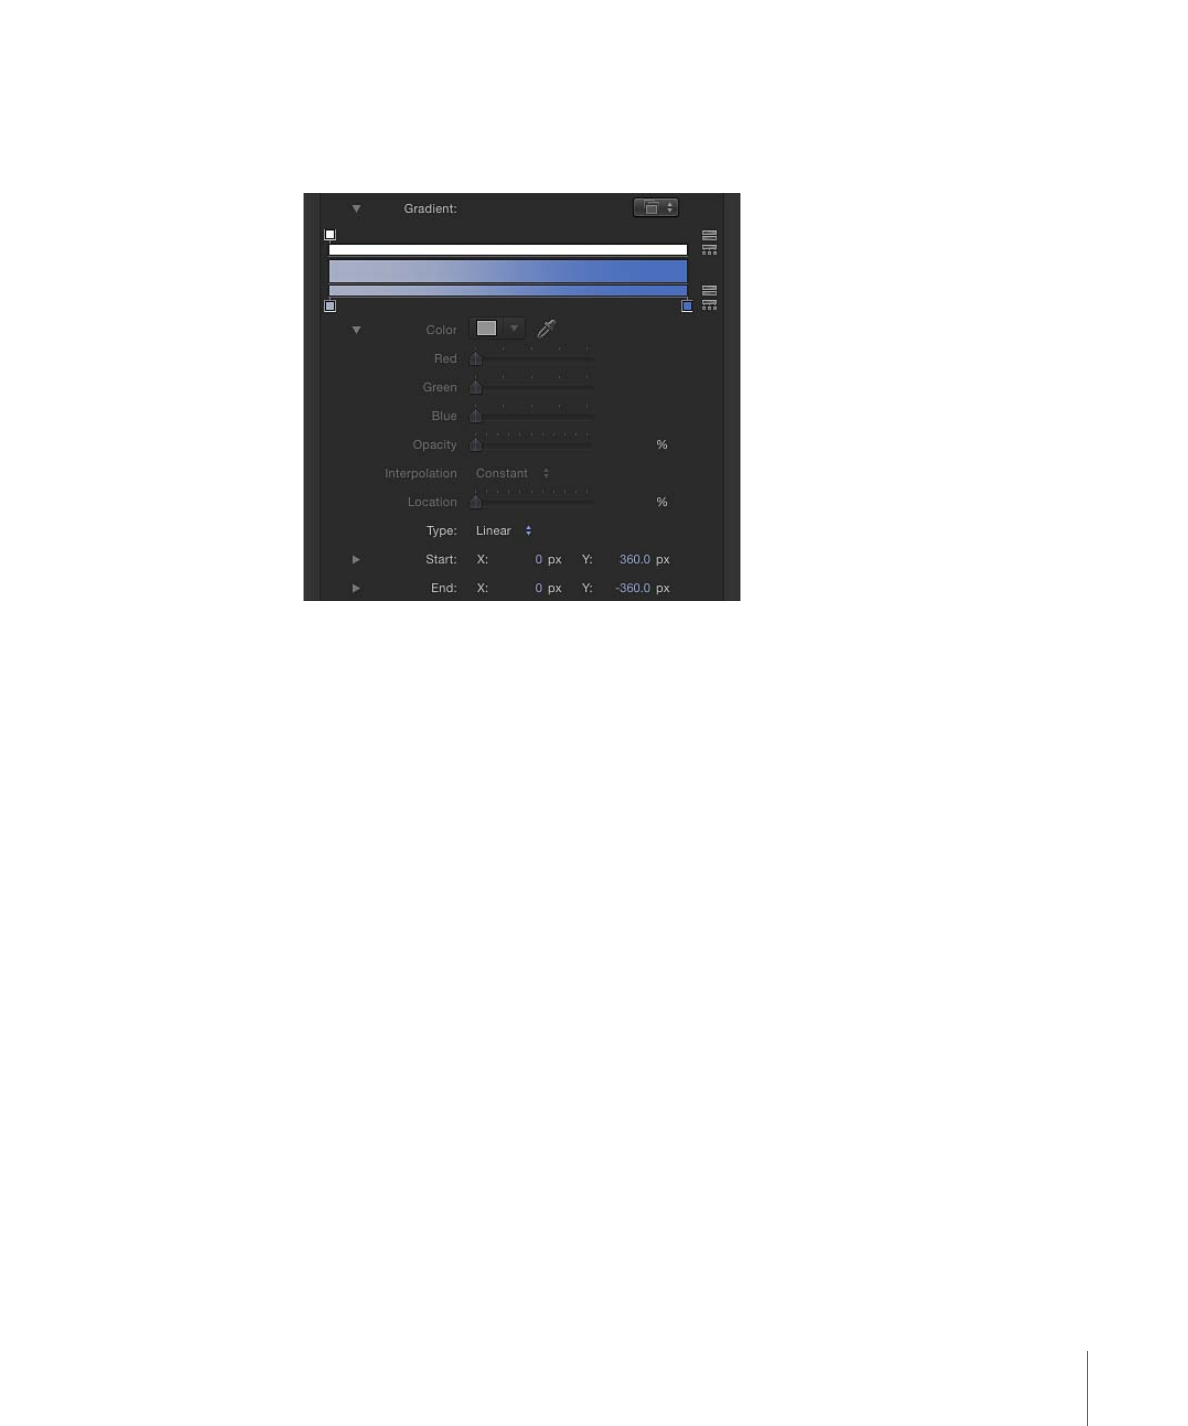
Controls in the Gradient Editor
Use the gradient editor to change the color, color position, number of colors, opacity,
direction, and interpolation of a gradient. Click the disclosure triangle in the Gradient row
to reveal the gradient editor, which comprises a graphical control and additional
subparameter controls. The color and opacity of a gradient can be animated.
Important:
This section covers common gradient editor controls. However, the gradient
editor in the Style pane of the Text Inspector has an additional Angle parameter.
Graphical controls:
Three horizontal bars that let you set and preview the opacity, color,
and spread of a gradient.
The narrow, white top bar (the opacity bar) controls opacity and transparency in the
gradient. Adjust the spread of opacity across the gradient by dragging one of the small
box-shaped opacity tags horizontally along the bar. Click in the opacity bar to add opacity
tags, creating a gradient with varying levels of transparency. Delete an opacity tag by
dragging it away from the color bar. Change the value of an opacity tag by selecting it
and dragging the Opacity slider (described below).
Opacity tags have a value range of 0% (completely transparent) to 100% (completely
opaque). Adjust the transition between two opacity tags by dragging the middle control—a
small triangle between adjacent tags, available when Interpolation is set to Continuous
(described below). By default, the opacity of a gradient applied to text is 100%.
The wide middle bar shows a preview of the current gradient.
133
Chapter 3
User Interface Controls
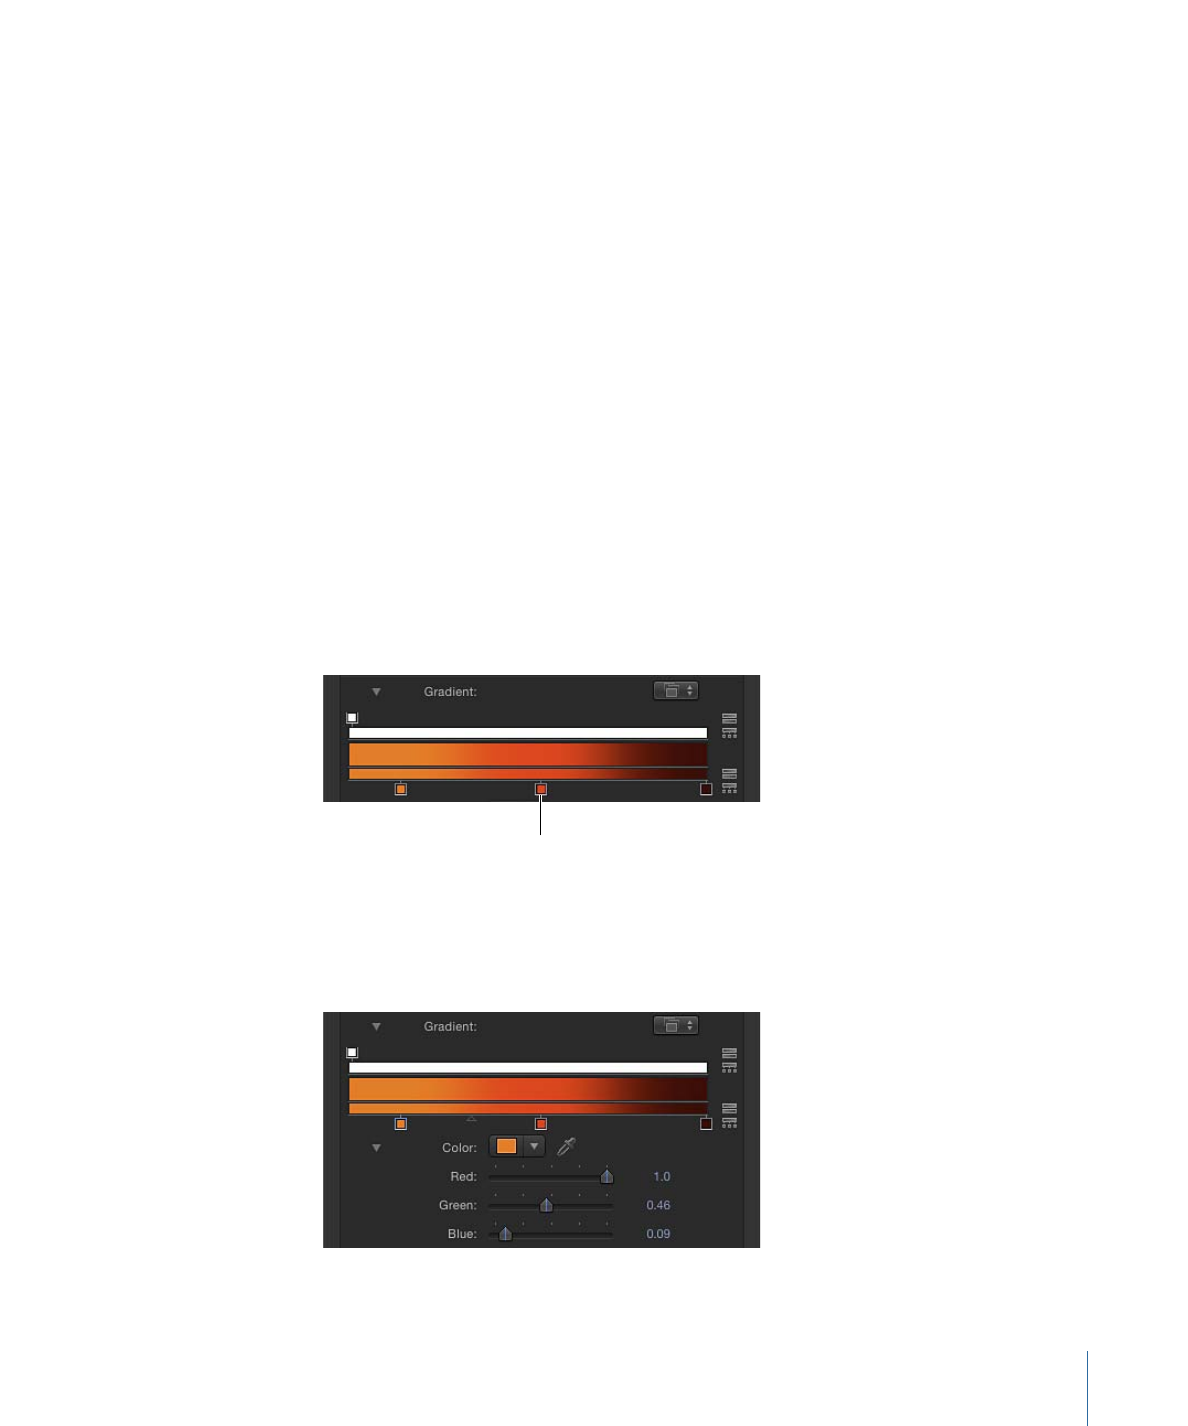
The narrow bottom bar (the gradient bar) controls color in the gradient. Adjust the spread
of color across the gradient by dragging one of the small box-shaped color tags horizontally
along the bar. Click in the gradient bar to add more color tags. Delete a color tag by
dragging it away from the gradient bar. Change the value of a color tag by selecting it
and choosing a color from the color well below, or by double-clicking the tag and choosing
a color from the Colors window. Adjust the transition between color tags by dragging
the middle control—a small triangle between adjacent tags, available when Interpolation
is set to Continuous (described below).
Selecting a color tag activates the Color and Location controls (described below). Selecting
an opacity tag activates the Opacity slider (described below). Selecting a middle control
activates the Middle slider (described below).
Color:
A color well and eyedropper that sets the hue of a selected color tag in the gradient
bar. For more information about color wells, see
Color Well
.
Opacity:
A slider that sets the transparency of a selected opacity tag in the opacity bar.
Values range from 0% (completely transparent) to 100% (completely opaque).
Interpolation:
A pop-up menu that sets the interpolation of a selected color tag or opacity
tag. There are three options:
• Constant: Creates a constant color distribution from the color or opacity tag, moving
from left to right in the gradient. For example, if the left color tag is set to Constant,
the area of the gradient between that tag and the next one to the right is a single, solid
color.
Tag set to Constant
Tag set to Linear
Tag set to Continuous
• Linear: Creates a uniform distribution of opacity or color between the tags.
• Continuous: Sets an adjustable rate of change between adjacent opacity or color tags.
Adjust the rate of change by dragging a middle control in the opacity bar or gradient
bar, or by dragging the Middle slider (described below).
Middle:
A slider that duplicates the function of the middle controls in the opacity bar
and gradient bar, adjusting the transition point between opacity tags or color tags. When
you select a middle control, the Middle slider becomes available.
Location:
A slider that adjusts the location of a selected opacity tag or color tag.
Type:
A pop-up menu that lets you choose a linear or radial gradient.
134
Chapter 3
User Interface Controls
Start:
Value sliders that set the start position of the gradient in the selected object. This
parameter affects the gradient as a whole—colors and opacity. Clicking the disclosure
triangle stacks the X and Y value sliders vertically instead of horizontally.
• X: Controls the X start position of the gradient.
• Y: Controls the Y start position of the gradient.
End:
Value sliders that set the end position of the gradient in the selected object. This
parameter affects the gradient as a whole—colors and opacity. Clicking the disclosure
triangle stacks the X and Y value sliders vertically instead of horizontally.
• X: Controls the X end position of the gradient.
• Y: Controls the Y end position of the gradient.