
Keyframe Editor Controls
The left side of the Keyframe Editor contains a list of parameters. You can choose which
parameters to display by using the Show Curve Set pop-up menu at the top of the list.
This menu has an option for creating custom curve sets so you can focus on specific
parameters in the Keyframe Editor. For more information on creating and viewing
parameter sets, see
Custom Parameter Sets
.
There are a number of controls above the parameter list:
Show Curve Set pop-up menu:
Sets what is displayed in the Keyframe Editor. The pop-up
menu items include:
• All: Displays all parameters for the selected object, whether or not the parameters are
animated.
• Animated: Displays only animated parameters and curves for the selected object. This
includes animation curves created by keyframing as well as behaviors. This is the default
setting. With the Keyframe Editor active, you can also press the U key to choose
Animated from the Show Curve Set pop-up menu.
112
Chapter 2
The Motion Interface
When the selected object is not animated, nothing appears in the Keyframe Editor.
• Modified: Displays only curves that are modified for the selected object. This includes
modifications that are not animated. For example, if you change the color of a shape
(without animating the color change), the parameter appears in the Modified list
because the color was changed from the default color. Animated parameters also
appear in the list.
• Active: Shows only parameters being modified. When this option is selected, nothing
appears in the Keyframe Editor unless you are modifying an object (in the Canvas,
Inspector, or HUD). For example, when Active is selected and you are moving an object
around in the Canvas, the X and Y Position parameters and curves are displayed.
• Position: Displays only the Position parameters for the selected object.
• Rotation: Displays only the Rotation parameters for the selected object.
• Scale: Displays only the Scale parameters for the selected object.
• Shear: Displays only the Shear parameters for the selected object.
• Anchor Point: Displays only the Anchor Point parameters for the selected object.
• Opacity: Displays only the Opacity parameters for the selected object.
• Retiming: Displays only the Retime Value parameter for the selected object. This
parameter appears in the Keyframe Editor only when Time Remap is set to Variable
Speed in the Timing controls of the Properties Inspector.
• New Curve Set: Lets you create a custom curve set.
• Manage Curve Sets: Lets you manage (delete, duplicate, and so on) custom curve sets.
Note: For more information on using curve sets, see
Custom Parameter Sets
.
113
Chapter 2
The Motion Interface
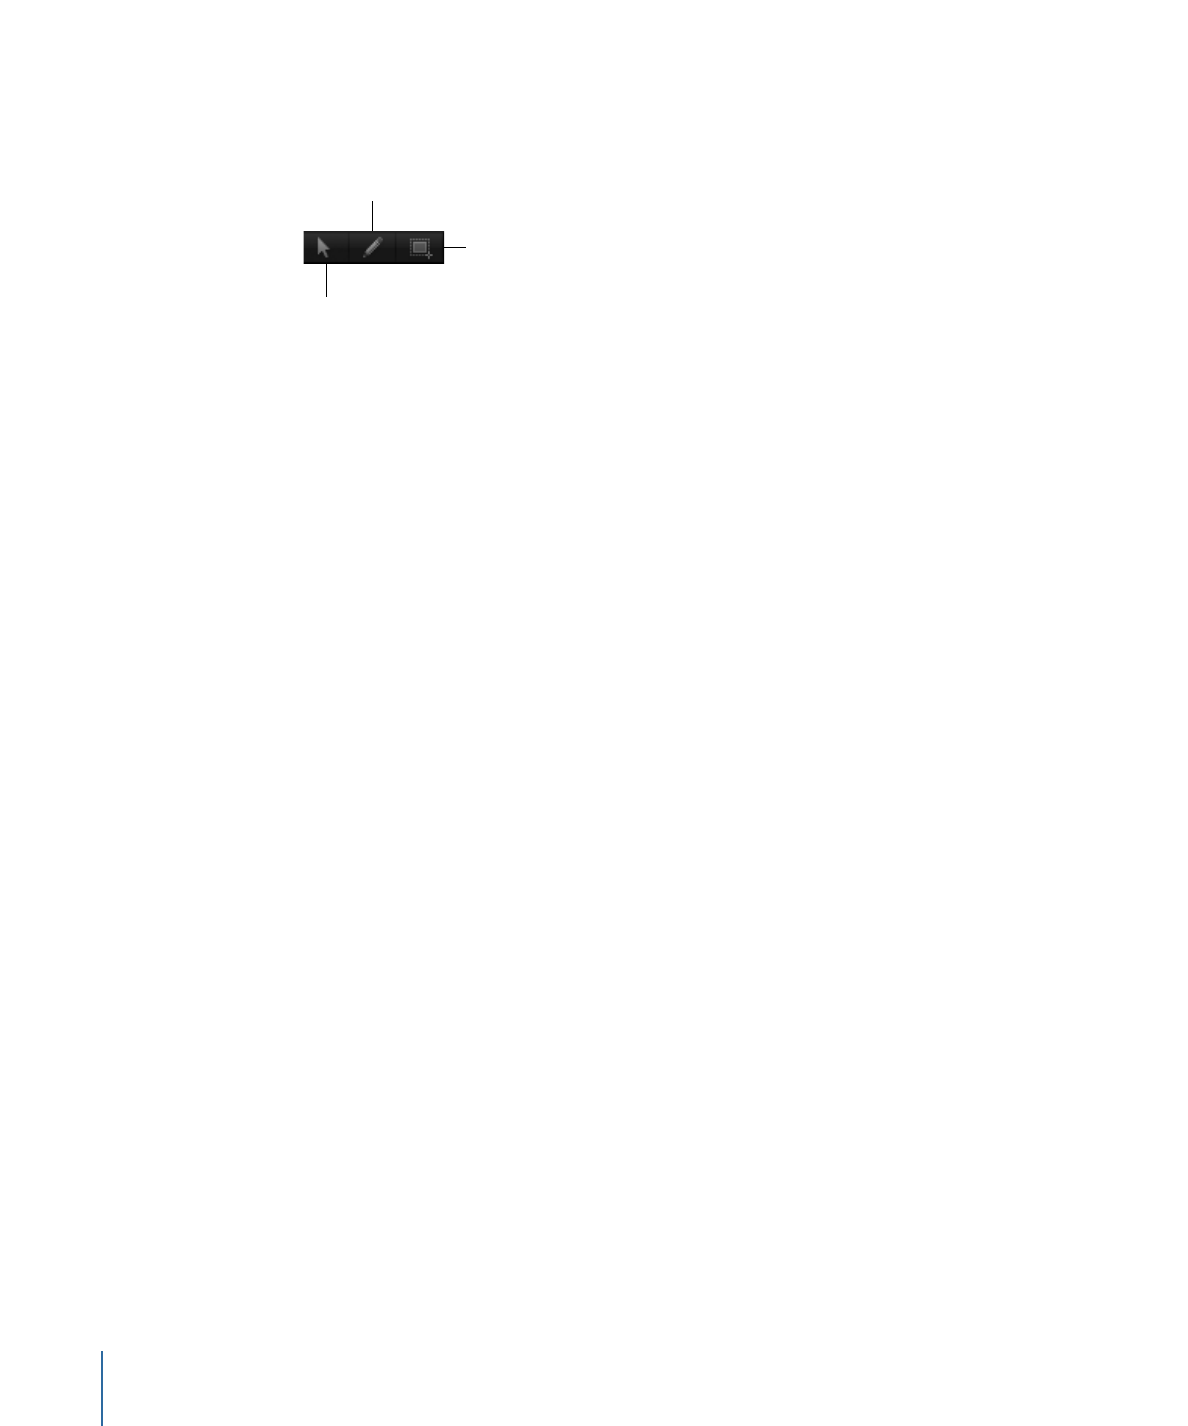
Keyframe edit tools:
There are three tools for editing keyframes and curves in the
Keyframe Editor. These tools are located above the parameter list. For more information
about using these tools, see
Modifying Keyframes
.
Sketch
Edit
Transform
• Edit Keyframes tool: Use to select and edit keyframes.
• Sketch Keyframes tool: Use to draw curves with keyframes. A parameter must be active
(its checkbox enabled) and selected in the list before you can sketch a curve.
• Transform Keyframes tool: Use to drag a selection box around keyframes and then
manipulate the selected keyframes.
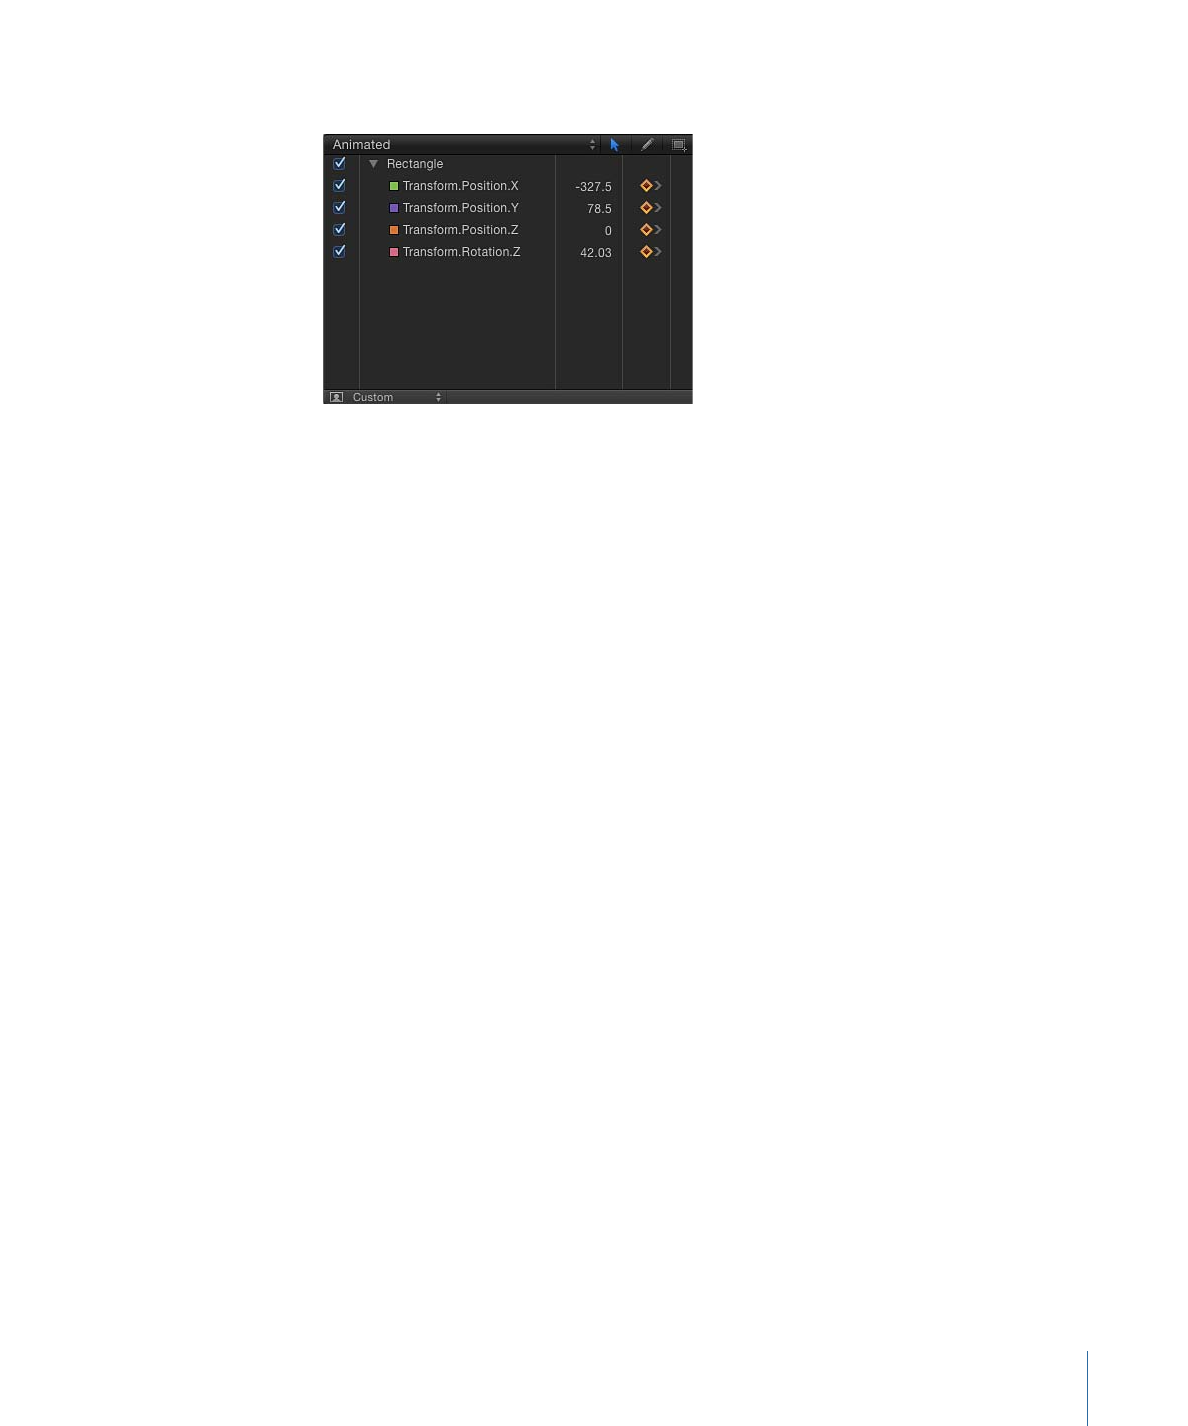
Parameter list:
The Keyframe Editor parameter list contains the following controls and
features:
• Activation checkbox: Turns the display of parameters on and off in the keyframe graph.
Activating the checkbox next to an object name turns all parameters for that object
on or off for display purposes—but the animation of the object is not affected.
• Name: Lists the name of the selected object and its parameters.
• Value: Displays the value for the playhead position for that parameter. You can drag
in the value field to set keyframe values, or double-click in the field and enter a new
value. For more information, see
Modifying Keyframes
.
• Add/Delete Keyframe button: Lets you add or delete keyframes, regardless of the status
of keyframe recording (the Record button). Click the button to add a keyframe. If a
keyframe exists for that parameter at the current playhead position, clicking the button
deletes the keyframe.
• Animation menu: Provides a pop-up menu to control animation and keyframing
attributes for that parameter. To open the menu, place the pointer over the column
(in the row of the parameter to modify). When the downward arrow appears, click it
to open the menu. The menu contains the following items:
• Enable/Disable Animation: Enables or disables keyframes for the parameter. This
menu item is unavailable until keyframes are applied to the parameter. When the
parameter is animated, the menu item is renamed to Disable Animation. Choosing
Disable Animation hides the keyframes you have set, restoring the parameter to its
default value. However, the keyframes are not discarded. Choosing Enable Animation
restores the parameter to its last keyframed state.
• Reset Parameter: Removes keyframes and settings for this parameter. The parameter
value is restored to its default value.
114
Chapter 2
The Motion Interface
• Add Keyframe: Adds a keyframe at the current frame. If the playhead is positioned
on a frame where a keyframe has been added, this menu item is unavailable. A
keyframe is automatically added to the last modified parameter of the object
(regardless of the status of the Record button) at the current playhead position.
• Delete Keyframe: Deletes the current keyframe. The Delete Keyframe command is
only available if the playhead is positioned on a frame where a keyframe exists. You
can also Control-click a keyframe and choose Delete from the shortcut menu, or
select the keyframe and press Delete.
• Previous Keyframe: Moves the playhead to the previous keyframe for this parameter.
The Previous Keyframe command is only available if a keyframe exists earlier in the
project. You can also press Option-K to advance to the next keyframe.
• Next Keyframe: Moves the playhead to the next keyframe for this parameter. The
Next Keyframe command is only available if a keyframe exists later in the project.
You can also press Shift-K to advance to the next keyframe.
• Interpolation: Sets the type of curve for the parameter. See the table in
Modifying
Curves
for examples of interpolation methods.
• Before First Keyframe: Defines the animation before the first keyframe of a parameter.
This is called extrapolation. For examples of extrapolation methods, see
Extrapolation
.
• After Last Keyframe: Defines the animation after the last keyframe of a parameter.
This is called extrapolation. For examples of extrapolation methods, see
Extrapolation
.
• Lock/Unlock Parameter: Locks the parameter to prevent changes. When a parameter
is locked, neither keyframes nor curves are adjustable.
• Reduce Keyframes: Applies a thinning algorithm to the selected parameter to reduce
the number of keyframes while attempting to maintain a similar curve shape. For
more information on keyframe thinning, see
Keyframe Thinning
.
• Curve Snapshot: Reverts keyframe changes made in the selected curve to the most
recent snapshot. This menu item is available only when the Take/Show Curve
Snapshot button is enabled. For more information, see
Keyframe Editor Control
Buttons
and
Curve Snapshots
.