Keyframe Editor
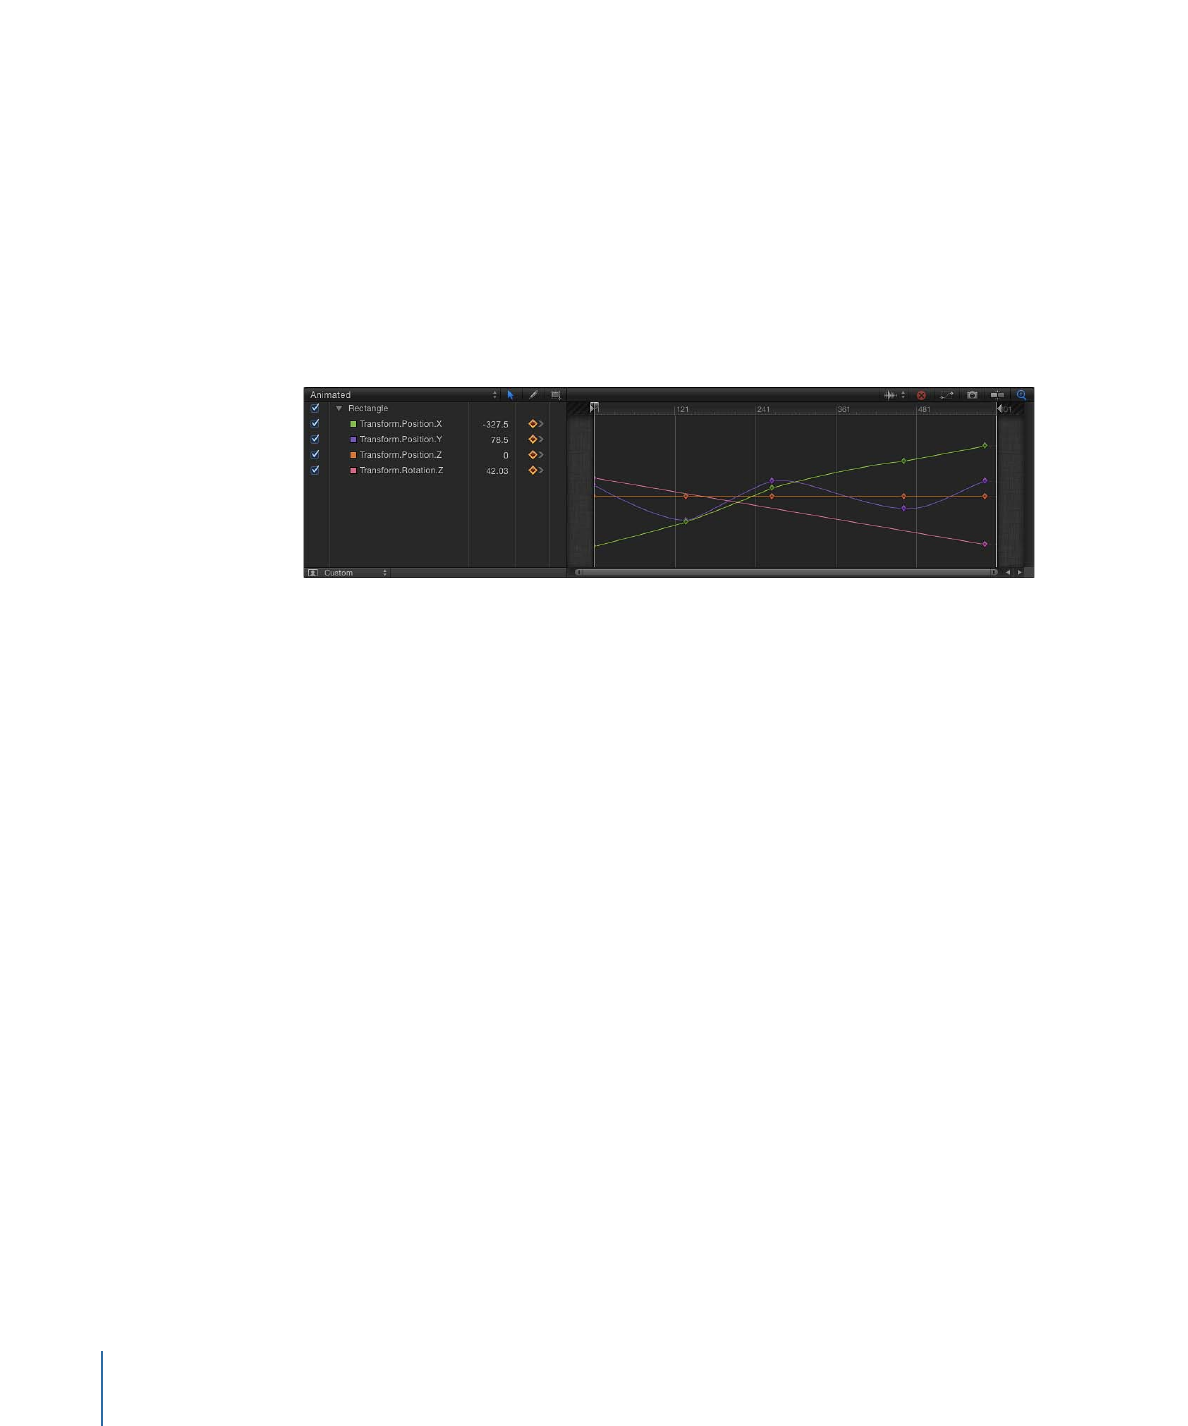
The Keyframe Editor is where you can view and modify the attributes of filters, behaviors,
and other effects over time. Each parameter can be displayed as a curve showing how
the parameter’s value changes over time. You can manipulate the points in that curve
(called keyframes) to create a variety of powerful effects. For more information on using
the Keyframe Editor, see
Keyframes and Curves
.
To display the Keyframe Editor
Do one of the following:
µ
Choose Window > Keyframe Editor (or press Command-8).
µ
Click the Show/Hide Keyframe Editor button in the lower-right corner of the workspace.
110
Chapter 2
The Motion Interface

Keyframe Basics
You animate an object by creating at least two keyframes for a parameter, such as
Opacity, at different points in a project. A keyframe is a point that records a change in
the value of a parameter. For example, to create an animation in which an object is
transparent at frame 1 and becomes opaque at frame 120, you create two keyframes:
an Opacity keyframe set to a value of 0% at frame 1 and an Opacity keyframe set to a
value of 100% at frame 120. The image fades in from 0% to 100% over the 120 frames.
The smooth, fade-in transition between the adjacent keyframed values is called
interpolation.
Keyframes for a specific parameter (such as Opacity or Rotation) are positioned on a
line over time. Values for the keyframes change the shape of that line and create an
animation curve. The type of curve from keyframe to keyframe (interpolation) can be
changed to create animation effects. For example, keyframes set to Bezier create smooth
transitions in values. Keyframes set to Linear create straight lines between the keyframes,
for sharper changes in value. You can modify keyframes and animation curves in the
Keyframe Editor, located in the Timing pane. For more information, see
Keyframes and
Curves
.
There are two keyframing methods available to suit your preferred workflow:
• Record Button: After the Record button is turned on, any adjustment to any parameter
in the Canvas, Inspector, or HUD adds a keyframe.
• Initial Keyframe: After a keyframe has been added to a parameter, any adjustment to
that parameter in the Canvas, Inspector, or HUD adds a keyframe, independent of the
state of the Record button.
For more information, see
Keyframing Methods
.
To create keyframes by moving an object across the screen using the Record button
1
Click the Record button under the Canvas (or press A) to turn on keyframe recording.
2
Place the playhead at the starting frame, then place the object in a starting position in
the Canvas.
3
Move the playhead forward, then drag the object to the ending position you want.
An editable animation path appears in the Canvas and keyframes appear in the Keyframe
Editor for the selected object.
4
Click the Record button (or press A) to turn off keyframe recording.
111
Chapter 2
The Motion Interface

To animate an object across the screen by setting an initial keyframe
1
In the Canvas, position the object to your desired starting location.
2
To create an initial Position keyframe, do one of the following:
• Press Control-K.
Note: Pressing Control-K adds a keyframe to the last-modified parameter of the object.
• In the Properties Inspector, open the Position parameter’s Animation menu (the
downward arrow on the right), then choose Add Keyframe.
Note: The Animation menu (the downward arrow) and the Add/Delete keyframe buttons
appear when you place the pointer over the end of the parameter row in the Inspector.
You can also Control-click a parameter’s name to reveal a shortcut menu.
• In the Properties Inspector, click the Position parameter’s Add/Delete Keyframe button.
A keyframe is added at the current playhead position, and the parameter appears red in
the Inspector.
3
Move the playhead to a new time position.
4
Move the object to a new position in the Canvas.
A keyframe is added at the current playhead position. When you play back the project,
the object moves over the interval you set.