Smoothing Tracking Keyframe Curves
You can smooth a track with the Keyframe Thinning function in the Animation menu in
the Keyframe Editor parameter list. Before smoothing the curve, you might want to copy
the behavior (as a backup) to the Library or duplicate the behavior in the project.
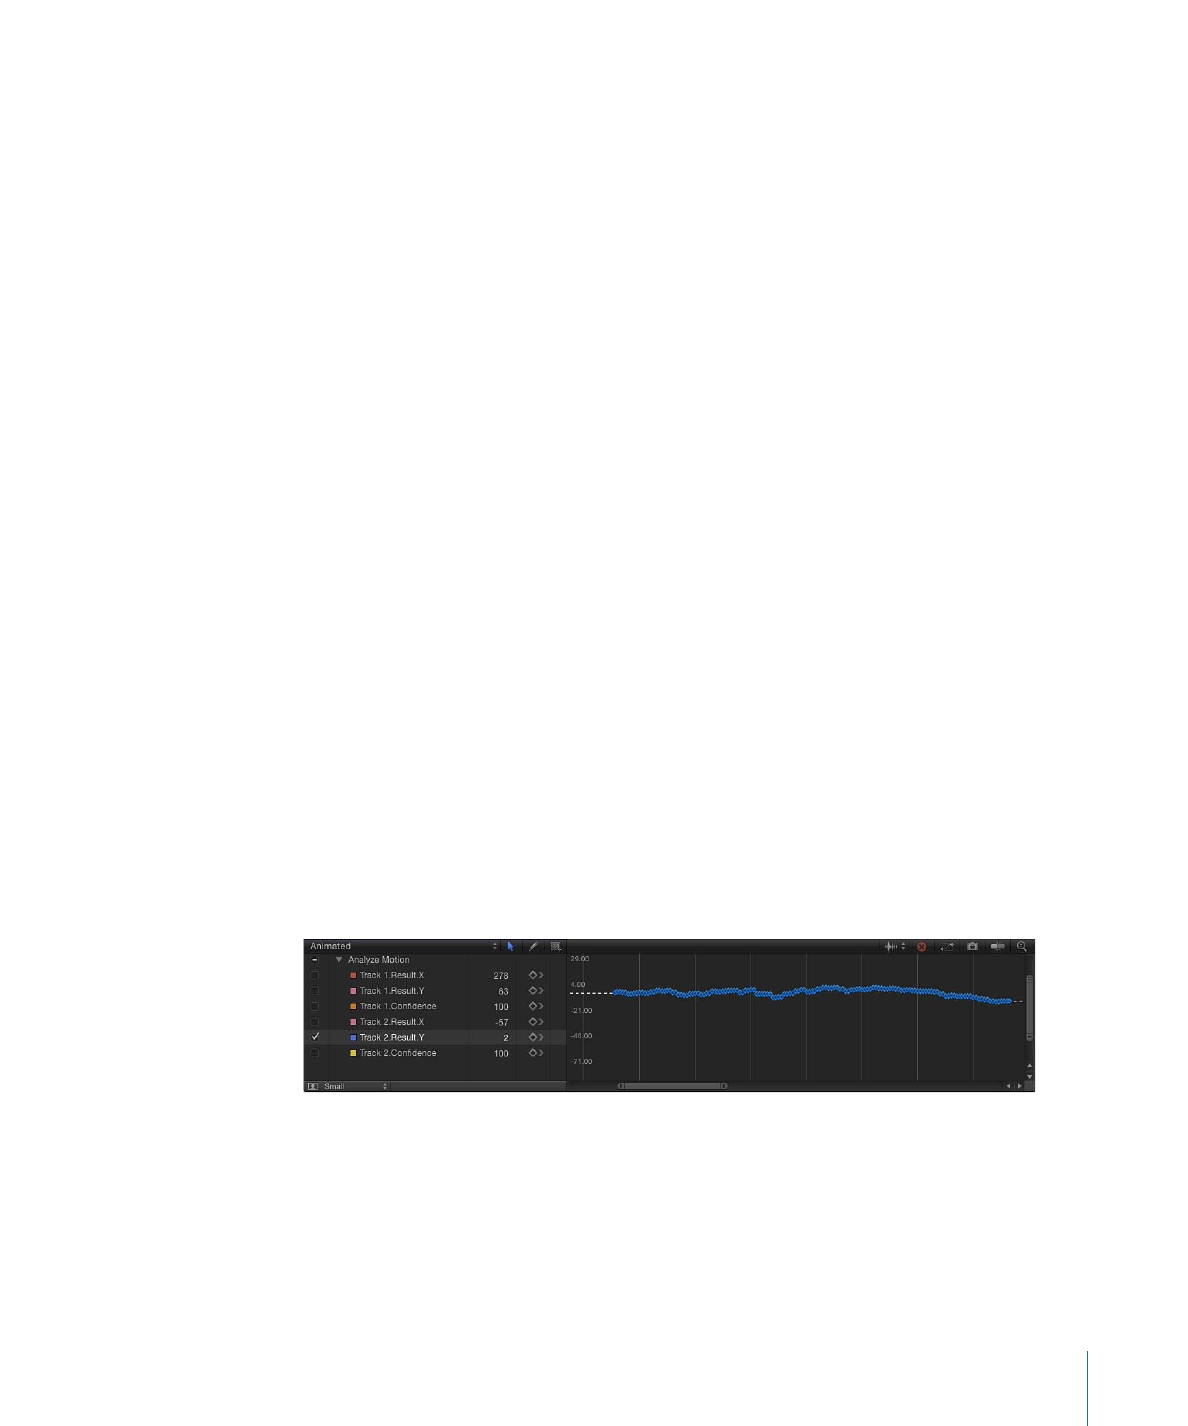
In the following graph, you can see that there’s a keyframe placed at every frame, and
the curve is quite jagged. The following example, shows how you can smooth this curve.
To smooth a track curve
1
In the Keyframe Editor, click in the fifth column of the parameter to open the Animation
menu, then choose Reduce Keyframes.
1325
Chapter 22
Motion Tracking
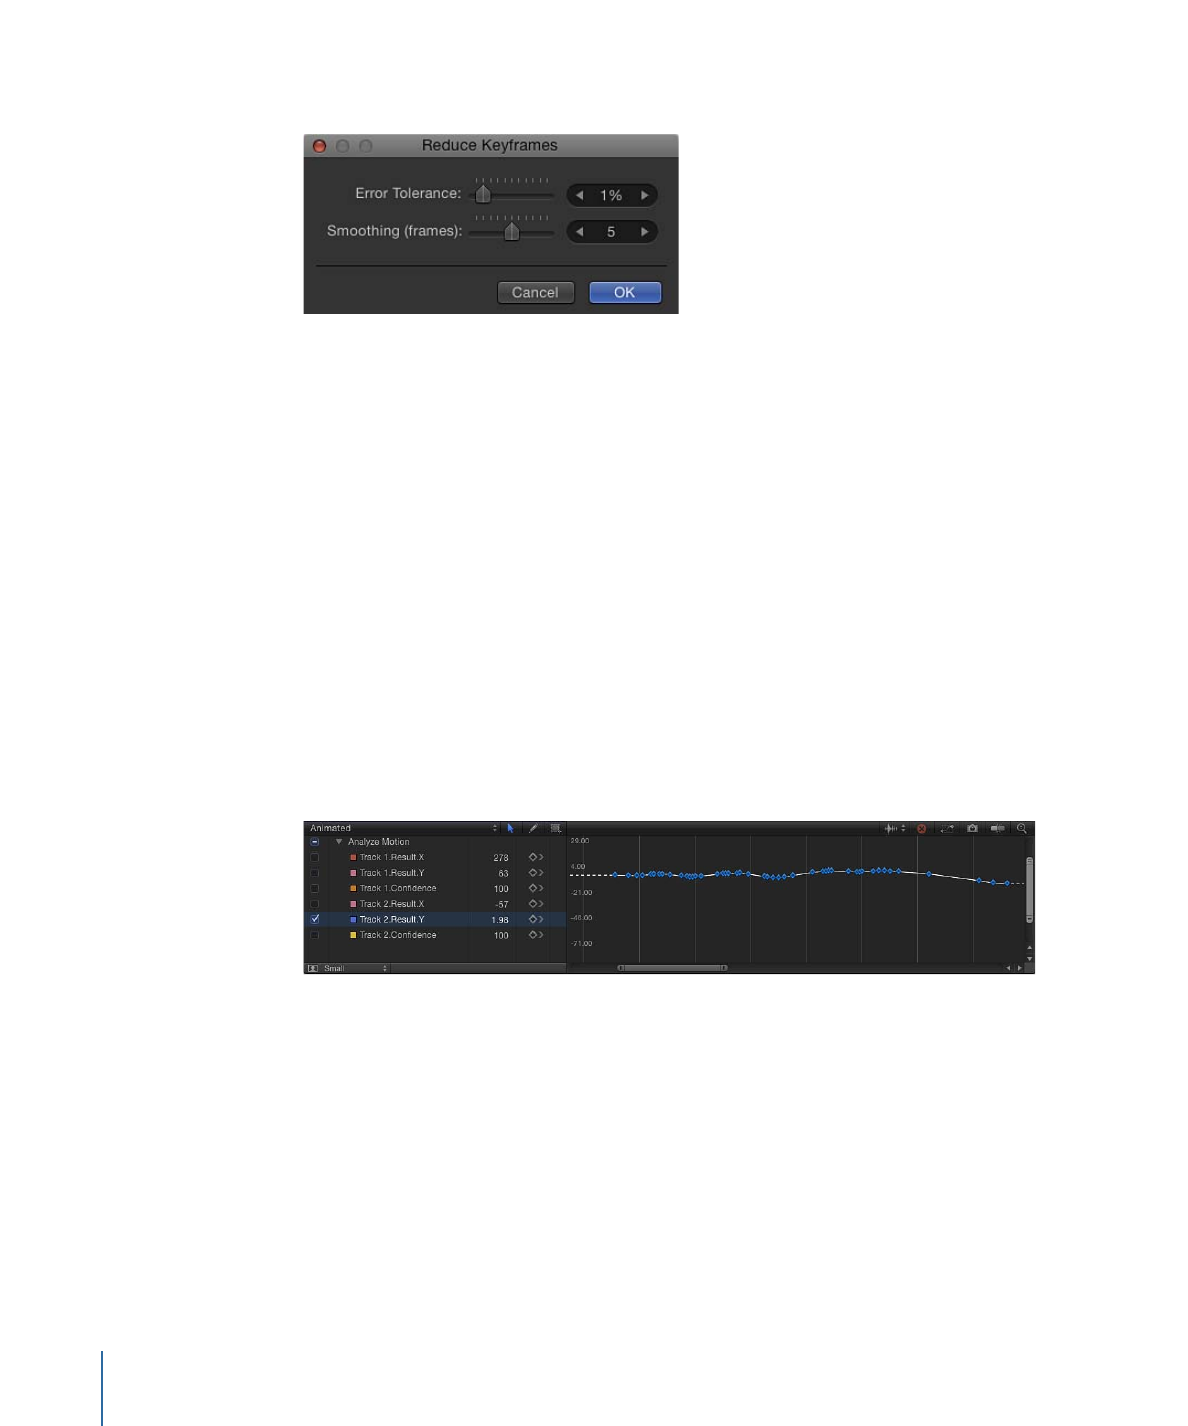
The Reduce Keyframes dialog appears.
Reduce Keyframes applies a thinning algorithm to the keyframes for the parameter. This
reduces the number of keyframes while attempting to maintain a similar shape to the
curve. The thinning algorithm can be adjusted in two ways. Increasing the Error Tolerance
results in fewer keyframes. Increasing the Smoothing (frames) makes smoother curves
between keyframe values.
This example uses 5, which means that 5 track points centered on the evaluated point
are used to compute the current point’s new, smoothed value. This is a standard Gaussian
(bell-curve type) filter. In other words, if you leave the Smoothing value at 5, when the
value of frame 12 is computed, frames 10, 11, 12, 13, and 14 are considered. If Smoothing
is set to 3, the algorithm uses frames 11, 12, and 13. The larger the Smoothing value, the
more points are considered (and thus more calculations done) for every point in the
curve.
2
Set the values in the Reduce Keyframes dialog.
As you adjust the sliders or value sliders in the dialog, the curve is modified in the Keyframe
Editor. There are now fewer keyframes on the curve, and the curve becomes smoother.
3
Click OK.