
How to Use the Keyer Filter
Getting started with the Keyer filter is easy. Here’s an example.
To create a key
1
Import a background image into your project.
This example uses a high-resolution still image of an orange sky at sunset.
2
Import a foreground image or video clip of a subject positioned in front of a green screen
or blue screen.
This example uses video footage of an actor standing in front of a green screen. Make
sure the foreground (the actor and green screen) layer is above the background layer in
the Layers list.
3
Move the playhead to a frame where the green screen is visible in the Canvas, then apply
the Keyer filter to the foreground layer.
The Keyer filter analyzes the frame and guesses the color you are trying to remove, based
on the dominant color in the image (if blue or green). For the best results, apply the filter
to the frame with the greatest amount of the color to key.
If the automatic guess is incorrect (for example, if you want to key on red), you can set
the Strength parameter in the Filters Inspector to 0 to disable automatic color sampling,
then use the Sample Color tool to draw a selection box in the Canvas around the color
you want to key. (This workflow is covered in the next task.)
The background layer shows through as long as the View control in the Filters Inspector
is set to Composite.
Note: If the clip you add a Keyer filter to is not visible in the Canvas, the initial key is pulled
based on the first or last frame in which the subject appears, whichever is closest to the
playhead.
648
Chapter 13
Keying
4
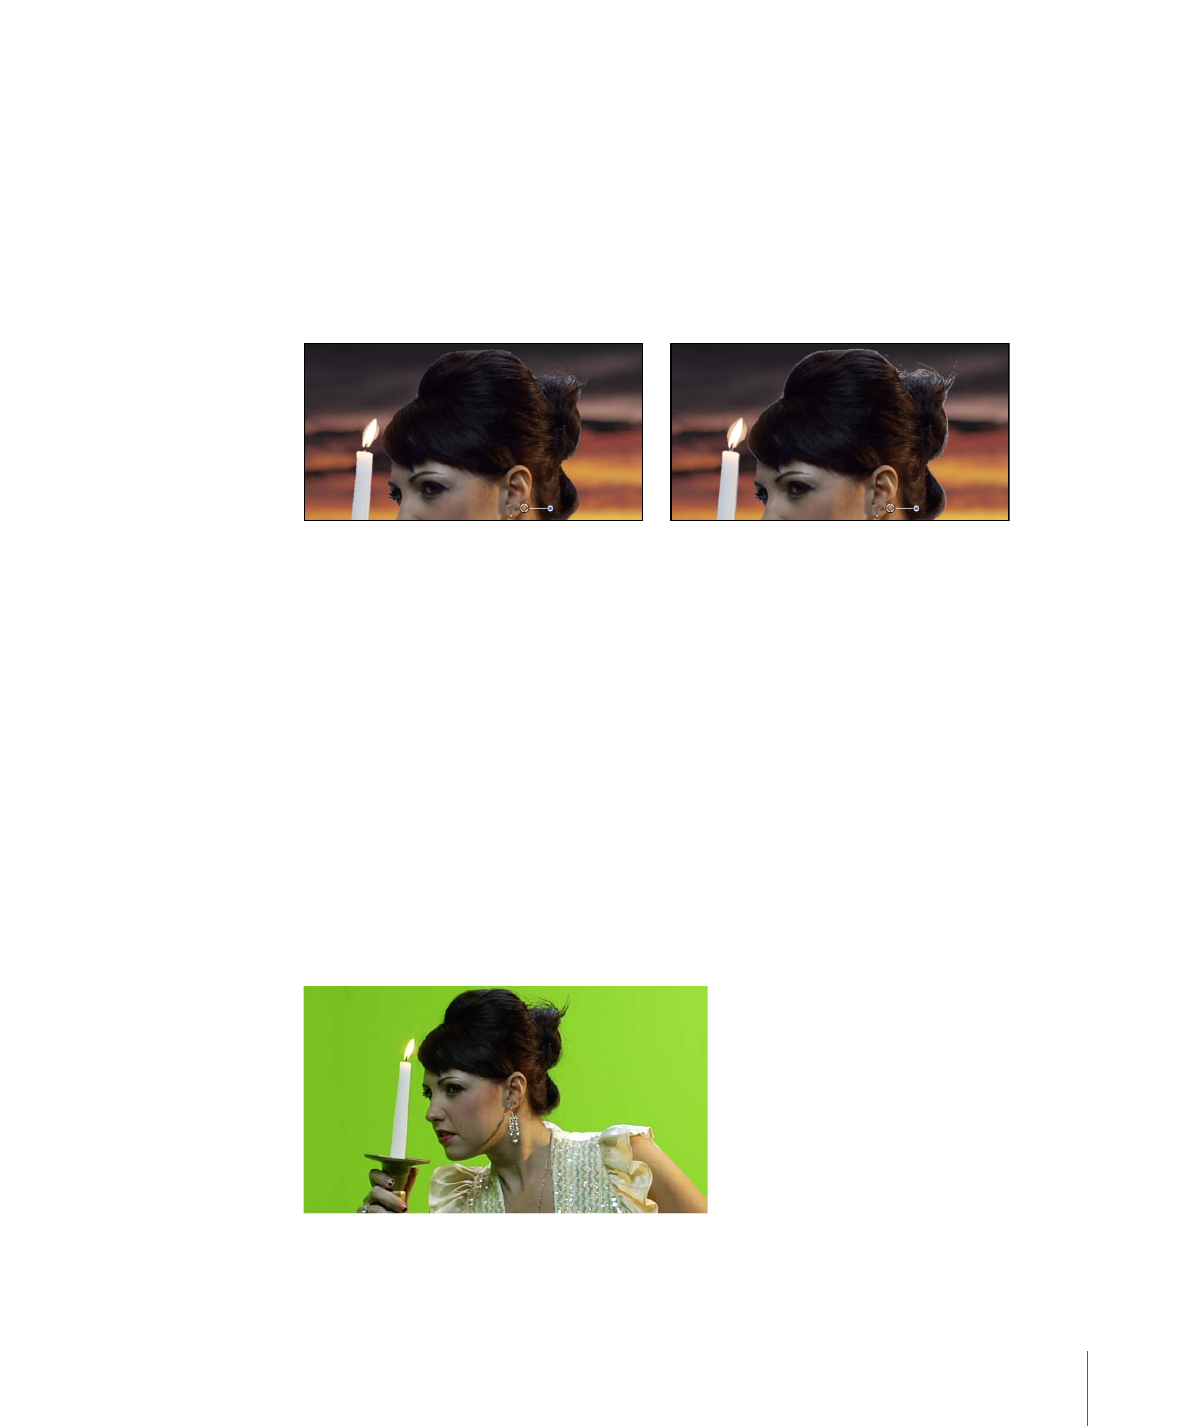
If the automatic key is too aggressive (keying out soft details of the keyed subject that
you want to preserve), slowly drag the Strength slider left to reduce the tolerance (core
transparency) of the matte until you’re satisfied with the amount of edge detail in the
key.
Doing so allows areas of marginal transparency like hair, smoke, and reflections to show
through. In general, it’s better to err on the side of a less aggressive key, using the
parameters within the Matte Tools group to fine-tune the soft details you’re trying to
preserve.
Strength set to 100%
Strength set to 35%
Tip: If you open the Color Selection controls while adjusting the Strength slider, you can
see how the Chroma and Luma parameters are affected.
If necessary, you can fine-tune the default color sampling using the Sample Color and
Edges tools in the Filters Inspector or HUD. Alternatively, you can override the Keyer filter’s
default sampling, then set the key colors manually. The next example describes that
method.
To override automatic color sampling and set your own key colors
1
Select the applied Keyer filter in the Layers list, then open the Filters Inspector or HUD.
2
Set the Strength slider to 0.
Automatic color sampling is disabled, and the green screen background becomes visible
in the Canvas.
649
Chapter 13
Keying
3
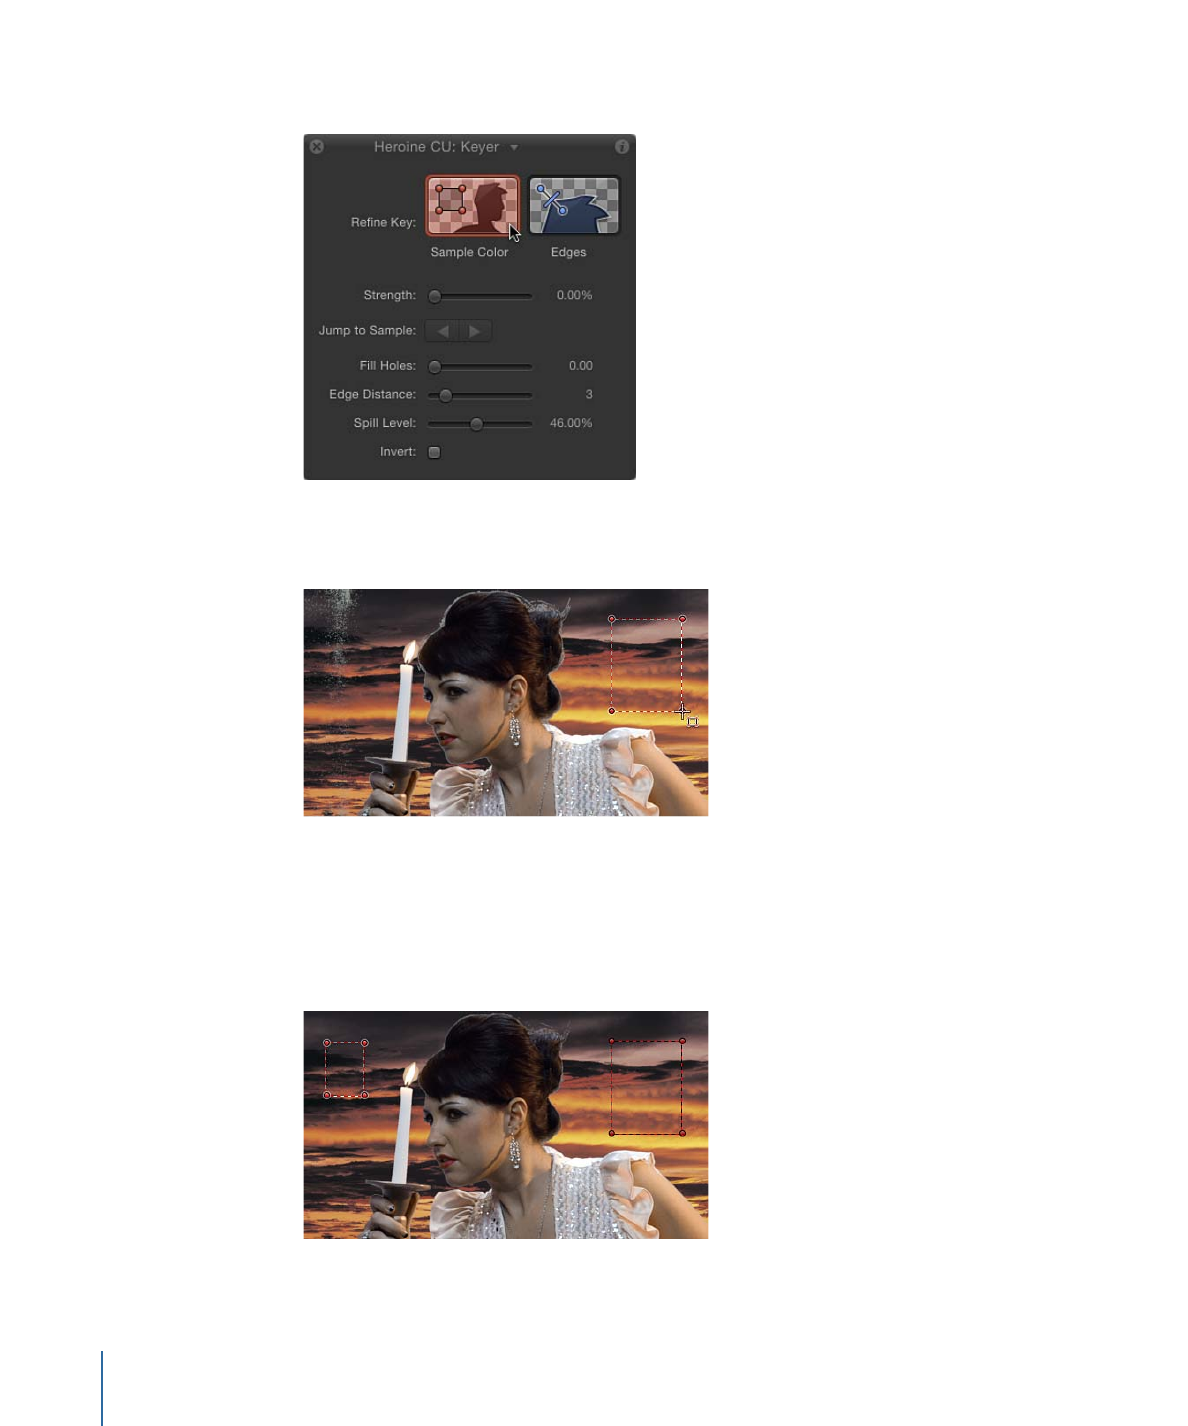
In the Filters Inspector (or HUD), click to select the Sample Color tool.
4
In the Canvas, drag a selection box over an area of the green screen color that you are
attempting to key.
Most of the green screen should disappear and be replaced by the image in the layer
underneath the foreground layer in the Layers list (in this example, the orange sunset
sky). You can add as many selection boxes as necessary to sample areas of the green
background (for example, highlights or shadows on the green screen) to achieve a better
result.
650
Chapter 13
Keying

If the edges of the foreground subject are too sharp, use the Edges tool to soften the
foreground edges. The Edges tool is also effective for fine-tuning semitransparent features
such as smoke, glass reflections, and shadows.
5
In the Filters Inspector or HUD, click to select the Edges tool.
6
In the Canvas, drag a line over the edge of the foreground subject so one end point lies
in the interior of the foreground subject and the other end point lies in the background
(the orange sky).
An Edges control line appears in the Canvas.
7
In the Canvas, drag the center handle of the Edges control line to adjust the edge
transparency of the keyed subject.
You can also set the View mode to Matte, which helps you see the effect of using the
Edges tool. (The Matte mode also helps you review your work when you modify the Fill
Holes and Edge Distance parameters.)
Tip: If you open the Color Selection controls while dragging the center handle, you can
see how the Edges control alters the outer softness graph of the Chroma control and the
bottom softness handles of the Luma controls.
When manually sampling colors to create a key, it’s not necessary to click the Sample
Color and Edges tools in the Inspector or HUD before you drag in the Canvas. Instead,
you can use keyboard shortcuts to activate the Sample Color and Edges tools while
dragging in the Canvas.
To add Sample Color and Edges controls in the Canvas using keyboard shortcuts
1
In the Layers list, select the Keyer filter to adjust.
2
Do one of the following:
• To create a Sample Color selection box, hold down the Shift key while dragging over
the color you want to key in the Canvas.
• To create a Edges sampling control, hold down the Command key while dragging to
draw a line that crosses over the edge of the subject you’re keying in the Canvas.
• To remove a Sample Color or Edges control, Option-click anywhere in the control you
want to delete, or click to select a sample control, then press the Delete key.
651
Chapter 13
Keying

For additional control over the transparency matte, use the Color Selection controls and
the Matte Tools in the Filters Inspector. These controls provide options for creating a
seamless composite without adding more Keyer filters.
To refine a key using the Color Selection controls
1
With the Keyer filter selected in the Layers list, set the View mode in the Filters Inspector
to Matte.
Matte mode lets you see how your adjustments affect the transparency of the image.
The keyed image now appears in grayscale: white areas represent solid pixels in the final
matte; black areas represent transparent pixels in the final matte, and varying levels of
gray represent translucent pixels in the final matte (darker gray is more transparent; lighter
gray is more opaque).
2
Click the disclosure triangle in the Color Selection row of the Filters Inspector to reveal
additional controls.
3
Choose one of the two Graph modes to select a mode for the adjustments you need:
• Scrub Boxes: Remain in Scrub Boxes mode (the default) if you are satisfied with the
current key but want to adjust the edge softness of the resulting matte. In Scrub Boxes
mode, you can adjust the outer graph of the Chroma control and the lower handles of
the Luma control to increase or decrease the translucency of the edges of the matte.
• Manual: Click Manual to make substantial alterations to tolerance (core transparency)
and edge softness in matte. In Manual mode, you can adjust the inner and outer graphs
of the Chroma control, as well as the upper and lower handles of the Luma control to
alter all aspects of transparency in the matte. In Manual mode, you cannot alter the
Strength parameter or add more Sample Color or Edges controls in the Canvas.
After you enter Manual mode, do not return to Scrub Boxes mode.
Note: For more information on keyframing the Color Selection controls, see
Animating
Parameters in the Keyer Filter
.
652
Chapter 13
Keying
4
Depending on the mode you selected in the previous step, adjust the controls to alter
your matte:
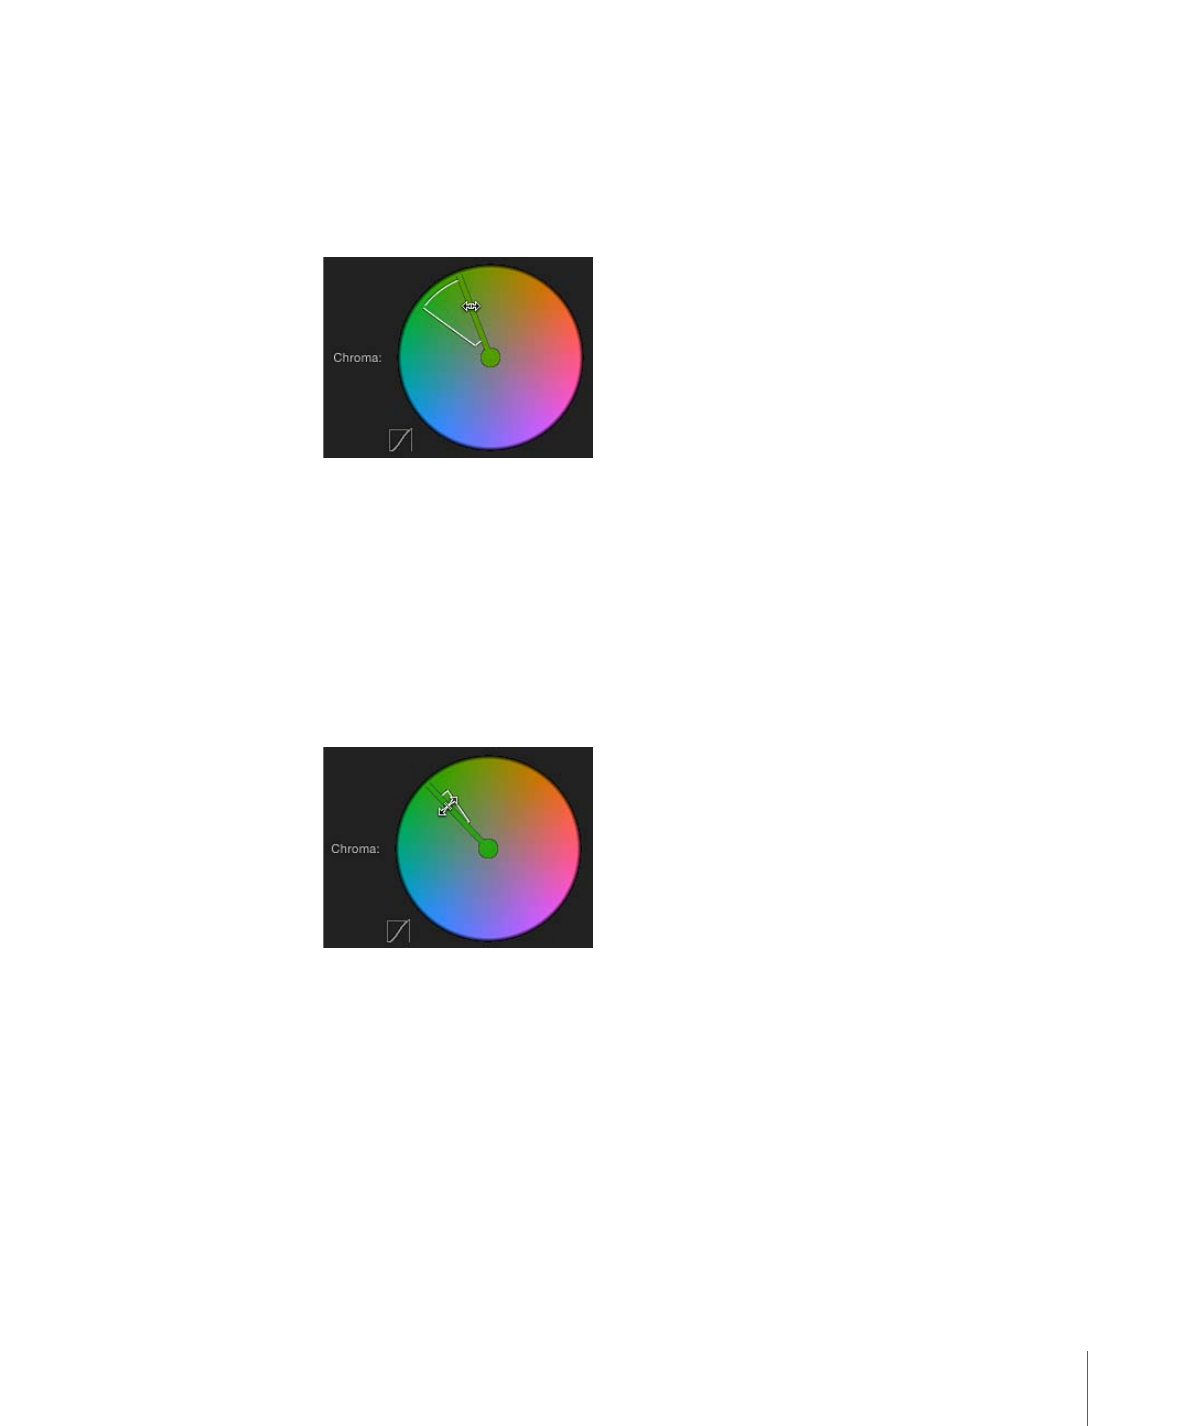
• In Scrub Boxes mode, drag any side of the outer graph in the Chroma control to alter
the range of hue and saturation contributing to the matte’s edge softness (transparency
around the edges of the key).
Note: In Scrub Boxes mode, you can also drag the two lower handles of the Luma
control to alter the range of lightness and darkness contributing to the matte’s edge
softness.
• In Manual mode, drag any side of the outer graph in the Chroma control to alter the
range of hue and saturation contributing to the matte’s edge softness. Drag any side
of the inner graph to alter the range of hue and saturation contributing to the matte’s
tolerance (core softness). Drag in the center of the inner graph to rotate the graph to
a new position in the color wheel.
Note: In Manual mode, you can also drag any of the four Luma control handles. The
two upper Luma handles alter the range of lightness and darkness contributing to the
matte’s tolerance (core transparency); the two lower handles alter the range of lightness
and darkness contributing to matte’s edge softness.
653
Chapter 13
Keying
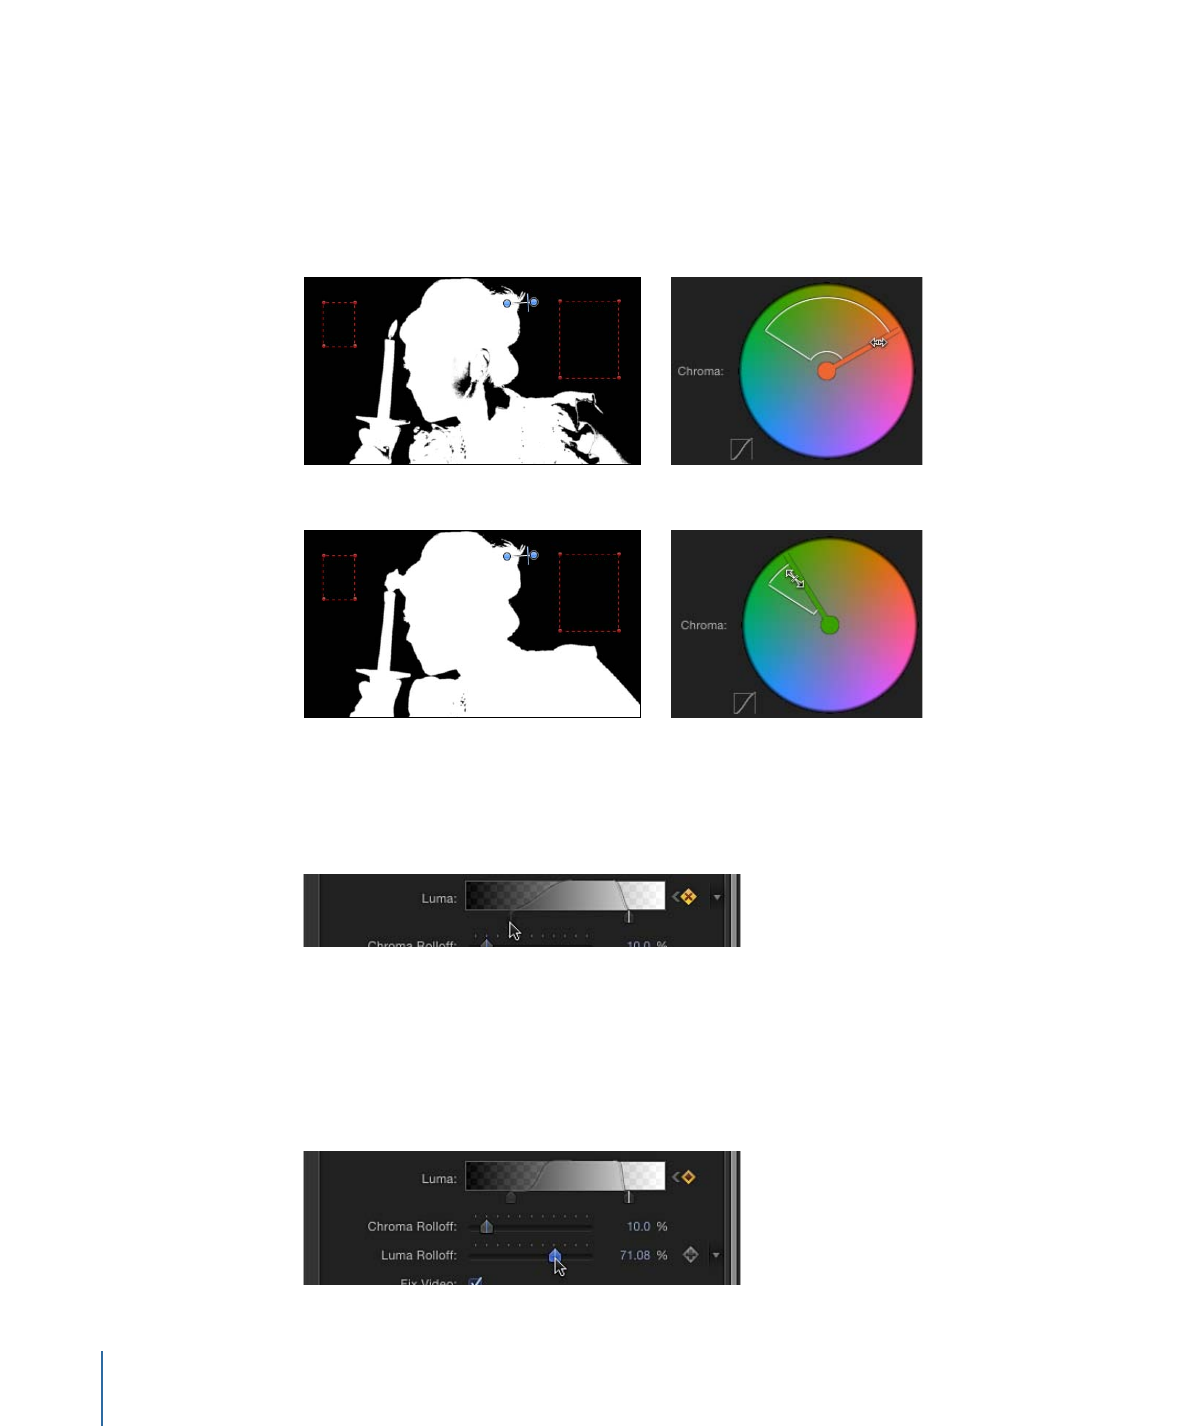
In either mode, expanding the Chroma graph or Luma handle outward increases the
regions of transparency in the keyed image. Dragging the side of a Chroma graph or a
Luma handle inward diminishes the transparent regions in the keyed image. In the
example below, the top image shows the holes in the matte that result from increasing
edge softness using the outer graph of the Chroma control. The bottom image shows
how reducing edge softness closes these holes.
Widening softness
Narrowing softness
5
If you haven’t adjusted the Luma control, drag the left or right lower handles to alter the
softness of the luma component of the image.
Tip: In Manual mode, you can adjust the lower handles by dragging the bar connecting
the top and bottom handles. To adjust all handles simultaneously, drag inside the curve
in the graph.
6
Adjust the Chroma and Luma Rolloff sliders to subtly alter the falloff between the tolerance
and softness of the key.
654
Chapter 13
Keying

To refine a key using Matte Tools
1
With the Keyer filter selected in the Layers list, set the View mode in the Filters Inspector
to Matte.
Matte mode lets you see how adjustments affect the transparency of the image. The
keyed image appears in grayscale: white areas represent solid pixels in the final matte;
black areas represent transparent pixels in the final matte; and varying levels of gray
represent translucent pixels in the final matte (darker gray is more transparent; lighter
gray is more opaque).
2
Click the disclosure triangle of the Matte Tools row of the Filters Inspector.
The row expands to reveal the Levels control, which adjusts the contrast of the matte.
Also revealed are the Shrink/Expand slider, the Soften slider, and the Erode slider.
3
Use the Levels control to modify transparency and contrast in the matte.
A general rule for using the Levels control is to drag the center Bias handle left to decrease
transparency in the matte or right to increase transparency in the matte. The Black slider
on the left and the White slider on the right modify contrast in the shadows and highlights
of the matte.
The effects of Levels adjustments are best seen when View is set to Matte. In this view,
the white area of the matte is the solid part, and the black area of the matte is the
transparent part. Gray is translucent, with lighter grays creating progressively more
transparency. With this in mind, here are some guidelines:
• Dragging the black bias handle right pushes gray areas to black, expanding areas of
transparency within the matte.
• Dragging the center bias handle left pushes the grays in the matte towards white,
widening solid areas of the key as semitransparent areas are made solid.
• Dragging the center bias handle right pushes the grays in the matte towards black,
widening transparent areas of the key as semitransparent areas are made transparent.
• Dragging the white bias handle left pushes the grays in the matte towards white,
expanding areas of solidity within the matte
4
Drag the Shrink/Expand slider left to shrink the matte inwards, widening holes in the
matte; drag the Shrink/Expand slider right to expand the matte outward, filling in holes
in the matte.
Original matte
Reducing Shrink/Expand
Increasing Shrink/Expand
655
Chapter 13
Keying
5
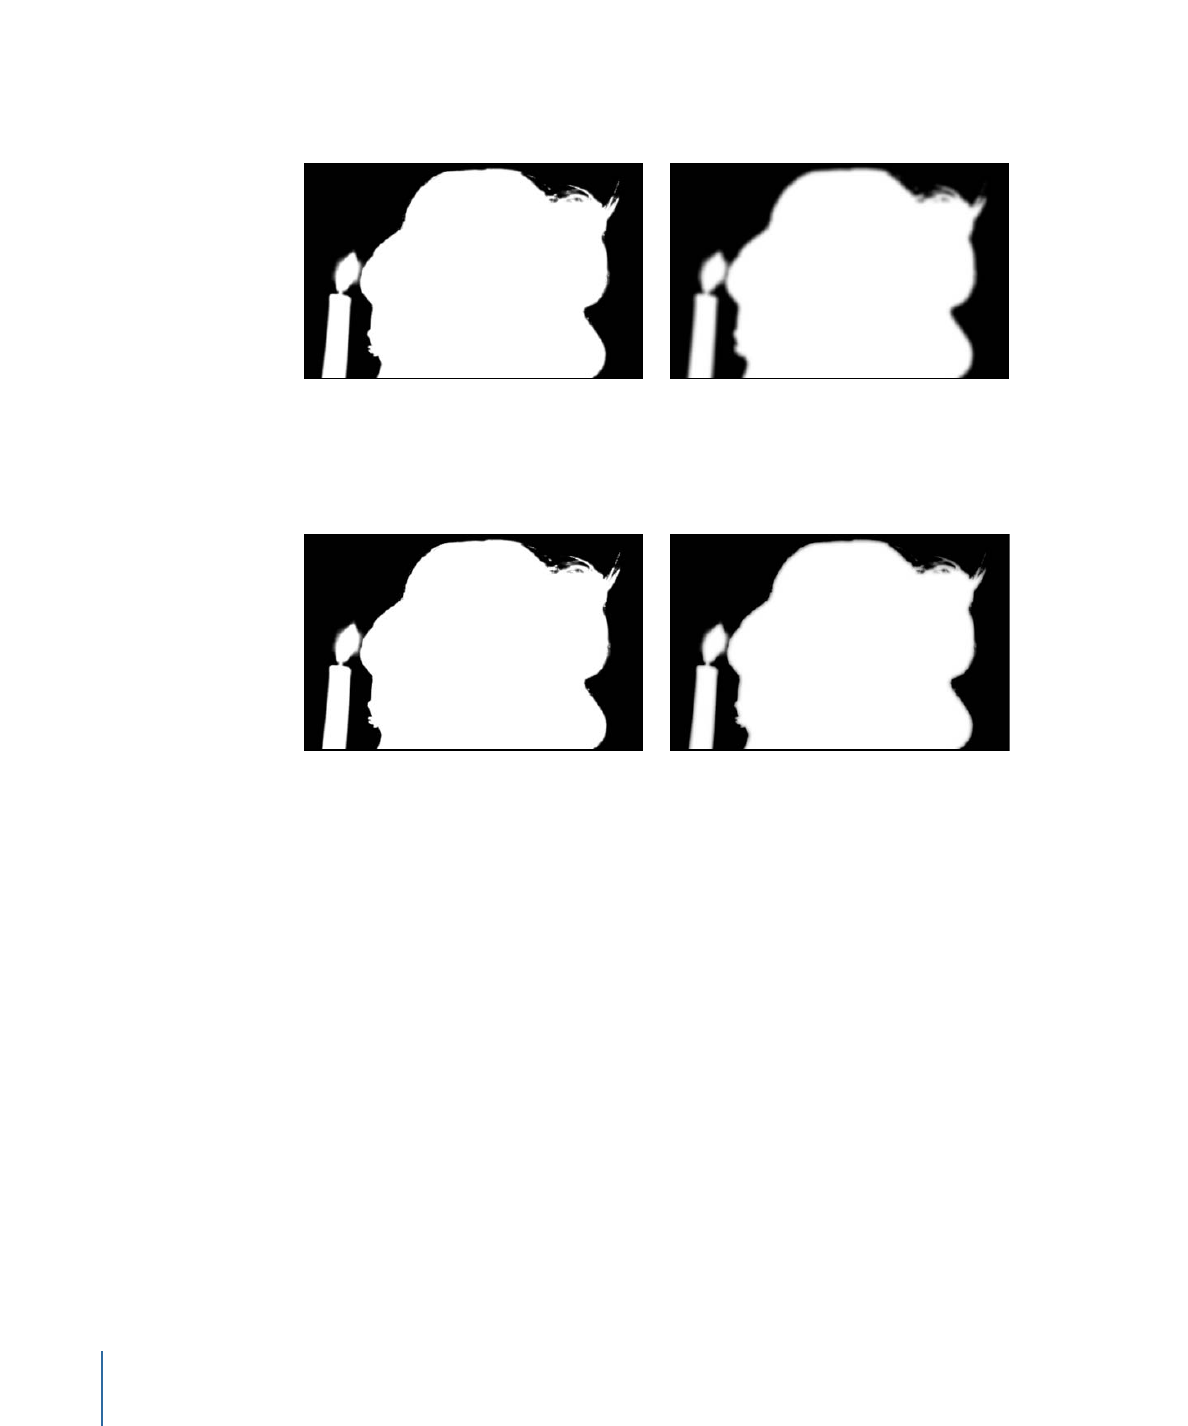
Drag the Soften slider right to blur the matte overall, resulting in softer edges throughout
the matte.
Original matte
Softened matte
6
Drag the Erode slider right to soften the matte from the edge inward, while preserving
the original matte outlines as a translucent outer boundary.
Original matte
Eroded matte