
Parameter List
Any keyframeable parameters of selected objects can be displayed in the list on the left
side of the Keyframe Editor. This includes object properties, filters, and behaviors. By
selecting multiple items in the Layers list or Timeline, you can compare parameters across
multiple objects.
The parameter list contains the following items:
Activation checkbox:
Checkboxes in the left column set which parameters are displayed
in the graph. Deselect a checkbox to hide a parameter’s keyframes and curves from the
graph on the right.
Parameter name:
Object and parameter names appear in the second column of the
parameter list. Control-click a parameter name to apply a Parameter behavior from the
shortcut menu.
Value:
Parameter values at the playhead position appear in the third column. Modify a
parameter value by dragging left or right over the number in this field. Or double-click
the field, then enter a value. The value displayed and editing options depend on several
factors:
• If the playhead is parked on a keyframe, this field shows the value for that keyframe.
Adjusting the value alters the keyframe.
• If the playhead is not parked on a keyframe, this field shows the value of that parameter
at the current frame. If the parameter has keyframes, adjusting the value creates a new
keyframe at that frame.
For more information on changing the values of keyframes, see
Modifying Keyframes
.
For more information on value sliders, see
Value Sliders
.
Keyframe and Keyframe Navigation buttons:
Keyframe controls appear in the fourth
column. These controls are identical to those found in the Inspector: the Previous Keyframe
button, Add/Delete Keyframe button, and Next Keyframe button. For more information,
see
Keyframe Controls
.
596
Chapter 12
Keyframes and Curves
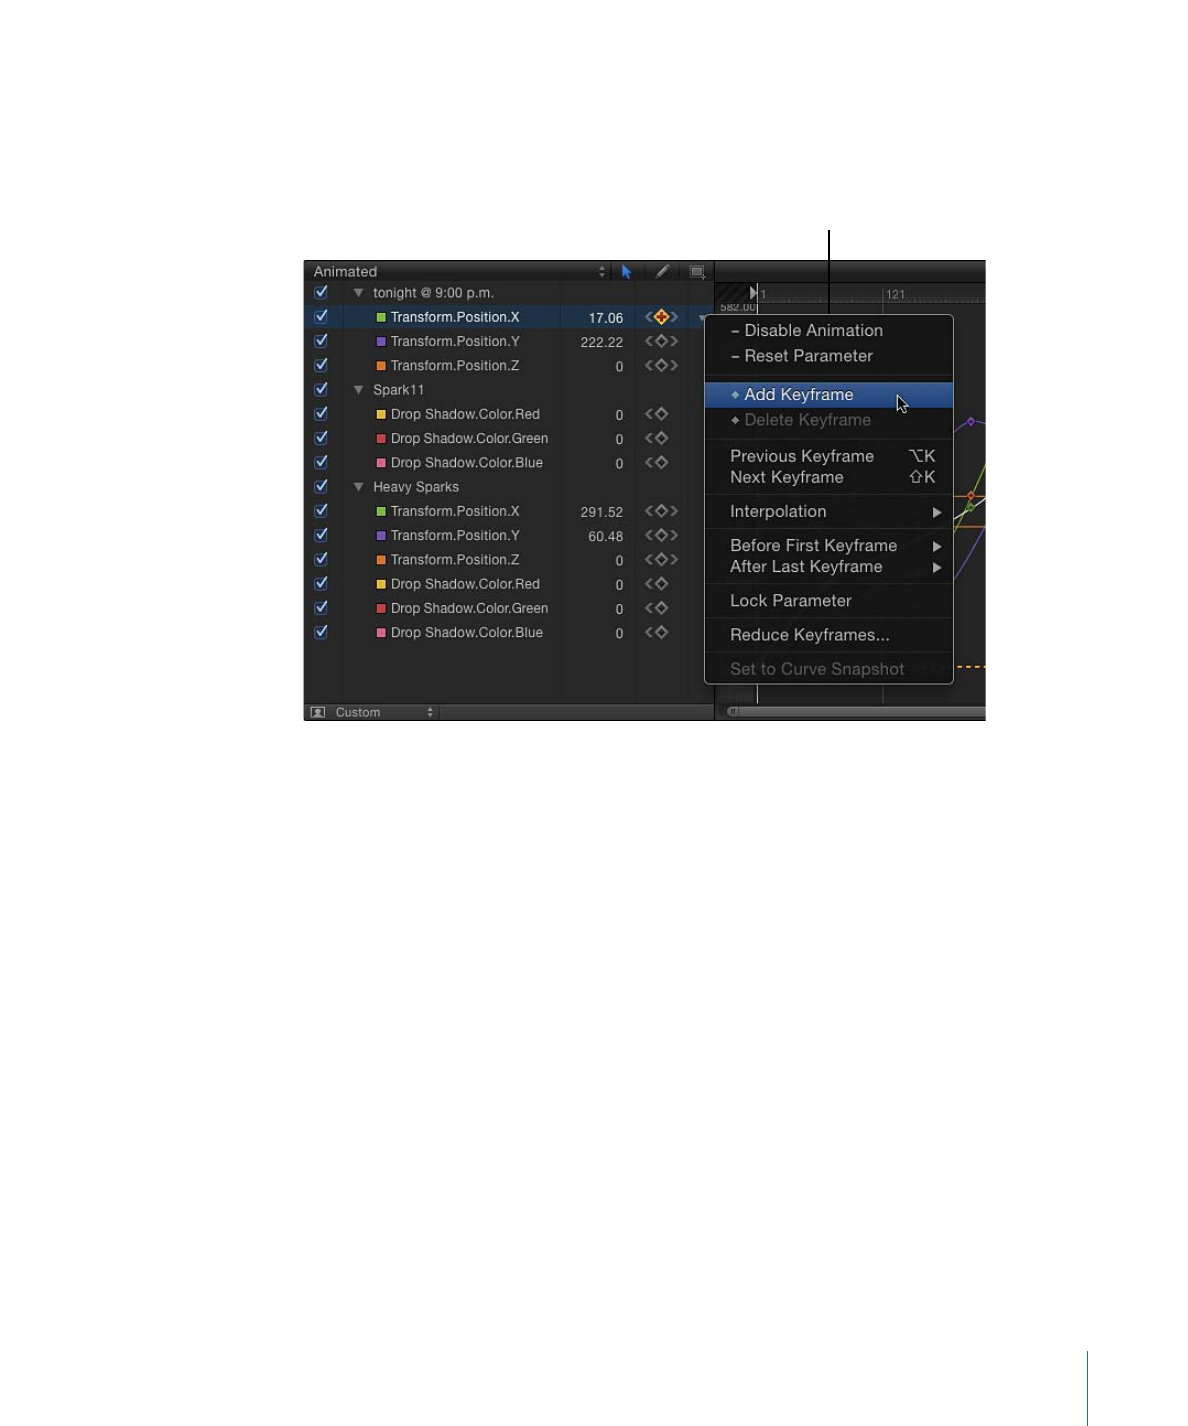
Animation menu:
The Animation menu appears in the fifth column. To open this menu,
position the pointer over this column, then click the inverted arrow that appears. The
Animation menu in the Keyframe Editor contains all commands found in the Inspector’s
Animation menu, plus a few additional commands:
Animation menu
• Enable/Disable Animation: Activates or deactivates the keyframed value. Choosing
Disable Animation hides the keyframes you set, restoring the parameter to its default
value. However, the keyframes are not thrown away. Choosing Enable Animation returns
the parameter to its last keyframed state.
• Reset Parameter: Removes keyframes and settings for the parameter, restoring the
default value.
• Add Keyframe: Adds a keyframe at the current frame in the Keyframe Editor. If the
playhead is positioned on a frame where a keyframe has been added, this command
is unavailable.
Note: You can use a keyboard shortcut (Control-K) to add a keyframe. A keyframe is
added to the last modified parameter of the object.
• Delete Keyframe: Deletes the current keyframe. This command is available if the playhead
is positioned on a frame where a keyframe exists.
• Previous Keyframe: Moves the playhead to the previous keyframe for this parameter.
This command is available if a keyframe exists earlier in the project.
• Next Keyframe: Moves the playhead to the next keyframe for this parameter. This
command is available if a keyframe exists later in the project.
597
Chapter 12
Keyframes and Curves
• Interpolation: Sets the type of curve for the parameter. See
Modifying Curves
for
examples of the different interpolation methods. Choose Constant, Linear, Bezier,
Continuous, Exponential, or Logarithmic.
• Before First Keyframe: Defines what happens between the first keyframe and the
beginning of the clip. See
Extrapolation
for examples of extrapolation methods. Choose
Constant, Linear, Ping Pong, Repeat, or Progressive. You can also turn the extrapolation
into keyframes by choosing Generate Keyframes.
• After Last Keyframe: Defines what happens between the last keyframe and the end of
the clip. See
Extrapolation
for examples of extrapolation methods. Choose Constant,
Linear, Ping Pong, Repeat, or Progressive. You can also turn the extrapolation into
keyframes by choosing Generate Keyframes.
• Lock/Unlock Parameter: Locks the parameter from changes. When a parameter is locked,
neither keyframes nor curves are adjustable.
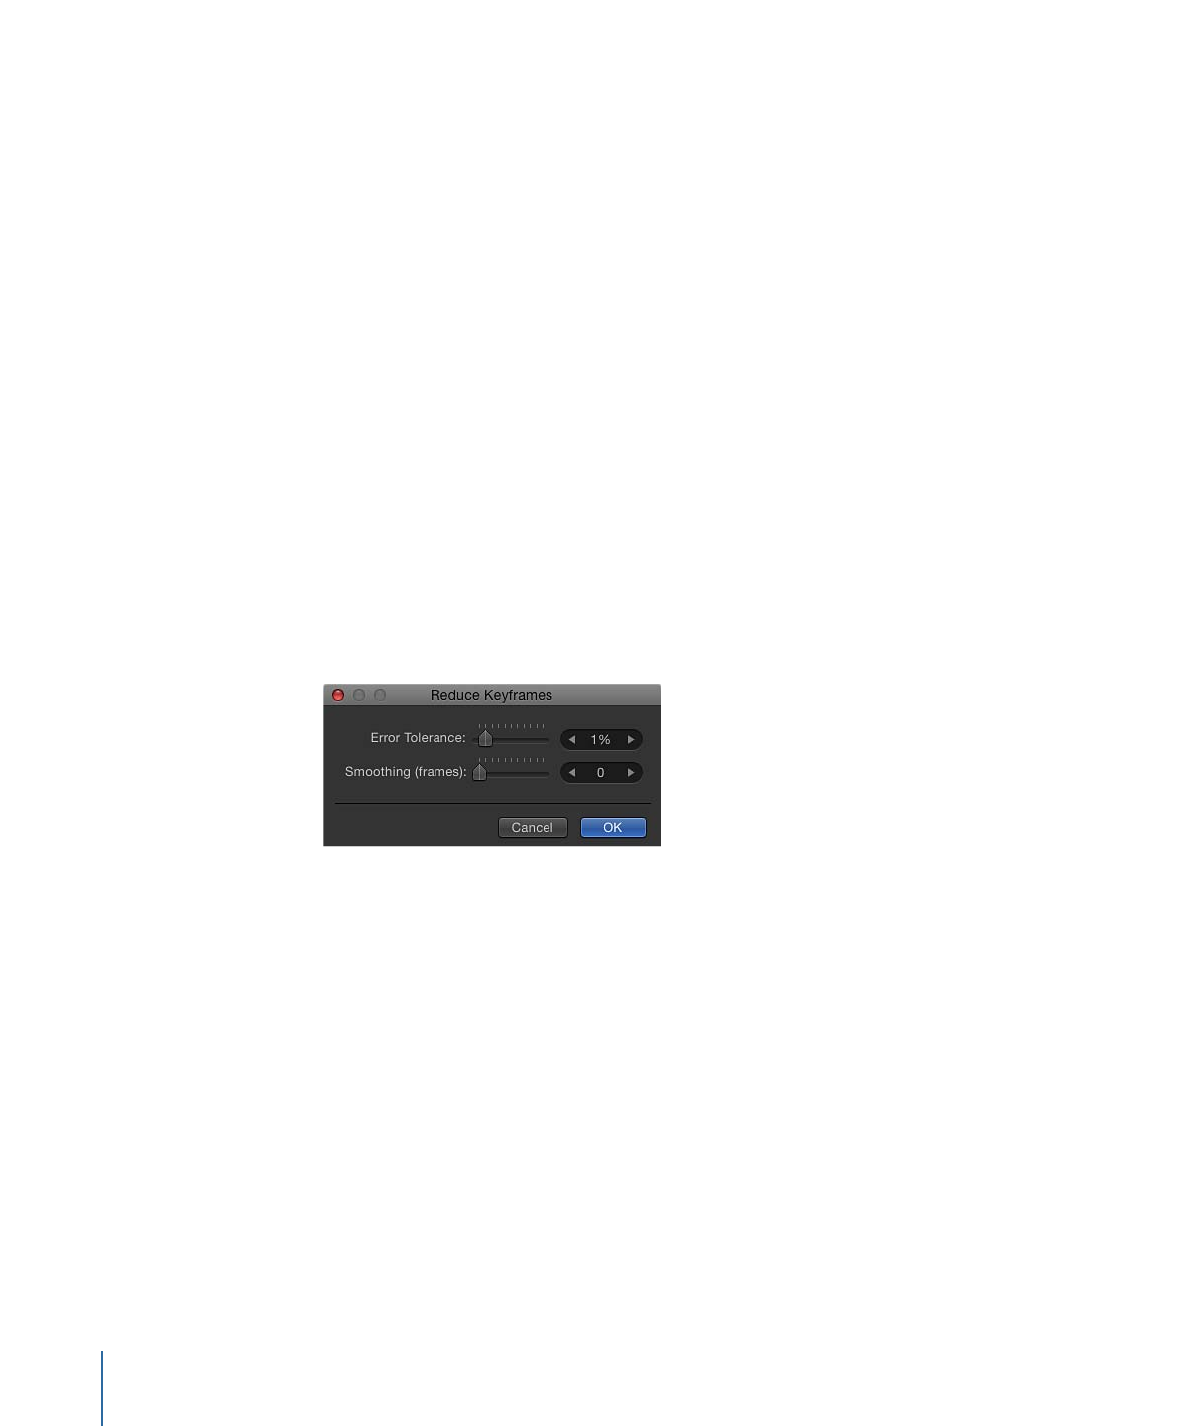
• Reduce Keyframes: Opens the Reduce Keyframes dialog, which allows you to apply a
thinning algorithm to the keyframes for the parameter. This reduces the number of
keyframes in a parameter while preserving the shape of the curve. The thinning
algorithm can be adjusted in two ways. Increasing the Maximum Error Tolerance results
in fewer keyframes. Increasing the Smoothing Factor makes smoother curves between
keyframe values.
• Set to Curve Snapshot: Reverts keyframe changes made in the selected curve to the
most recent snapshot. This command is available when Take/Show Curve Snapshop is
turned on (the camera button in the upper-right corner of the Keyframe Editor). For
more information, see
Curve Snapshots
.