
Example: Creating a Prism Blur Transition
This example demonstrates how to create an original, simple Final Cut Pro X transition
in Motion. Clip A dissolves into clip B with a prism blur effect.
To create a prism blur transition effect
1
Choose File > New (or press Command-N).
2
In the Project Browser, select Final Cut Transition, choose the project preset required for
your FCP X project, set the Duration to 200 frames, then click Open.
Note: This example uses the Broadcast HD 720 preset.
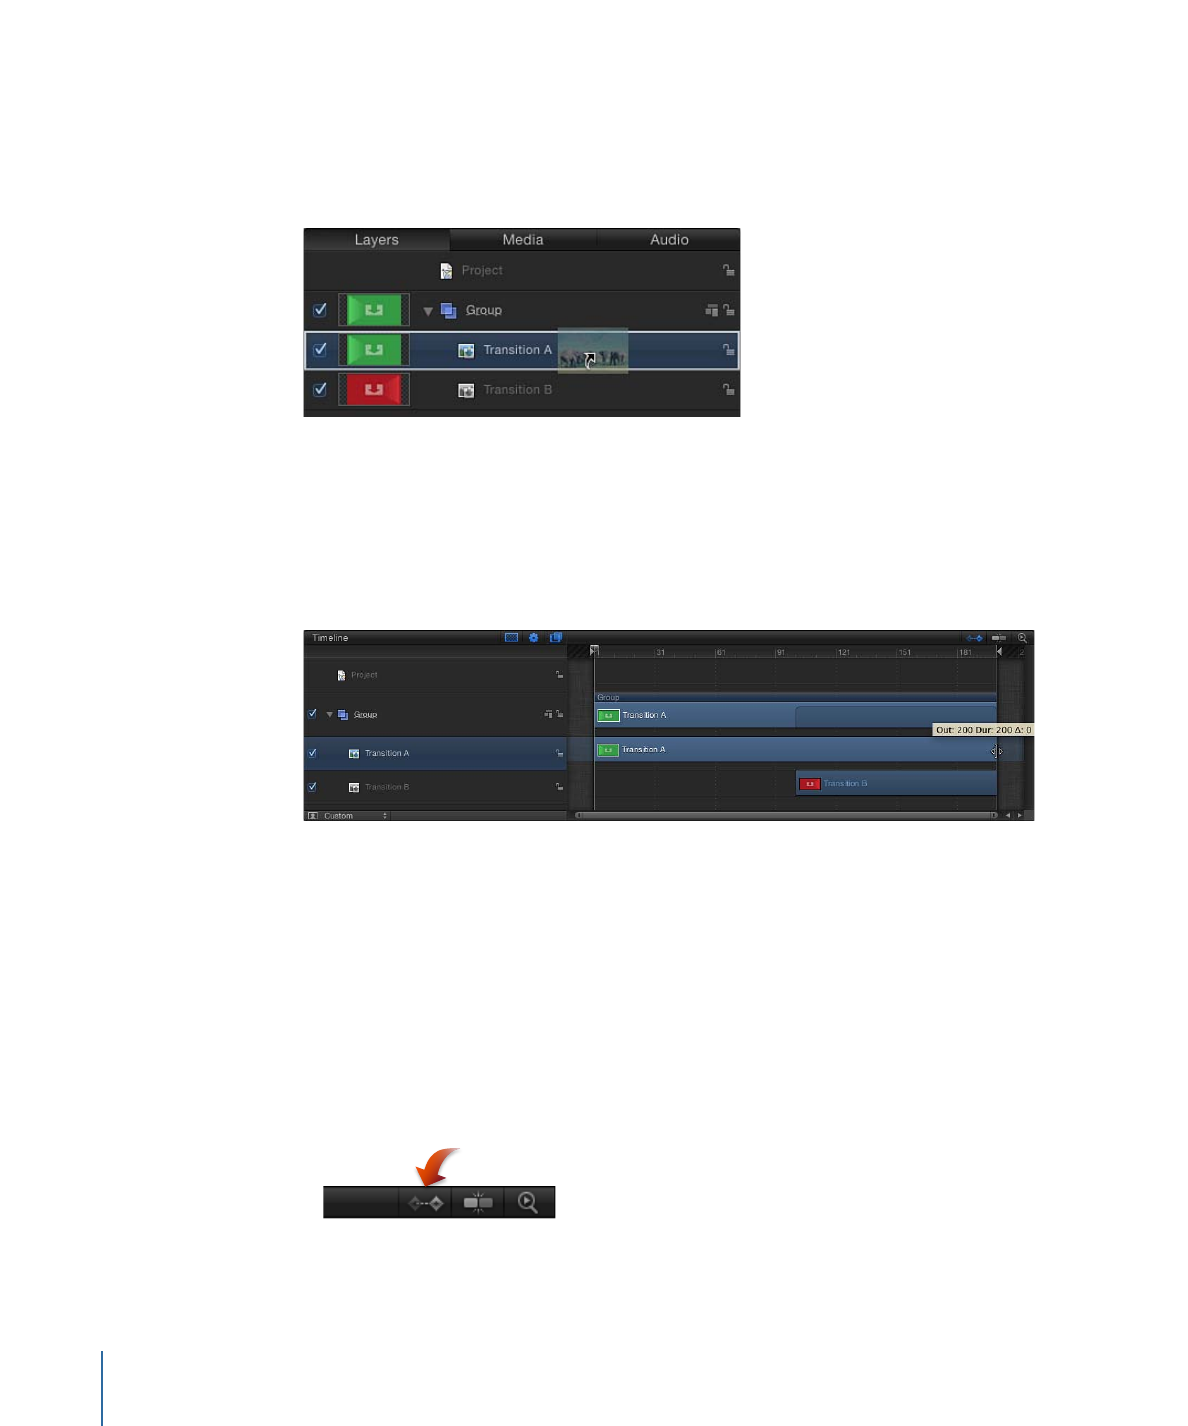
The project opens and contains a single group with two placeholder layers: Transition A
and Transition B.
533
Chapter 11
Creating Templates for Final Cut Pro X
3
Optional: You can drag a still image from the File Browser to Transition A in the Layers
list and then drag a different still image to Transition B, releasing the mouse button when
the pointer changes to a curved arrow.
Doing so gives you a better view of the transition you are building.
Note: This example does not use any images.
When you play the project (press the Space bar), no transition is present by default.
Transition A ends, and transition B begins abruptly.
4
In the Timeline, position the pointer over the end of the Transition A bar, and when the
arrow becomes a trim pointer, drag the bar to the end of the project.
5
Drag the beginning of the Transition B bar to frame 80.
6
Animate the opacity of Transition A by doing the following:
a
Click the Record button (press A) and select Transition A.
b
Drag the playhead to frame 1 and set Opacity to 100 in the Properties Inspector.
Because the default Opacity value is 100, move the Opacity value slider back and forth,
or enter 100 in the value field to be sure a keyframe is created.
Tip: To see keyframes in the Timeline, click the Show/Hide Keyframes button in the
upper-right corner of the Timeline track area.
c
At frame 80, set Opacity to 100.
534
Chapter 11
Creating Templates for Final Cut Pro X
Again, adjust the Opacity value to be sure a keyframe is created. This prevents any
dipping to black as transition A fades into transition B.
d
At frame 130, set Opacity to 0.
When you play the project, Transition A fades into Transition B.
7
In the Layers list, select the Group.
8
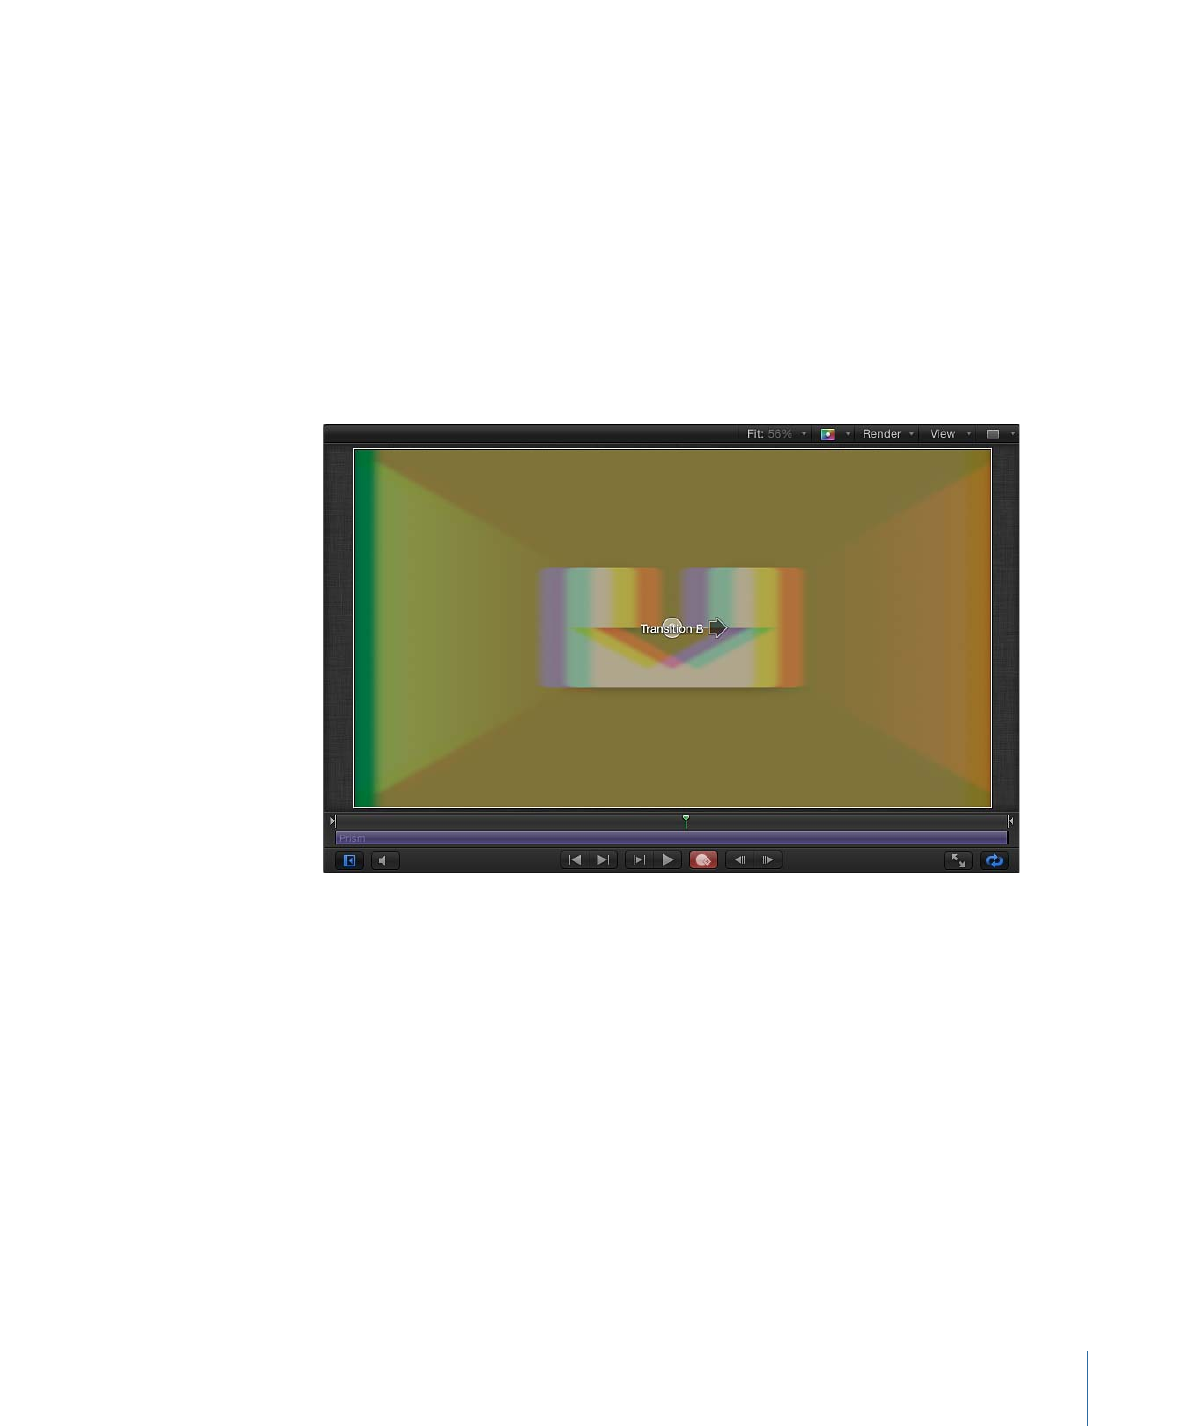
In the toolbar, choose Blur > Prism from the Add Filter pop-up menu.
9
Animate the blur amount of the Prism filter:
a
Drag the playhead to frame 1, then open the Filters Inspector and set Amount to 0.
b
At frame 105, set Amount to 50.
c
At frame 200, set Amount to 0.
When you play the project, Transition A fades into Transition B with a prism blur that
moves right, then left.
10
Choose File > Save, then do the following:
a
In the save dialog, enter a name for the template.
If you don’t specify a name, the template appears in the Final Cut Pro Transitions Browser
as “New Template.”
b
Choose a category from the Category pop-up menu.
You can also create a custom category. Categories appear in the Motion Project Browser
and the Final Cut Pro Transitions Browser.
c
If needed, choose a theme from the Theme pop-up menu.
535
Chapter 11
Creating Templates for Final Cut Pro X

You can also create themes. Themes appear in the Motion Project Browser and the
Final Cut Pro Themes Browser. A theme is a metadata tag that helps categorize
templates. For more information on Motion Project Browser themes and categories,
see
The Project Browser
.
d
To retain unused media in the project (media or audio in the Media list that is not used
in the template), select “Include unused media.”
e
If you want a preview movie to appear in the Motion Project Browser, select Save
Preview Movie.
After the prism blur transition is applied to the Final Cut Pro X Timeline, its duration
can be easily modified. For more information transition duration, see
Final Cut Transition
.