Showing and Hiding Groups and Layers
Layers and groups appearing in the Layers list can be hidden to make them invisible in
the Canvas without removing them from your composition. For example, if you place a
large object into your project and it’s in the way of objects you want to move or rotate
in the Canvas, you can hide the offending object. You can also hide objects you’re not
sure you want to keep, while preserving their placement in case you want to use them
later.
If you hide a group, you also hide all layers and groups nested in it. Hidden layers and
groups are not rendered when your project is exported.
238
Chapter 6
Creating and Managing Projects

To show or hide selected layers
Do one of the following:
µ
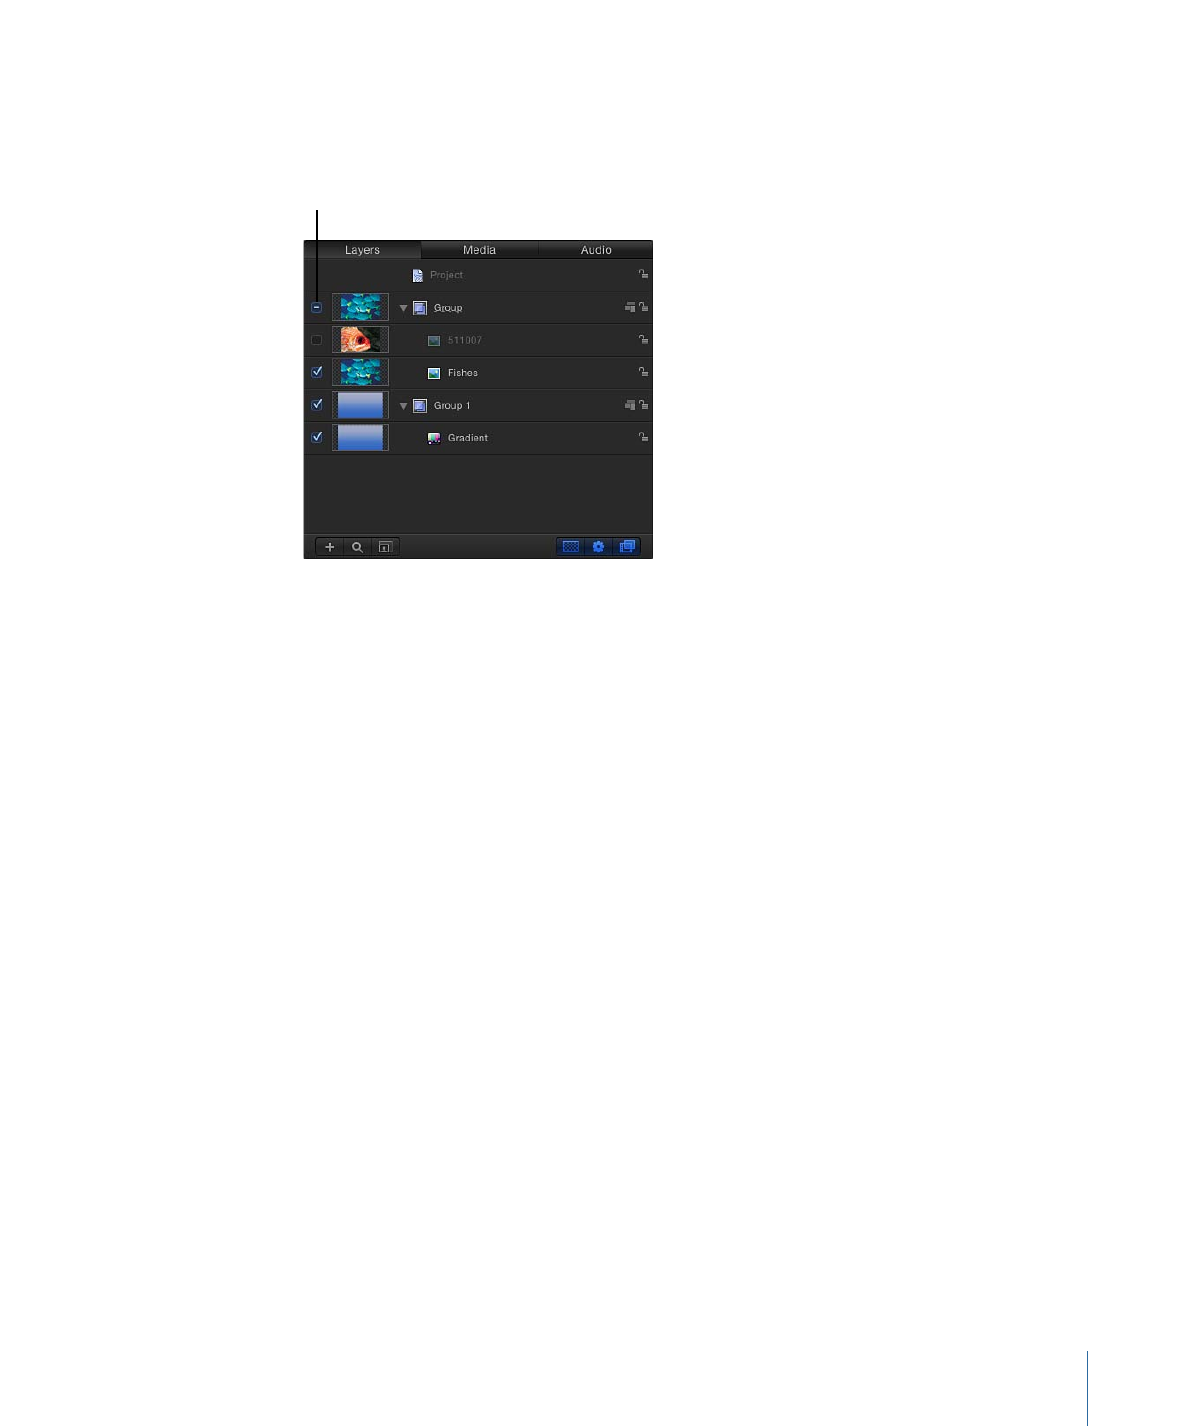
Click the checkbox to the left of an object or group in the Layers list or Timeline.
Activation checkboxes
µ
Choose Object > Active (or press Control-T) to turn the layers on or off.
µ
Control-click a layer or group, then choose Active from the shortcut menu.
Note: If you hide layers in a group, the enclosing group’s checkbox displays a dash instead
of a checkmark, to indicate that some layers are not visible.
You can “solo” a layer or group to hide all other layers in the project. This technique can
be useful to isolate a single object in the Canvas to animate or manipulate without
interfering with other objects in your composition.
To solo a layer
µ
Select layers or groups to solo.
µ
Choose Object > Solo (or press Control-S).
Note: You can also Control-click an object in the Layers list, then choose Solo from the
shortcut menu.
All other layers or groups are deactivated, and only the soloed object is visible in the
Canvas. When the selected item is soloed, the solo menu item displays a checkmark.