
Basic Formatting Controls
The following parameter controls affect common formatting adjustments for text objects.
Of these parameters, the Family, Typeface, Size, and Tracking also appear in the Text HUD.
Basic Formatting
Preset (unlabeled):
Use this pop-up menu at the top of the Format pane to save the
format, style, or format and style of the text to the Library, or to apply a preset text style
from the Library to the text. The default menu item is Normal.
For more information on applying and saving text styles, see
Using and Creating Preset
Text Styles
.
828
Chapter 16
Creating and Editing Text
Collection:
Use this pop-up menu to filter the font categories available in the Font pop-up
menu. When set to All Fonts, every font installed on your Mac OS X system appears in
the Font pop-up menu.
Font:
Use this pop-up menu to choose the font for the text.
Typeface:
Use this unlabeled pop-up menu to the right of the Font pop-up menu to set
a type style, such as Regular, Bold, Condensed, and so on. The available typefaces are
specific to the font family selected in the Font pop-up menu.
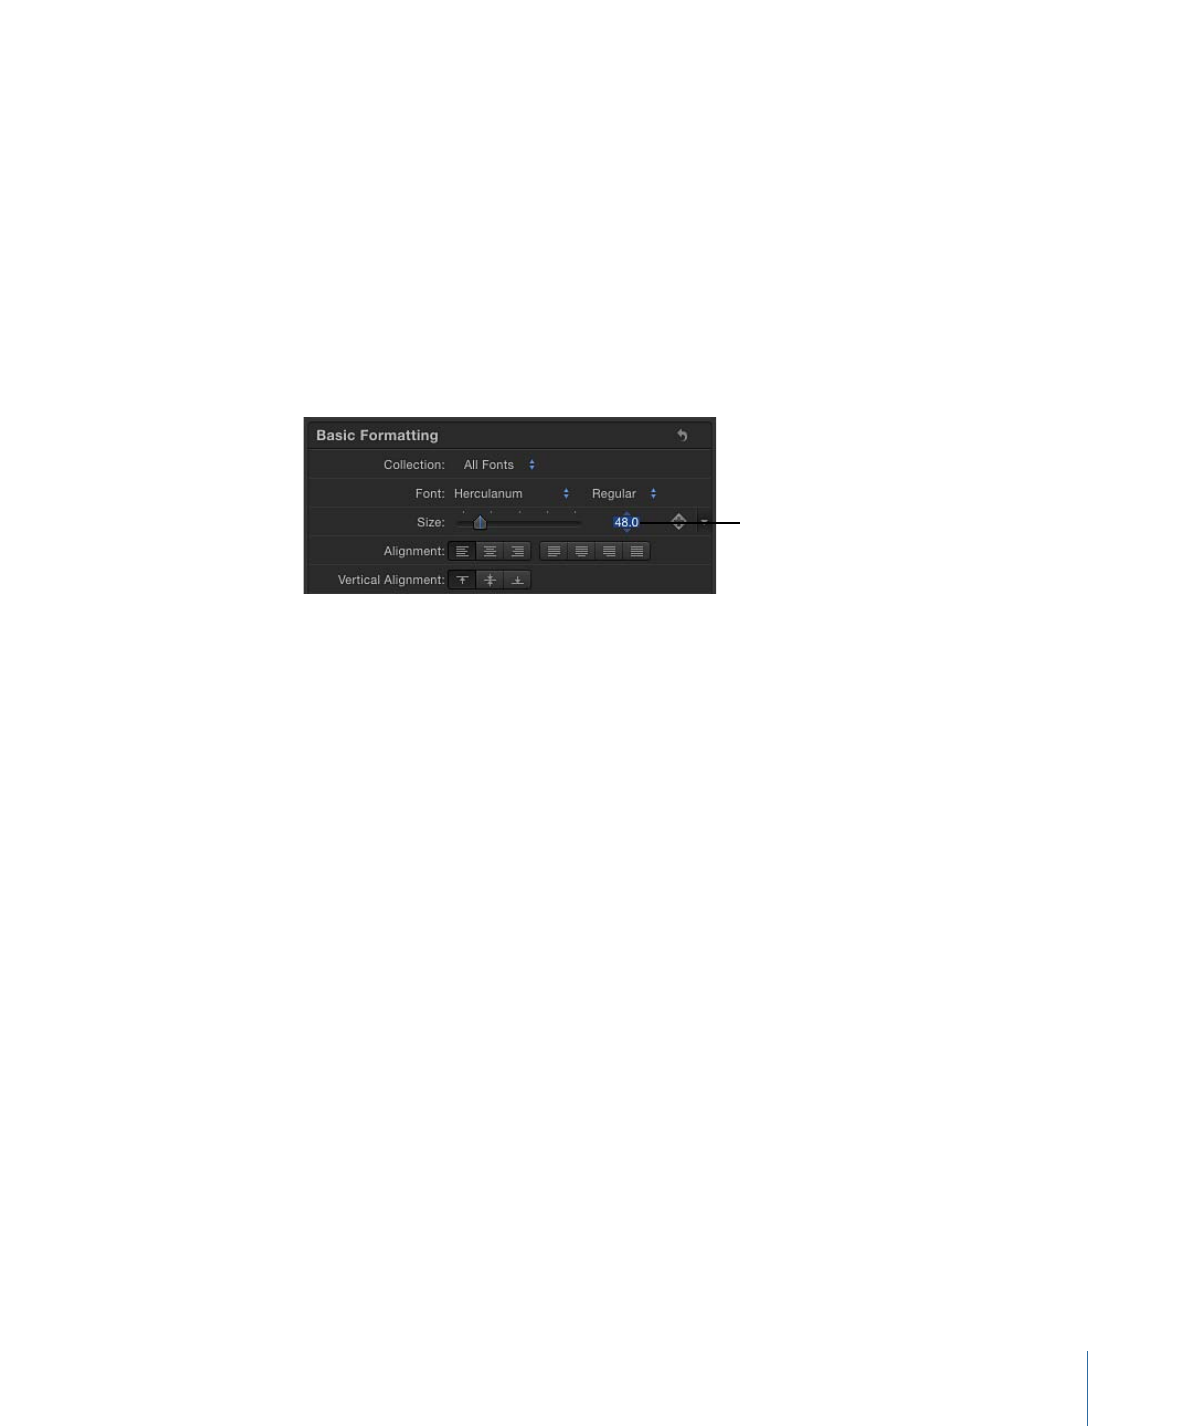
Size:
Use this slider to set the point size of the text. Drag the Size slider left or right to
change the size. The slider is constrained to a maximum of 288 points. To create larger
text, click the numerical value and drag to the right or type a new number.
Drag up or right to
increase value beyond
default maximum, or
click and type a number.
Note: You can also scale the text in the Canvas using onscreen controls, but doing so
scales text as an object and is independent of setting type point size via the Size slider.
Alignment:
Use these buttons to set the alignment and justification of text. The alignment
choices are Left, Center, Right, Left Justified, Center Justified, Right Justified, and Full
Justified. Paragraphs of a text object can be aligned by selecting the text and choosing
an alignment option. Vertical Alignment can be applied in addition to horizontal alignment
choices.
Vertical Alignment:
Use these buttons to set the vertical alignment of text. The choices
are Top Aligned, Middle Aligned, and Bottom Aligned. The paragraphs of a text object
can be aligned by selecting the text and choosing an alignment option.
Line Spacing:
Use this slider to set the distance between each line of text (leading) in
point-size increments. Dragging to the right (above 0) increases the line spacing. Dragging
to the left (below 0) creates negative line spacing.
Tip: To modify the spacing for individual lines of text when hard returns are present,
select the text with the Text tool, then adjust the Line Spacing slider. Spacing is modified
on the line that includes the selected text.
Tracking:
Use this slider to set the spacing between text characters. Tracking applies a
uniform value between each character.
Kerning:
Use this slider to adjust spacing between text characters.
Baseline:
Use this slider to adjust the baseline of text characters. The baseline is an invisible
horizontal line defining the bottom alignment of characters.
829
Chapter 16
Creating and Editing Text
Advanced Formatting
The Advanced Formatting controls are used less often than Basic Formatting controls.
They affect additional aspects of selected text.
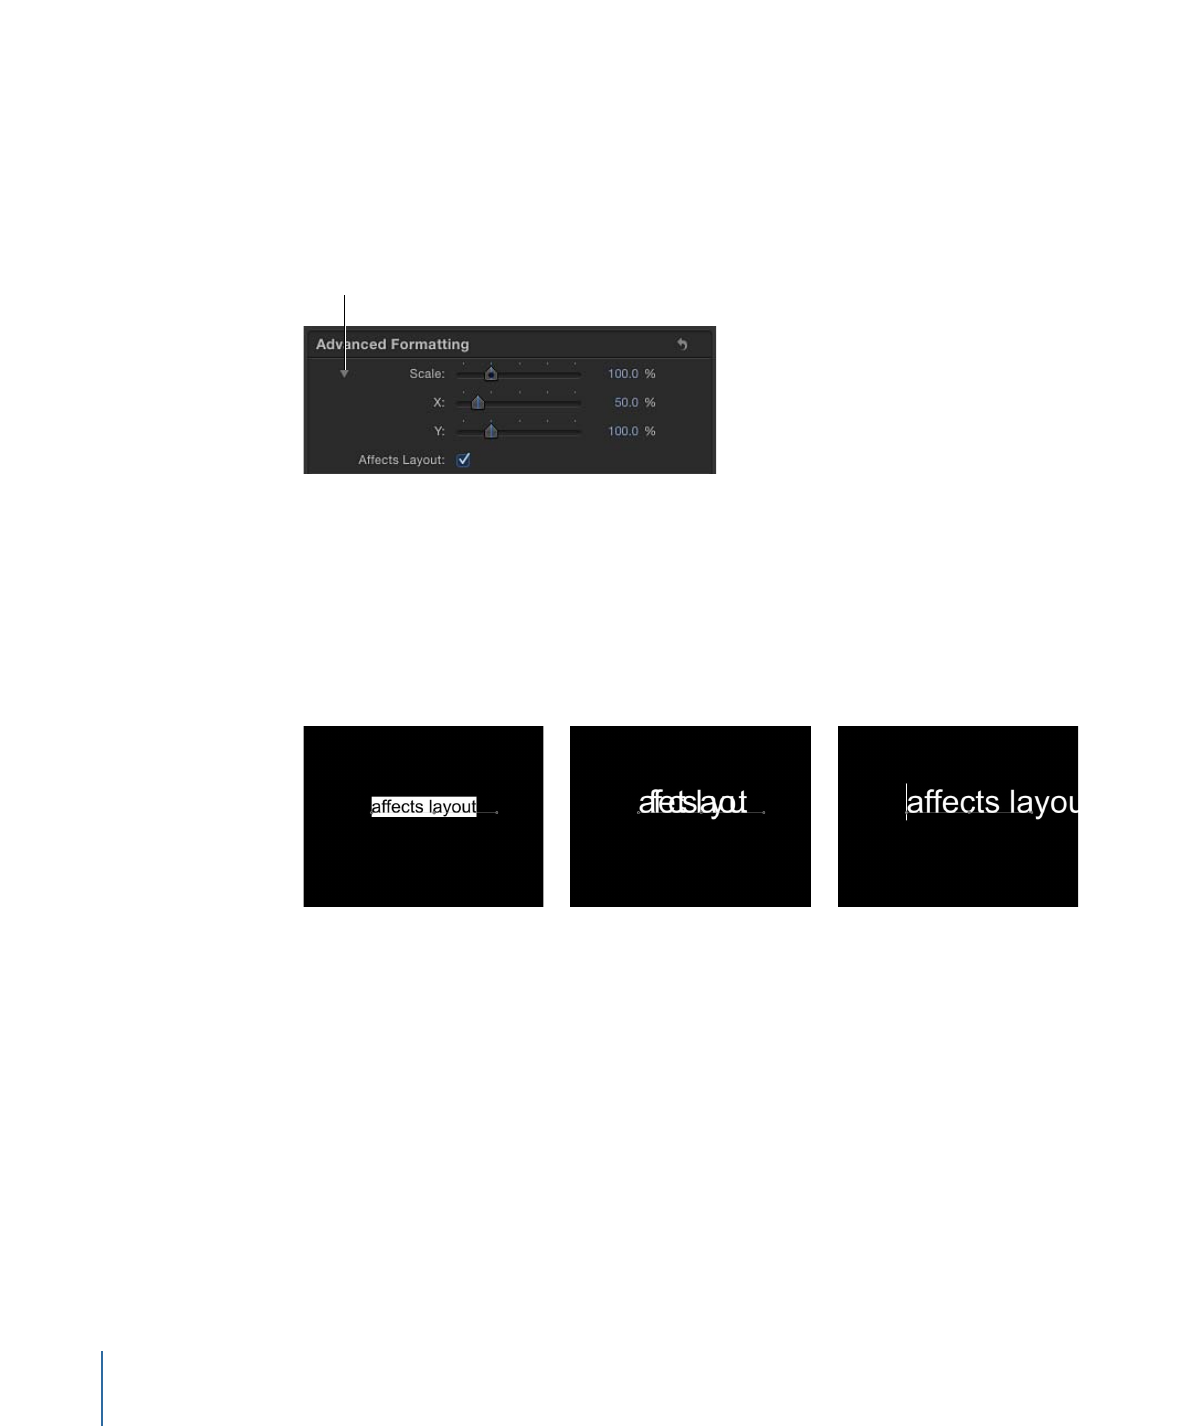
Scale:
Use this slider to scale text characters proportionally. To scale in only X or Y space,
click the disclosure triangle to set separate X and Y scale values. In the following image,
the text X Scale is set to 50%, and the Y Scale is set to 100%.
Disclosure triangle
Affects Layout:
Use this checkbox to set how the layout of the text on its path is affected
by changes in scale. For example, when Affects Layout is deselected and text is on an
open spline path (and Wrap Around is deselected in the Layout pane), increases in scale
bunch up the text characters along the length of the path; decreases in scale spread the
characters out over the length of the path. When Affects Layout is selected, increases in
scale extend the text characters beyond the path; decreases in scale bunch up the
characters toward their set alignment (left, right, or center).
Text on a path prior to scaling
Affects Layout checkbox off
Affects Layout checkbox on
Offset:
Use these value sliders to offset the text from its original position (anchor point).
Enter a value in the left value slider to offset the text in X space; enter a value in the right
value slider to offset the text in Y space. Click the disclosure triangle to access the X, Y,
and Z position values.
Rotation:
Use this dial to rotate the text characters in Z space. Click the disclosure triangle
to access separate X, Y, and Z rotation controls and also the Animate pop-up menu.
Animate:
Use this pop-up menu, available when the Rotation parameter is disclosed, to
change the interpolation for animated 3D rotation channels. By default, this parameter
is set to Use Rotation.
830
Chapter 16
Creating and Editing Text

For more information about the Animate parameter, see
Parameters in the Properties
Inspector
.
Note: The Rotation parameter must be keyframed Animate parameter options to have
effect.
The Animate pop-up menu contains the following options:
• Use Rotation: The default interpolation method, whereby text characters rotate from
their start rotation to their final rotation. Depending on the animation, the characters
may twist before reaching their final orientation (the last keyframed value). For example,
if the X, Y, and Z Rotation parameters are animated from 0 degrees to 180 degrees in
a project, the text characters rotate on all axes before reaching their final orientation.
• Use Orientation: This method provides smoother interpolation but does not allow
multiple revolutions. This method interpolates between the text characters’ start
orientation (first keyframe) and their end orientation (second keyframe).
Slant:
Use this slider to simulate italics by adding a slant value to text characters.
Monospace:
Select this checkbox to apply a fixed amount of space between each text
character.
All Caps:
Select this checkbox to make text characters uppercase.
All Caps Size:
Use this slider, available when the All Caps checkbox is selected, to set the
size of uppercase characters based on a percentage of the font point size.
Editable in FCP:
When using a Motion project as a template in Final Cut Pro X, select this
checkbox to allow editing of text parameters in Final Cut Pro. The editable parameters
include the following:
• Text string (text characters can be modified)
• Text size
• Text tracking
For more information on publishing to Final Cut Pro X, see
Creating Templates for
Final Cut Pro X
.
Text
Text:
Type in the Text editor (the darker shaded area) to add and edit text in the Inspector.
For more information, see
Adding Text with the Text Editor
.