Using the Distort Tool
Using the Distort tool you can reposition a layer’s corner points independently, and slant
or shear its midsection points horizontally or vertically.
To distort a layer in the Canvas
1
Choose the Distort tool from the 2D tools pop-up menu in the toolbar.
275
Chapter 7
Basic Compositing
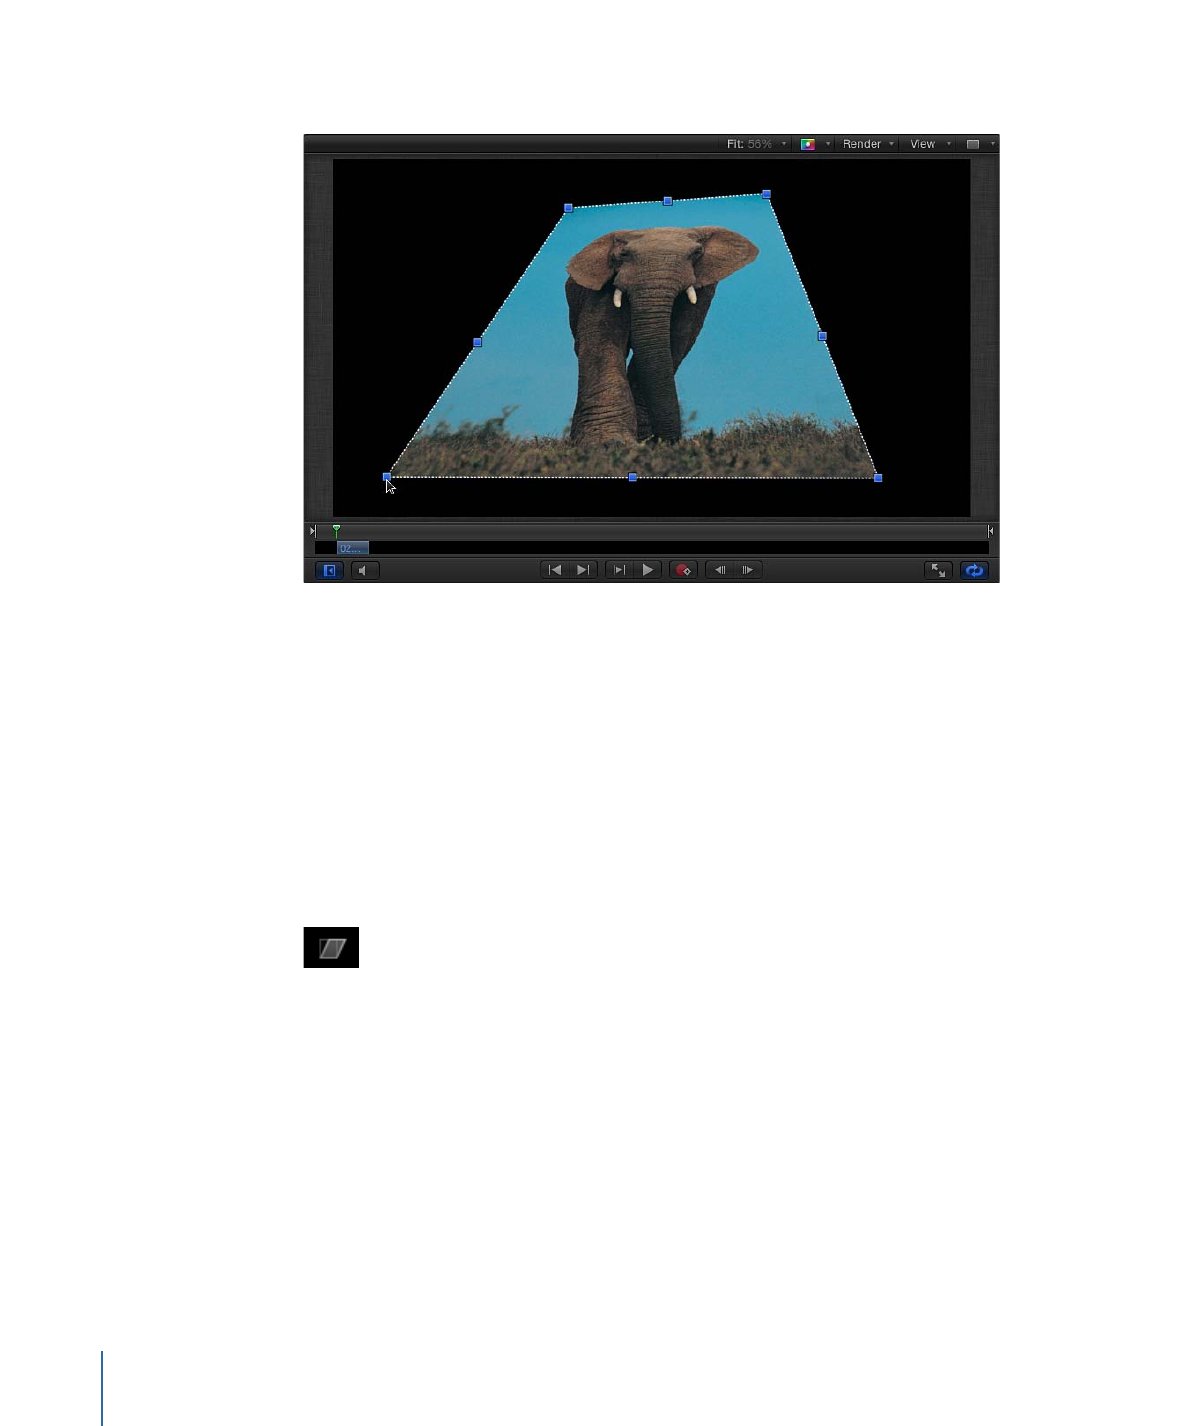
2
In the Canvas, drag the four corner handles to stretch the layer into a shape.
After you distort a layer, you can revert to the layer’s original shape by deselecting the
layer’s Four Corner checkbox in the Properties Inspector. Doing so resets the shape of
the layer without resetting the shape you defined in the Four Corner parameters of the
Properties Inspector.
Note: The Four Corner parameters can be used in combination with a tracking behavior
to create a four-corner track on a foreground layer. For more information, see
Option 2:
Corner-Pin the Object Before Tracking
.
To shear a layer in the Canvas
1
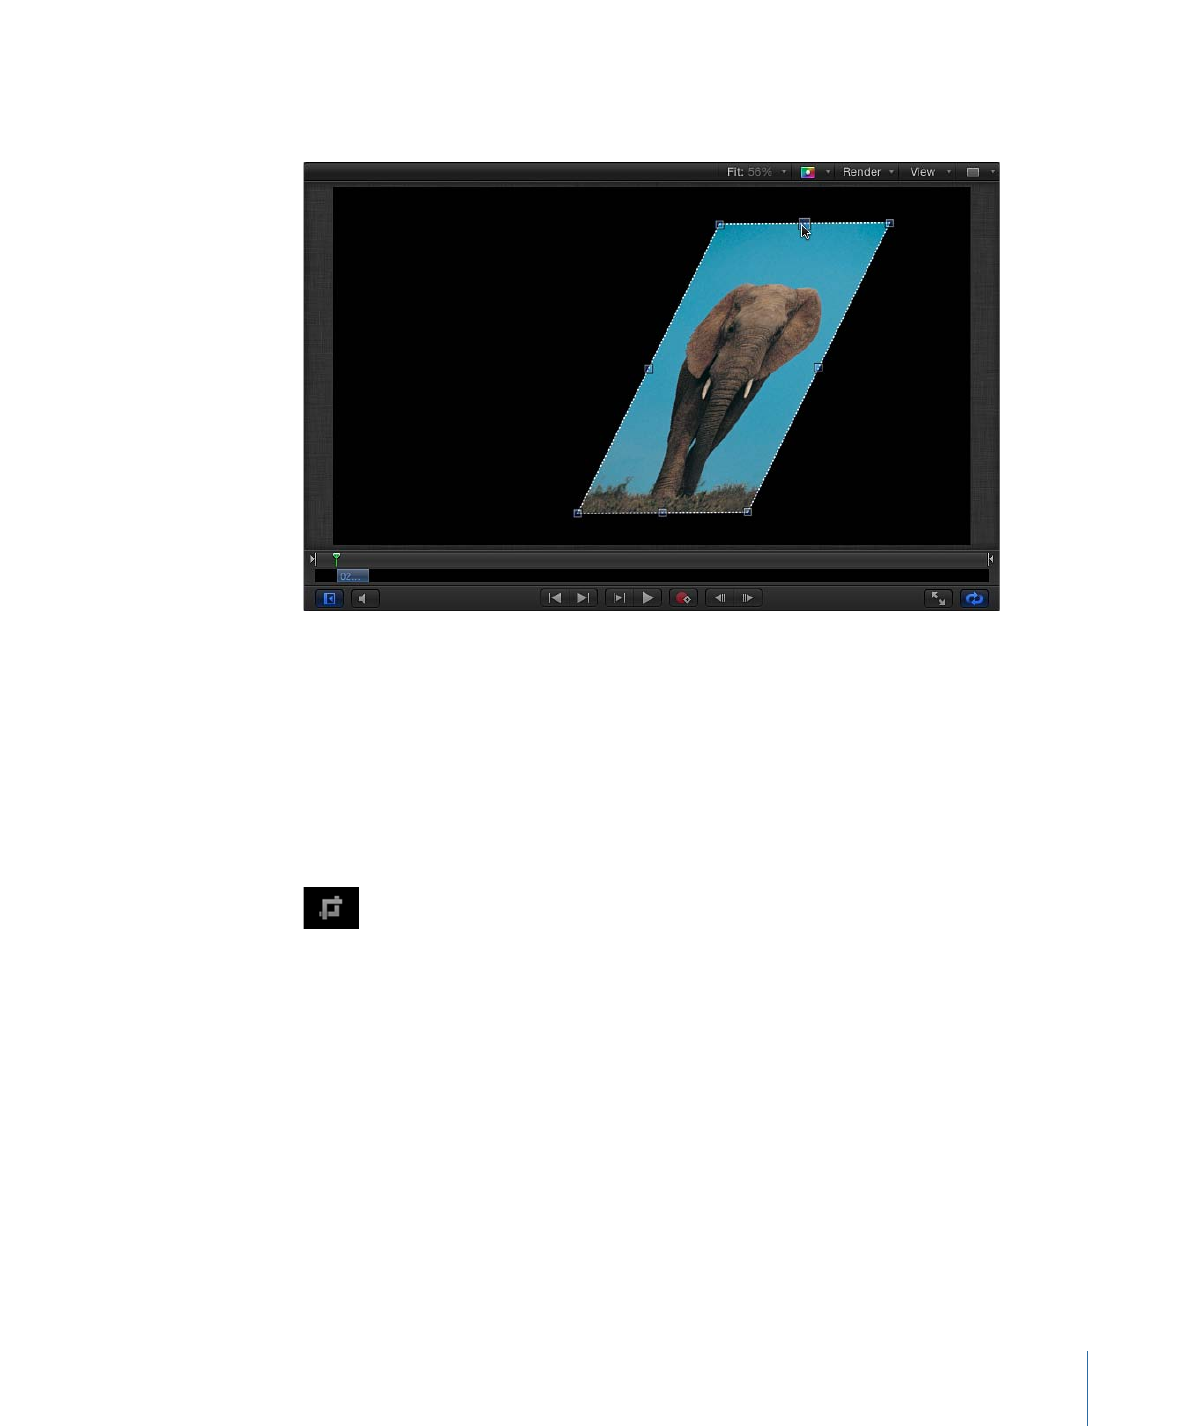
Choose the Distort tool from the 2D tools pop-up menu in the toolbar.
276
Chapter 7
Basic Compositing
2
In the Canvas, drag a shear handle to slant the layer. The top and bottom handles angle
the layer horizontally. The left and right handles angle the layer vertically.
Note: Shearing a layer using the Distort tool does not affect the Shear parameter in the
Properties Inspector. Instead, the Distort tool modifies the Four Corner parameters to
simulate a Shear effect. You can still modify the Shear parameter, effectively shearing the
shear simulation for interesting results.